

A practical guide to reliable caliper measurement, so you can measure parts, holes, depths and steps without guessing.
A caliper is more than a ruler with jaws
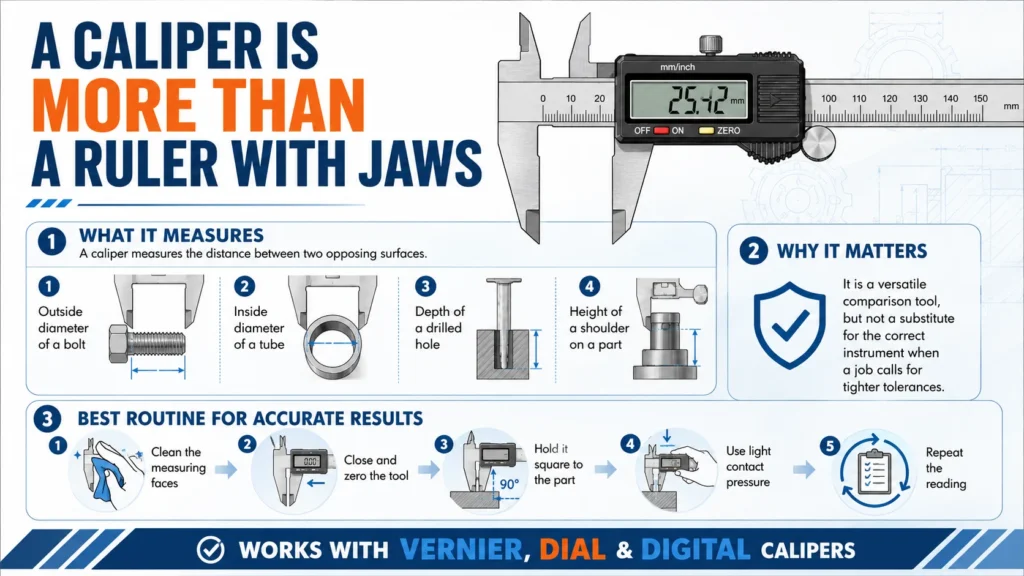
A caliper measures the distance between two opposing surfaces. That can mean the outside diameter of a bolt, the inside diameter of a tube, the depth of a drilled hole, or the height of a shoulder on a part. It is a versatile comparison tool, not a substitute for the correct instrument when a job calls for tighter tolerances.
Good results come from a repeatable routine: clean the measuring faces, close and zero the tool, hold it square to the part, use light contact pressure, and repeat the reading. This process works whether your caliper has a Vernier scale, a dial, or a digital display.
Know the parts before you measure
Most modern calipers share the same basic layout. Names may vary slightly by manufacturer, but the measuring functions are consistent.
Outside & inside jaws
The larger lower jaws measure outside dimensions. The smaller upper jaws measure openings and internal diameters.
Beam & slider
The beam carries the main scale. The slider moves along it and holds the dial, digital display, or Vernier scale.
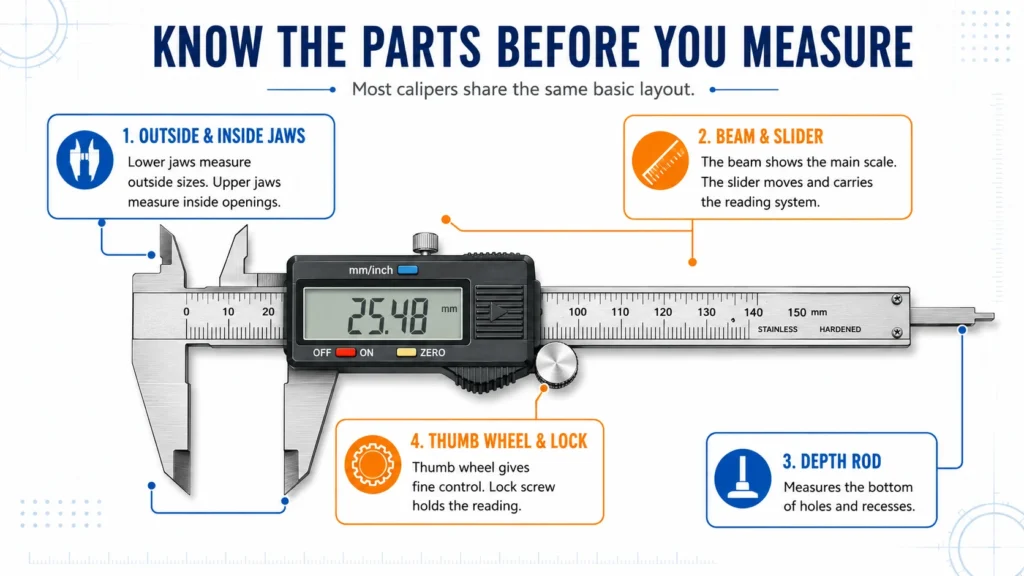
Depth rod
The thin rod that extends from the end of the beam measures the bottom of holes and recesses.
Thumb wheel & lock
Use the thumb wheel for controlled movement. The locking screw helps preserve a reading while you move to see it.
Prepare and zero your caliper first
- Wipe the jaw faces and beam with a clean, lint-free cloth. A tiny chip can create a real measurement error.
- Close the outside jaws gently. Do not snap them shut or squeeze them together.
- Check zero: the dial hand should point to zero, the digital display should read 0.00, or the Vernier zero marks should align.
- If a digital caliper is closed cleanly but not at zero, press ZERO. For a dial or Vernier tool, note the error or follow the manufacturer’s adjustment procedure.
Bench note
Zeroing only corrects the current reference point. It does not fix worn jaw faces, a bent beam, grit, or a damaged rack-and-pinion mechanism.
How to take each caliper measurement
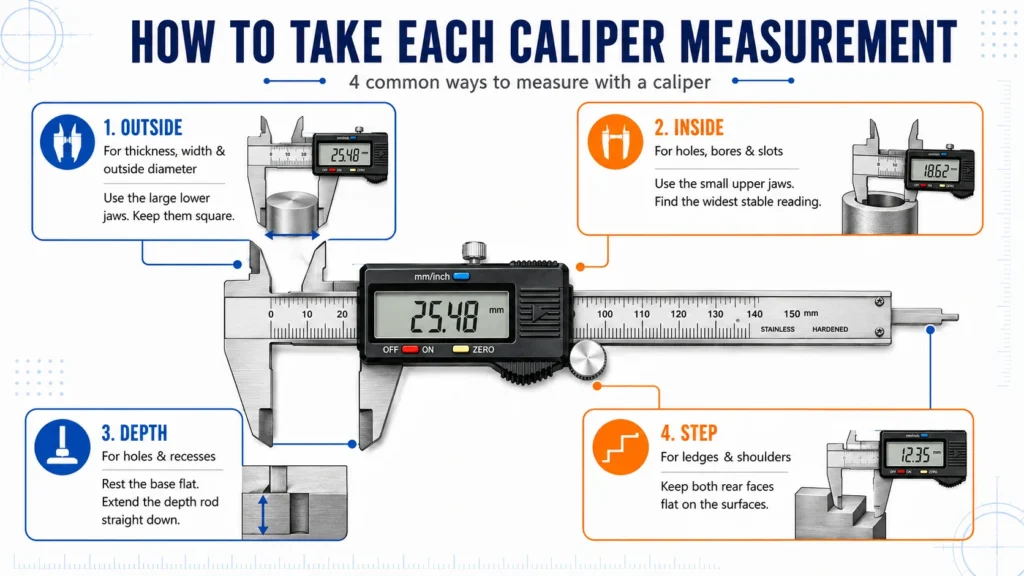
Outside measurement: thickness, width and diameter
Open the larger lower jaws wider than the part. Place the part between the flat jaw faces, then close with the thumb wheel until both sides just touch. Keep the jaws square to the feature. On round stock, gently rock the caliper across the diameter; the largest reading is usually the true outside diameter.
Inside measurement: holes, bores and slots
Insert the small upper jaws into the opening and open them until they touch opposite walls. Keep the beam aligned with the hole or slot. For a round bore, sweep slightly through the center and use the largest stable reading. Avoid using the very tips if a burr or chamfer is present.
Depth measurement: holes and recesses
Rest the flat end of the beam squarely on the reference surface. Extend the depth rod until it touches the bottom, keeping the tool vertical. If the base is tilted, the result will be longer than the true depth.
Step measurement: ledges and shoulders
Place the fixed rear measuring face against one ledge and extend the slider until its rear face meets the second ledge. Keep both contact faces flat against their surfaces. Step measurement is useful, but it is the easiest mode to skew, take a second reading after repositioning.
How to read a dial caliper
A common inch dial caliper has a beam marked in 0.100-inch increments and a dial that reads thousandths of an inch. One full revolution of the dial usually equals 0.100 inch. Always verify the graduations printed on your own tool.
- Read the main beam first. Use the last fully visible 0.100-inch mark to the left of the slider index.
- Read the dial next. Each small dial division is commonly 0.001 inch; the numbered marks show larger increments.
- Add the beam reading and dial reading. If the dial hand has passed zero, include the additional 0.100 inch shown on the beam.
How to read a Vernier caliper
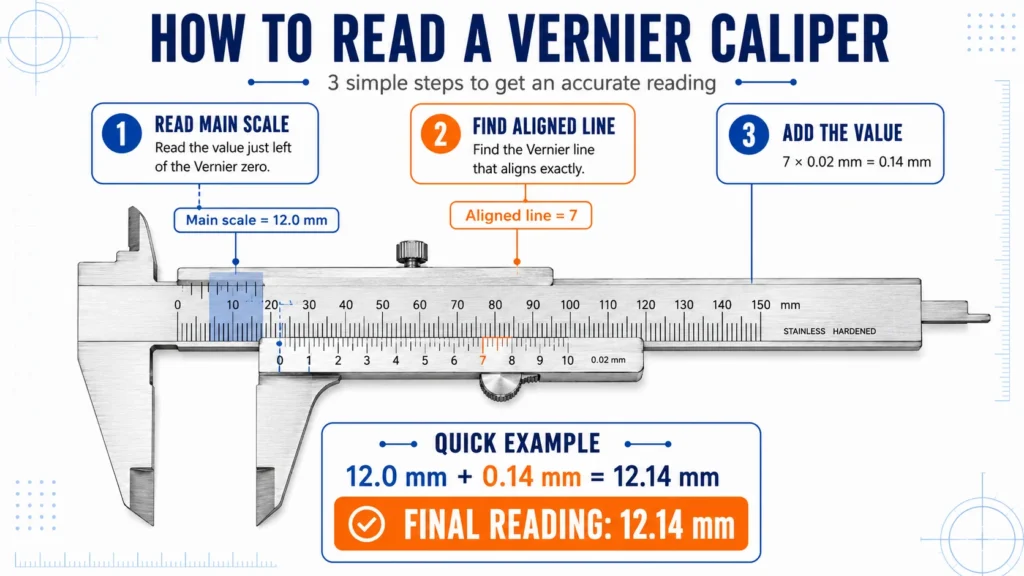
Vernier calipers use two scales instead of a dial. Read the main scale immediately to the left of the Vernier zero. Then find the line on the Vernier scale that aligns exactly with any line on the main scale. Add that aligned Vernier value to the main-scale value. The division value is printed on the Vernier scale, so use your tool’s marking rather than assuming a resolution.
Quick Vernier example
If the main scale reads 12.0 mm and the 7th Vernier line is the one that aligns on a 0.02 mm caliper, add 7 × 0.02 mm. Final reading: 12.14 mm.
How to use a digital caliper
Digital calipers are often the quickest option for routine work because the display shows the result directly. Close the jaws cleanly and press ZERO before measuring. Use the inch/mm button only to change units—not to convert a reading mentally. Keep spare batteries on hand, and remember that a digital display can still show a wrong result if the jaws are dirty or the tool is tilted.
Get consistent, trustworthy readings
Calipers are commonly used for inspection and general fitting, but their real-world accuracy depends on model quality, condition, range, environment, and technique. Consult the manufacturer’s specification when a tolerance matters. If a job is tighter than your caliper can reliably support, use a micrometer, bore gauge, gauge pins, or another appropriate instrument.
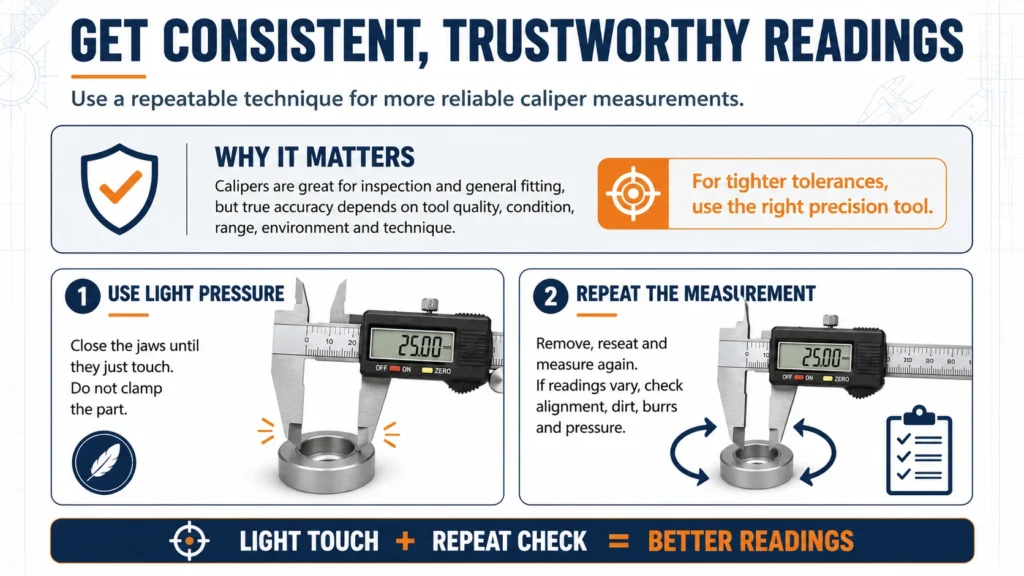
Use light, repeatable pressure
Close the jaws until contact is felt, not until the part is clamped. Extra force can flex thin work, compress soft materials, or move the slider beyond the true size.
Repeat the measurement
Measure again after removing and reseating the caliper. If readings vary, check alignment, contact pressure, burrs, dirt, and whether you are finding the true diameter.
Common caliper measurement mistakes
- Measuring over a burr, chip, paint edge, or damaged surface.
- Holding the jaws at an angle instead of square to the feature.
- Forcing the jaws closed or using the caliper as a clamp.
- Trusting zero alone instead of checking the caliper against a known reference.
Caliper FAQs
What is the most important caliper technique?
Keep the caliper square to the feature, use light and repeatable contact pressure, and take a second reading after repositioning. Good alignment matters as much as the instrument itself.
Should I use a caliper or a micrometer?
Use a caliper for general-purpose outside, inside, depth, and step measurements. Choose a micrometer or another specialized gauge when the tolerance is tighter than your caliper can reliably support.
Why does my caliper give different readings?
Check for dirt, burrs, worn contact faces, angled jaws, changing pressure, or a part that is not truly round. Clean the tool, zero it, measure squarely, and repeat the reading.
How should I care for a caliper?
Wipe the measuring faces and beam after use, keep the tool dry and lightly protected as recommended by the manufacturer, and avoid using it as a clamp or laying it where it can be dropped.