

If there’s one power tool that transformed my craft more than any other, it’s the router. When I bought my first one back in 1991 — a second-hand Bosch fixed-base model — I had no idea it would become the heart of nearly every project I build. Whether you’re cutting decorative edge profiles, hollowing out dadoes for shelves, or carving intricate inlays, the woodworking router is the single most versatile tool you can own. Let me walk you through what it does, the types available, and how to get started safely.
Types of Woodworking Routers
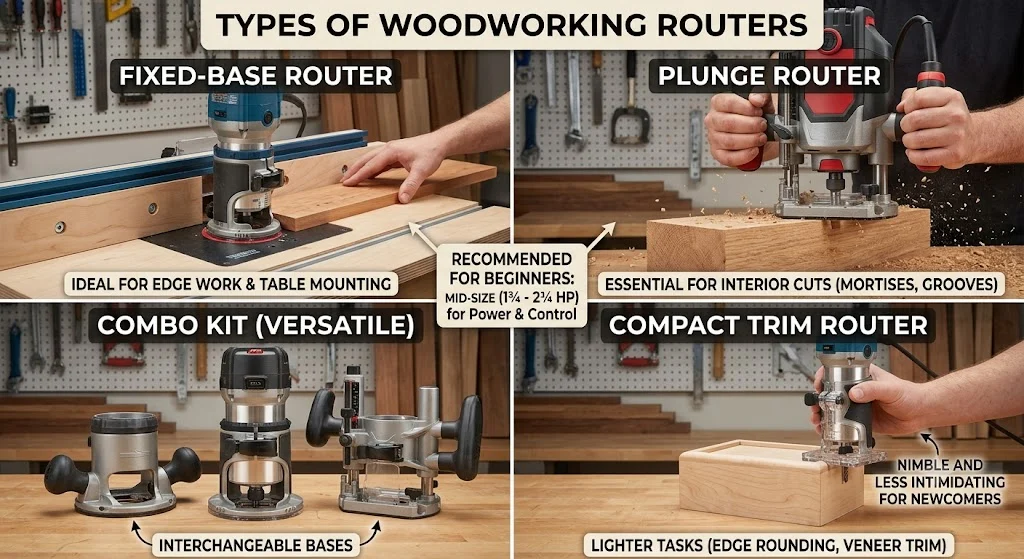
There are two primary styles: the fixed-base router and the plunge router. A fixed-base router locks the bit at a set depth before you power it on — ideal for edge work and table mounting. A plunge router lets you lower the spinning bit straight into the wood, which is essential for interior cuts like mortises and stopped grooves. Many manufacturers now sell combo kits with interchangeable bases, giving you the best of both worlds.
For beginners, I always recommend starting with a mid-size model — around 1¾ to 2¼ horsepower. It’s powerful enough to handle hardwoods without being unwieldy. Compact trim routers (often called laminate trimmers) are excellent for lighter tasks like rounding over edges or flush-trimming veneer, and they’re far less intimidating for newcomers.
Common Uses for a Wood Router
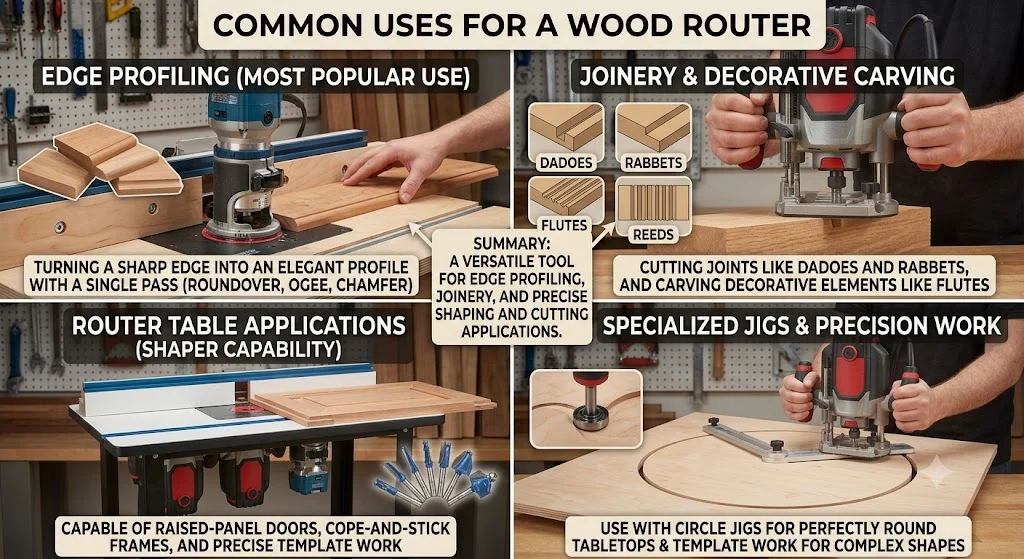
Edge profiling is probably the most popular use — turning a sharp, square edge into an elegant ogee, chamfer, or roundover with a single pass. Beyond aesthetics, routers cut dadoes and rabbets for joinery, create tongue-and-groove joints, and carve flutes or reeds into columns and table legs.
When mounted upside-down in a router table, the tool becomes a miniature shaper capable of raised-panel doors, cope-and-stick frames, and precise template work. I’ve also used mine with a straight bit and circle jig to cut perfectly round tabletops — something that would take forever with a jigsaw and sander.
How to Use a Router: Step by Step
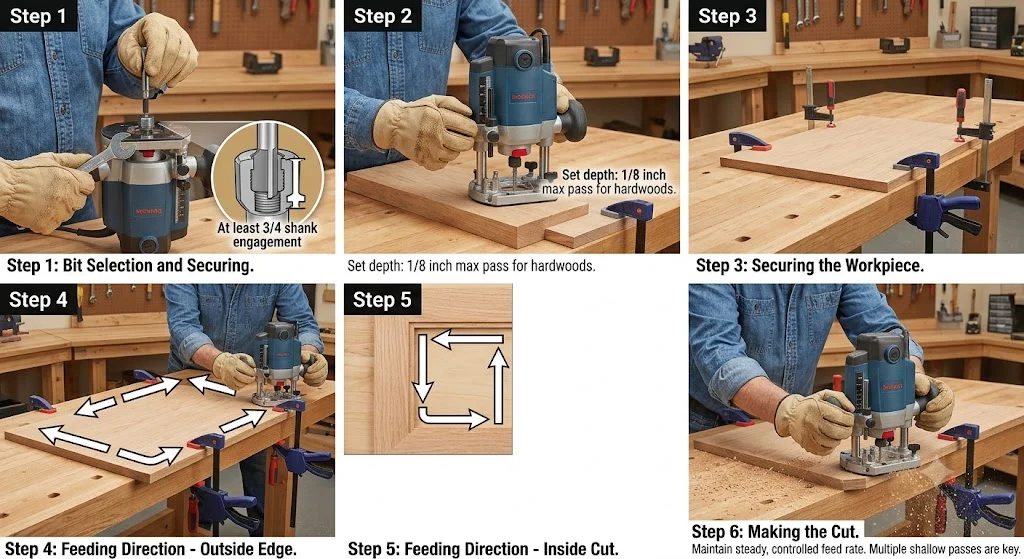
First, select the correct bit for your task and secure it in the collet — at least ¾ of the shank should be gripped. Set your depth of cut; for most hardwoods, take no more than ⅛ inch per pass to keep the cut clean and reduce strain on the motor.
Clamp your workpiece firmly. When routing an outside edge, move the router counter-clockwise around the piece (left to right along the near edge). This keeps the bit’s rotation pulling the tool against the wood for a controlled cut. For inside cuts — like the inner edge of a frame — move clockwise.
Let the router reach full speed before engaging the wood, and maintain a steady, unhurried feed rate. If the motor bogs down or you see burn marks, you’re either cutting too deep or feeding too slowly. Patience and shallow passes are the keys to a smooth finish.
Safety Tips from the Shop
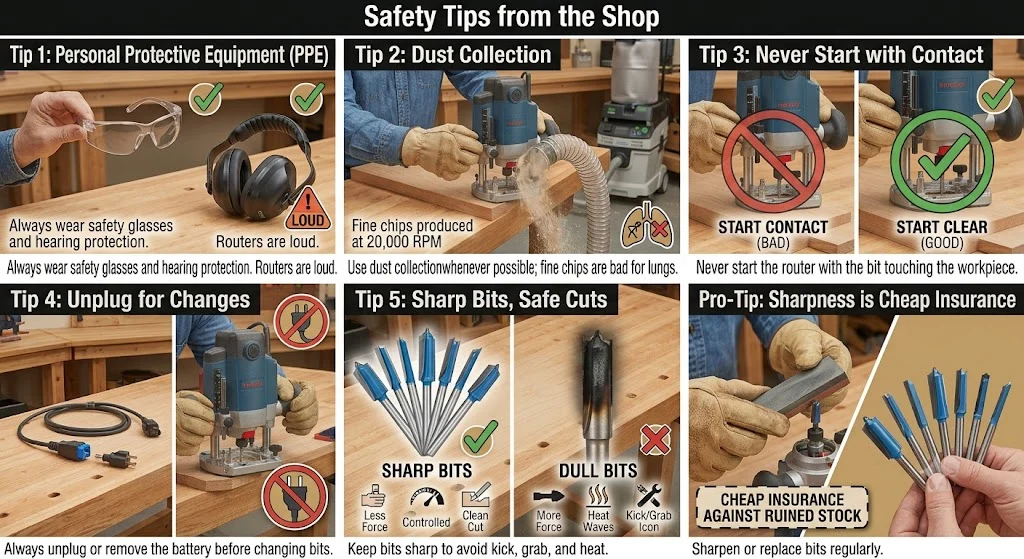
Always wear safety glasses and hearing protection — routers are loud. Use dust collection whenever possible; the fine chips produced at 20,000 RPM are no joke for your lungs. Never start the router with the bit touching the workpiece, and always unplug (or remove the battery) before changing bits. Finally, keep your bits sharp. A dull bit requires more force, generates more heat, and is far more likely to kick or grab. I sharpen or replace my bits regularly — it’s cheap insurance against ruined stock and worse.