

An 18-gauge brad nailer protects delicate trim and leaves smaller holes. A 15- or 16-gauge finish nailer provides the stronger hold needed for heavier casing, baseboards, and crown molding. Here is how to choose with confidence.
The practical difference is fastener size and holding power. A brad nailer fires thin 18-gauge brads for lightweight trim, paneling, small furniture parts, and delicate material. A finish nailer drives thicker 15- or 16-gauge nails for baseboards, door casing, crown molding, stair trim, and other work that needs a more secure mechanical hold.
Brad nailer vs. finish nailer: the practical difference
What is a brad nailer? It is a nail gun designed around slim 18-gauge brad nails. Because a higher gauge number means a thinner fastener, an 18-gauge brad is thinner than a 16-gauge finish nail. That smaller diameter helps reduce splitting in narrow molding and leaves a hole that is usually easier to fill before paint or clear finish.
A finish nailer is built for more demanding finish work. Most models use either 16-gauge straight finish nails or 15-gauge angled finish nails. The thicker nail has more withdrawal resistance and better holding strength, but it leaves a more noticeable hole and can split thin stock if the nail is too long, too close to an edge, or driven into brittle material.
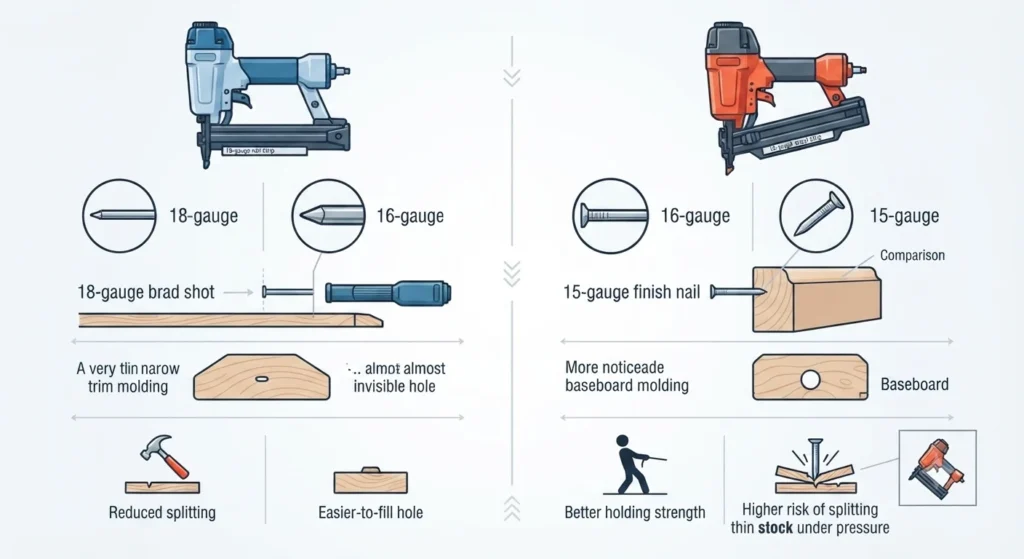
Choose a brad nailer for light, delicate work
An 18-gauge brad nailer is useful for thin decorative trim, edge banding, paneling, small cabinet parts, craft projects, and holding glued pieces in place while adhesive cures.
Choose a finish nailer when holding power matters
A 15- or 16-gauge finish nailer is the better choice for baseboards, door and window casing, substantial crown molding, stair trim, and thicker hardwood trim.
For a clean finish, test fastener depth and splitting risk on an offcut from the same trim before moving to visible work.
Finish nail gun vs. brad nailer: side-by-side comparison
Exact nail-length ranges, magazine angles, and cordless availability vary by tool model. Check the manufacturer manual and the fastener strip specifications before buying nails. The table below describes the usual differences found in common DIY and finish-carpentry tools.
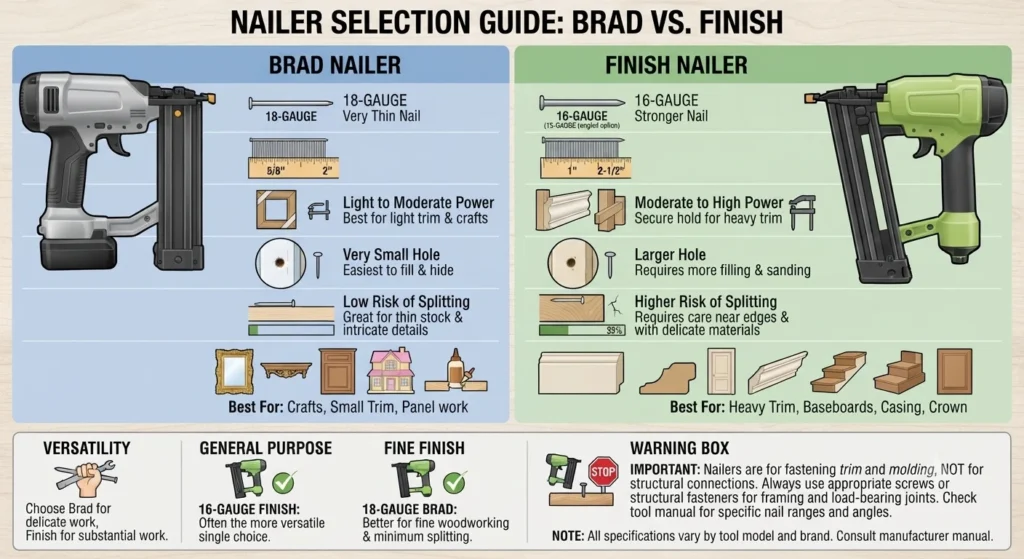
| Feature | Brad nailer | Finish nailer |
|---|---|---|
| Typical nail gauge | 18-gauge brad nails. | Usually 16-gauge straight or 15-gauge angled finish nails. |
| Typical nail length | Often about 5/8 inch to 2 inches, depending on model. | Often about 1 inch to 2-1/2 inches, depending on model. |
| Holding strength | Light to moderate; best where glue or the trim profile provides support. | Moderate to high for finish carpentry and heavier trim attachment. |
| Hole size and filling | Small hole; usually the easier option for fine paint and stain work. | Larger hole; normally needs more filler and sanding before final finish. |
| Risk of splitting wood | Lower, especially in thin or narrow stock, though not zero. | Higher in delicate trim, close to edges, and in brittle hardwoods. |
| Best materials and projects | Thin molding, paneling, small furniture, cabinet trim, crafts, and glue-ups. | Baseboards, casing, crown, stair trim, heavier cabinet parts, and hardwood trim. |
| Magazine options | Usually straight magazine. | 16-gauge is commonly straight; 15-gauge is commonly angled for tighter spaces. |
| Power options | Widely available as pneumatic and cordless battery-powered tools. | Widely available as pneumatic and cordless battery-powered tools. |
Heavier trim benefits from a finish nailer, but adhesive, proper fit, and secure fastening into framing or solid backing still matter.
Which nailer is best for your project?
Choose based on the trim thickness, the material behind it, and how much holding strength the joint needs. A nailer speeds installation, but it does not turn decorative fasteners into approved structural fasteners.
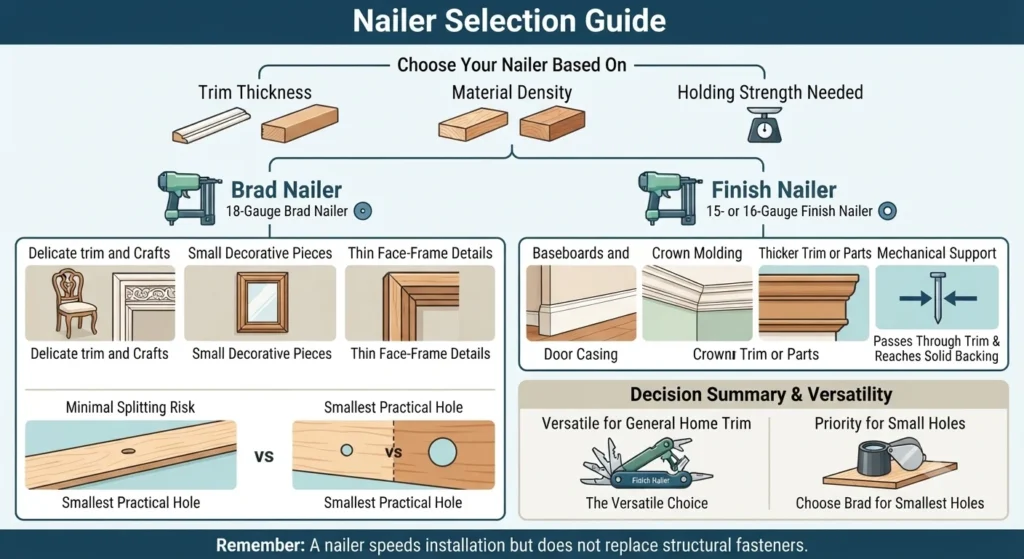
- Baseboards and door casing: use a 15- or 16-gauge finish nailer for most standard profiles. Select nail length so it passes through trim and reaches solid backing without creating avoidable hazards.
- Crown molding: a finish nailer is usually the safer default for larger crown. A brad nailer can help position lightweight decorative pieces, but may not provide enough holding strength on its own.
- Cabinets and furniture: use brads for thin face-frame details, back panels, and glue-ups; step up to a finish nailer for thicker trim or parts that need more mechanical support.
- Delicate trim and crafts: use an 18-gauge brad nailer when you want the smallest practical hole and the lowest chance of splitting. Test first on thin hardwood or fragile molding.
If you can only buy one nailer, a 16-gauge finish nailer is often the more versatile choice for general home trim. Buy an 18-gauge brad nailer first when your work is mainly fine decorative trim, small furniture, craft wood, or cabinet details where small holes are the priority.
Pin nailer vs. brad nailer
A pin nailer normally uses 21- or 23-gauge headless pins, which are thinner than 18-gauge brads. Pins leave exceptionally small holes and are excellent for delicate returns, tiny moldings, veneer work, and temporarily holding parts while glue cures.
The trade-off is holding power. A pin nailer should not be treated as a substitute for a brad nailer or finish nailer on heavier trim. It is a specialist tool for refined work, where adhesive and joinery do most of the actual holding.
A simple gauge rule to remember
Higher gauge means thinner nail: a 23-gauge pin is thinner than an 18-gauge brad, and an 18-gauge brad is thinner than a 16-gauge finish nail.
Nail length, power choice, and safe setup
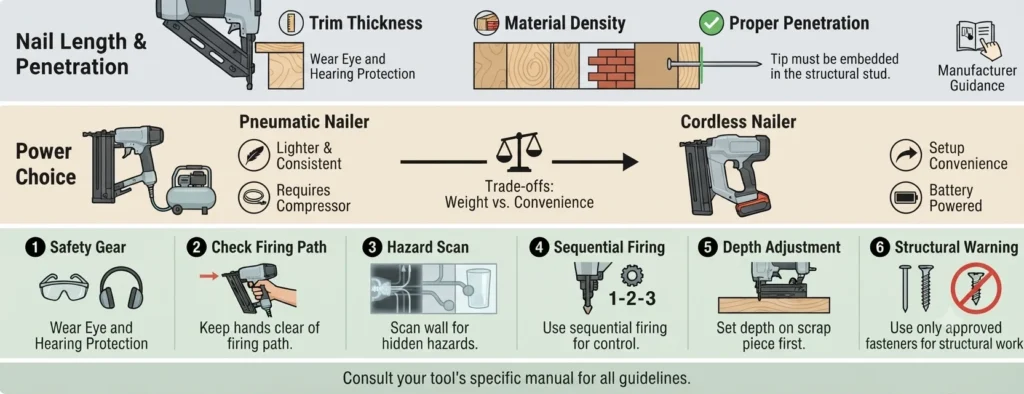
For a reliable hold, the fastener needs enough penetration into suitable backing after passing through the trim. Nail length depends on trim thickness, wall construction, material density, and the manufacturer guidance for your tool. Pneumatic nailers are often lighter and consistent if you already own a compressor; cordless nailers trade some weight for setup convenience and battery-platform compatibility.
Safe fastening starts before you pull the trigger
Read the nailer manual, wear eye protection and suitable hearing protection, and keep hands clear of the firing path. Check for wiring, pipes, glass, and other hidden hazards before fastening. Use sequential firing when control matters, set depth on a scrap piece, and never use brads or finish nails where screws or approved structural fasteners are required.
Frequently asked questions
Can a brad nailer install baseboards?
It can install very lightweight baseboard in some situations, but it is usually not the best primary tool. Standard baseboards typically benefit from the thicker, stronger fasteners used in a 15- or 16-gauge finish nailer. A brad nailer may be helpful for small detail pieces or temporary positioning.
Is a finish nailer too powerful for thin trim?
Sometimes. The issue is not only tool power; it is the thicker nail, nail length, material brittleness, and distance from edges. Fine narrow molding can split with a finish nail. Use an 18-gauge brad nailer, reduce nail length where appropriate, and test on offcuts before fastening visible pieces.
Do I need both a brad nailer and a finish nailer?
You need both only if your projects regularly cross between heavy trim and delicate finish work. A finish nailer handles most household trim jobs, while a brad nailer earns its place when you build furniture, work with thin molding, attach small decorative pieces, or want smaller holes and less filling.