
Choose the specialty tool by where the part is stuck—not by the loudest method in the garage. This guide separates outer tie rods, inner tie rods, transmission-side axles, and hub-side axles.
Start by locating the stuck connection
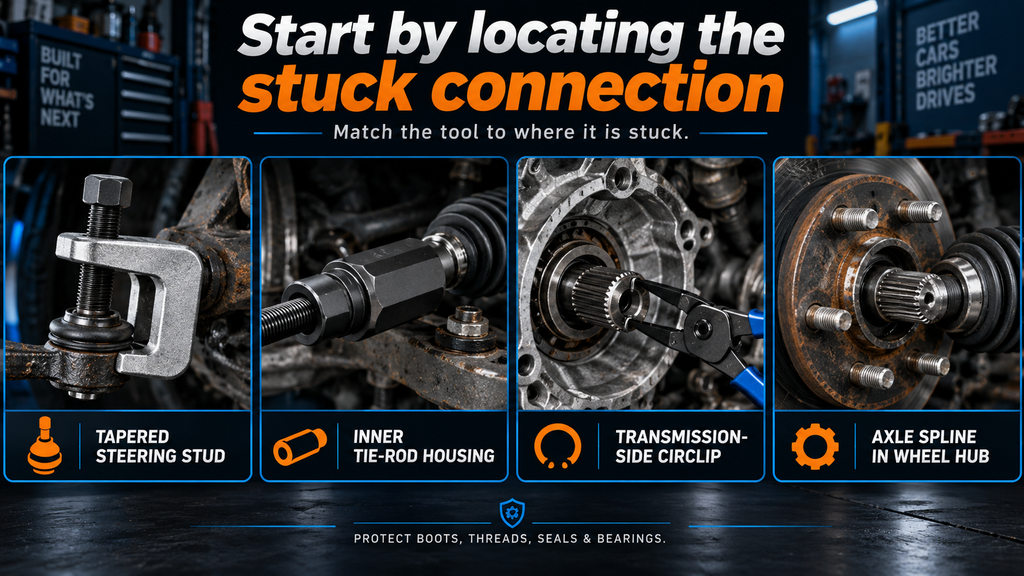
A tie rod removal tool and a CV axle removal tool are not single, universal products. Each tool is designed to apply force at a different connection: a tapered steering stud, an inner tie-rod housing, a transmission-side circlip, or an axle spline seized in a wheel hub. The safest choice is the one that loads the intended surface while protecting boots, threads, seals, and bearings.
QUICK ANSWER
Match the tool to the repair
A separator removes a tapered outer tie-rod stud. An inner tie-rod socket reaches the steering rack. An axle popper releases an inboard CV joint, while a hub pusher deals with splines stuck at the wheel.
| Repair | Typical tool | Why it fits |
|---|---|---|
| Separate an outer tie-rod end | Tie-rod puller or separator | Presses the tapered stud out with controlled force and can preserve a reusable boot. |
| Remove an inner tie rod | Inner tie-rod tool or socket | Reaches the rack-side flats after the bellows boot is moved aside. |
| Release axle from transmission | Axle popper or suitable pry method | Applies a sharp, even force near the inboard joint to release the retaining circlip. |
| Free axle spline from wheel hub | Hub or axle pusher | Pushes on the axle end without mushrooming threads or hammering through the bearing. |
Tie rod removal: outer and inner are different jobs
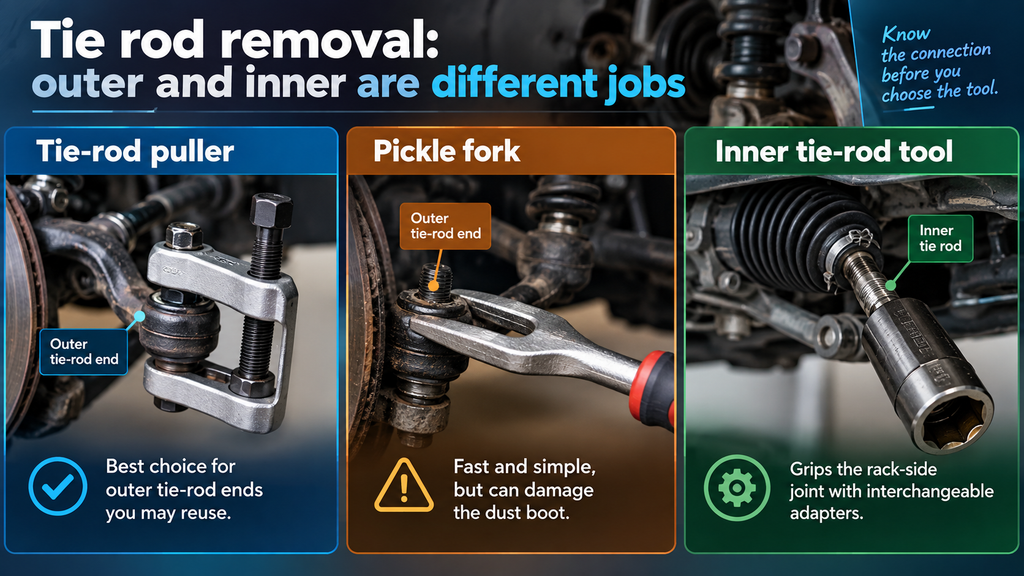
An outer tie-rod end usually seats in the steering knuckle with a tapered stud. An inner tie rod threads directly into the steering rack and sits behind the rack bellows boot. Do not buy a “universal tie rod remover” until you know which connection you need to release.
Tie-rod puller
Best first choice for an outer tie-rod end you may reuse. Its screw applies steady separation force rather than striking the joint.
Pickle fork
A fast wedge-style separator, but it can tear the dust boot. Use it when the joint is being replaced or boot damage is acceptable.
Inner tie-rod tool
A long tube with interchangeable crowfoot adapters that grips the rack-side joint. Confirm the adapter size and access clearance first.
DRIVETRAIN SIDE
CV axle removal: transmission-side is not hub-side
Most front-wheel-drive axles create two separate challenges. The inner joint may be held in the transaxle or differential by a circlip, while the outer spline may be corroded into the wheel hub. These need different tools and different force paths.
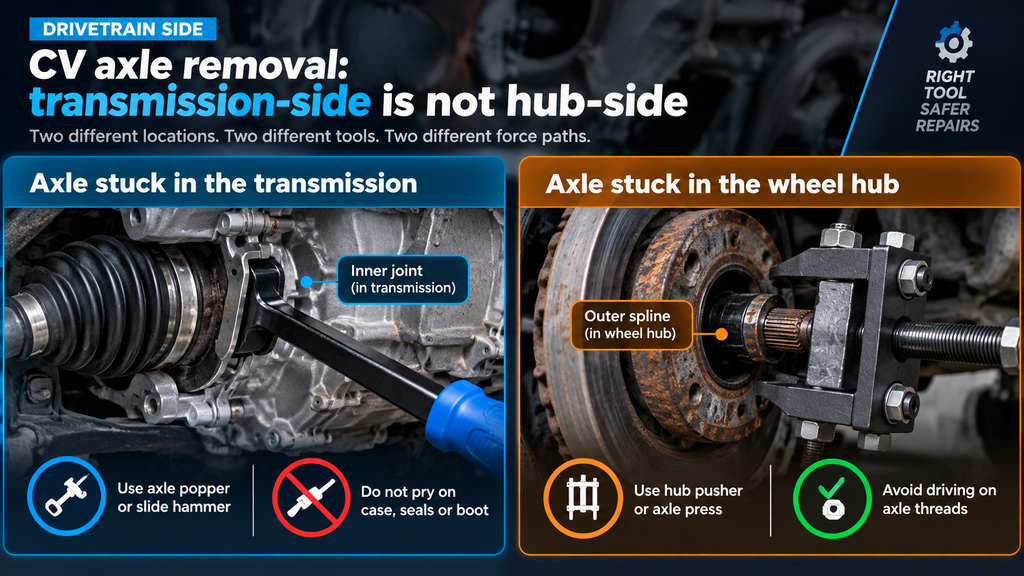
Never pry against a thin transmission case, seal lip, ABS sensor, or CV boot. If the axle does not release with a controlled attempt, stop and verify the retention design in service information for your exact vehicle.
Axle stuck in the transmission
Use axle poppers or a specifically supported pry point to release the circlip. A slide hammer with the correct axle attachment can help when space is limited or corrosion is severe.
Axle stuck in the wheel hub
Use a hub pusher or axle press. Avoid driving directly on the axle threads; reinstalling the axle nut partway can help protect threads only when the procedure permits it.
FIT BEFORE FORCE
How to check tool compatibility
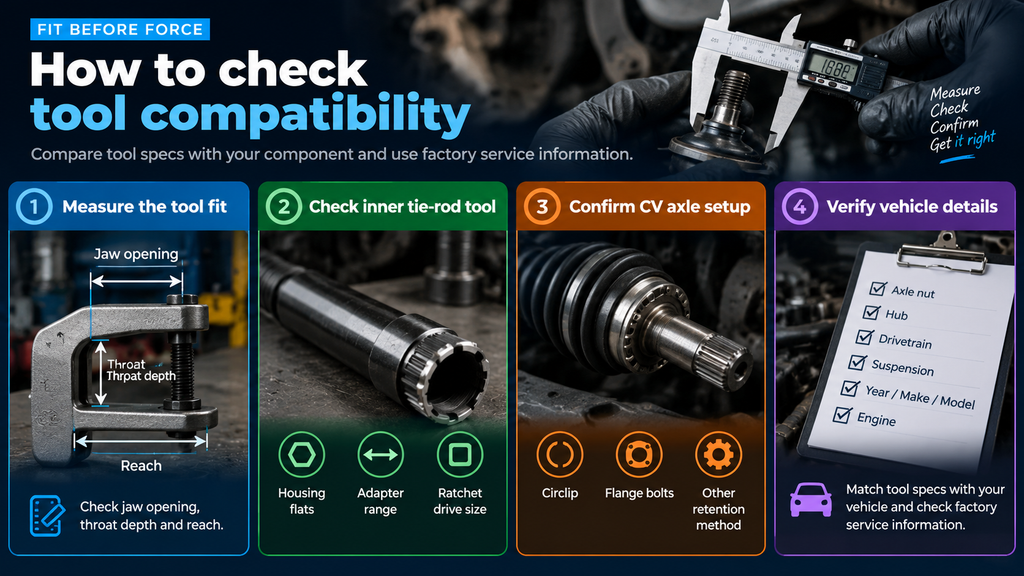
“Universal” normally means a tool covers a range—not every vehicle. Compare the tool specifications with your component and always prioritize factory service information where it specifies a procedure or special service tool.
- Measure jaw opening, throat depth, and reach for an outer tie-rod separator.
- Check inner tie-rod housing flats, adapter range, and ratchet drive size.
- Confirm whether the CV axle uses a circlip, flange bolts, or another retention method.
- Verify axle nut, hub, drivetrain, and suspension details for your year, make, model, and engine.
WORK DELIBERATELY
Use controlled force to avoid expensive damage
Secure the vehicle on correctly positioned jack stands, follow the specified disassembly sequence, and support components so the brake hose and ABS wiring are not stretched. Torque values, lifting points, axle-nut procedures, and alignment requirements are vehicle-specific.
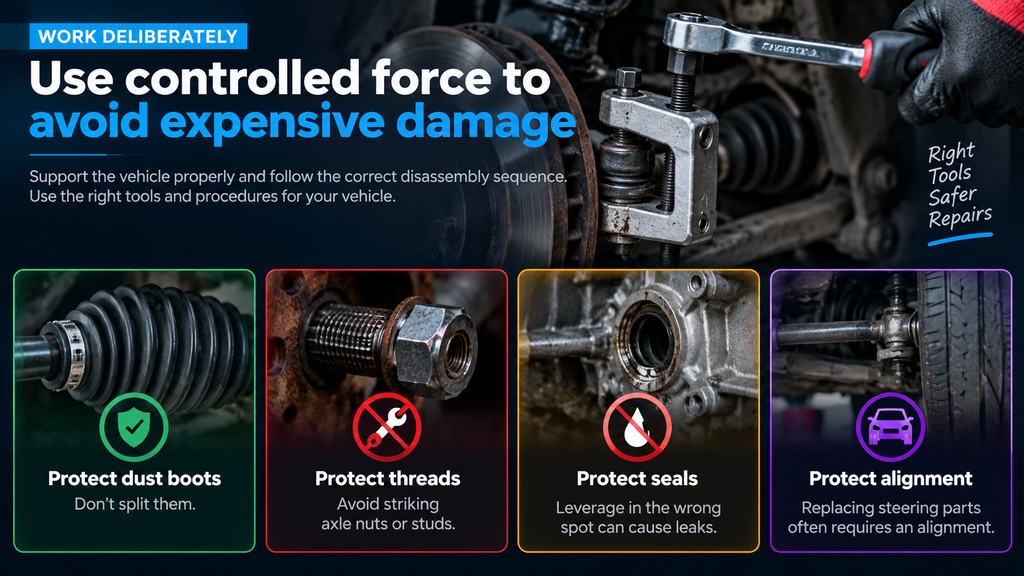
- Protect reusable dust boots: a pickle fork can split them before the joint releases.
- Protect threads and splines: do not hammer bare axle ends or tie-rod studs.
- Protect seals: levering in the wrong spot can damage a transmission seal and cause a leak.
- Protect alignment: replacing steering parts commonly requires a professional wheel alignment.
BUY, RENT, OR BORROW
Choose the practical ownership option
For a single repair, check local loaner-tool programs, rental counters, or a trusted enthusiast network before buying. A basic tie-rod separator can make sense for frequent suspension work; an inner tie-rod kit, slide hammer, or vehicle-specific hub tool is often more economical to borrow. Inspect any loaned tool for bent forks, damaged forcing screws, and missing adapters before use.
COMMON QUESTIONS
Tie rod and CV axle tool FAQs
Can I use a hammer instead of a tie-rod puller?
Some service methods allow a carefully placed strike to the steering knuckle boss, not the stud itself. But a proper separator is more controlled and is the safer default when you want to avoid thread or boot damage.
When is a slide hammer useful for CV axle removal?
A slide hammer is useful when an inboard joint will not release with an axle popper or when hub corrosion is significant. Use only an attachment designed for the component and avoid transmitting impact through unsupported bearings or seals.
Do I need an alignment after replacing a tie rod?
Usually, yes. Counting thread turns can help keep the vehicle close enough for a trip to the alignment shop, but it is not a substitute for setting toe to the manufacturer’s specification.