
The safest way to remove a panel is rarely to pull harder. Learn which trim tool fits the fastener, where to apply pressure, and when to stop before a clip, tab, or finished surface gets damaged.
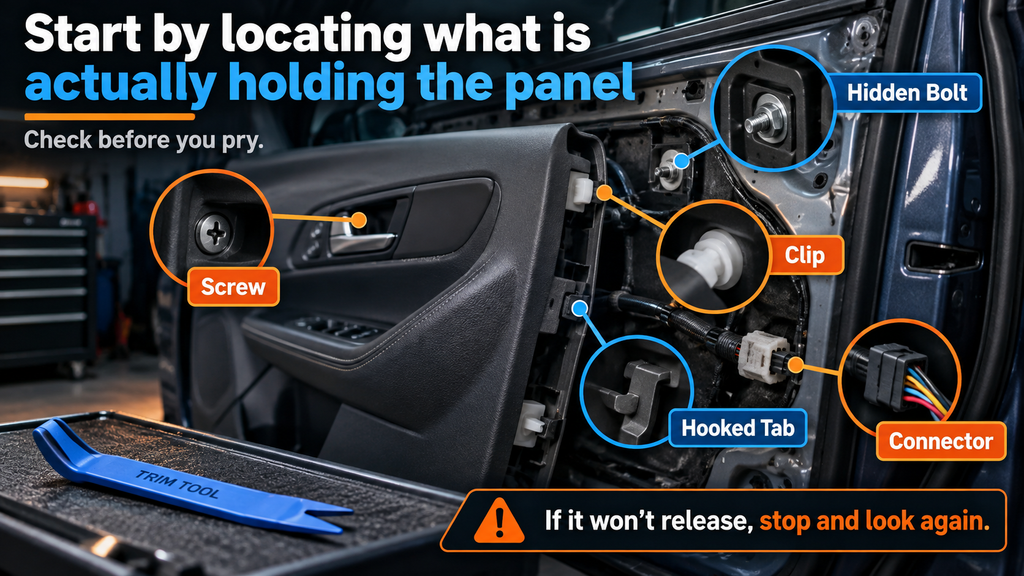
Start by locating what is actually holding the panel
A trim tool is designed to spread force across a panel edge or release a fastener with less surface damage than a screwdriver. But even the best automotive trim removal tools cannot compensate for a missed screw, hidden bolt, hooked tab, or electrical connector behind the panel. Before prying, inspect seams, handle pockets, switch panels, speaker grilles, and trim caps for concealed hardware. If a panel does not release with reasonable pressure, stop and look again rather than escalating force.
QUICK ANSWER
Use the least aggressive tool that can release the fastener
Begin with a plastic trim removal tool around visible interior finishes. Move to a forked clip removal tool when you can identify a push clip or door-panel retainer. Save stronger metal tools for stubborn hardware only after protecting the finish and confirming the panel’s attachment method.
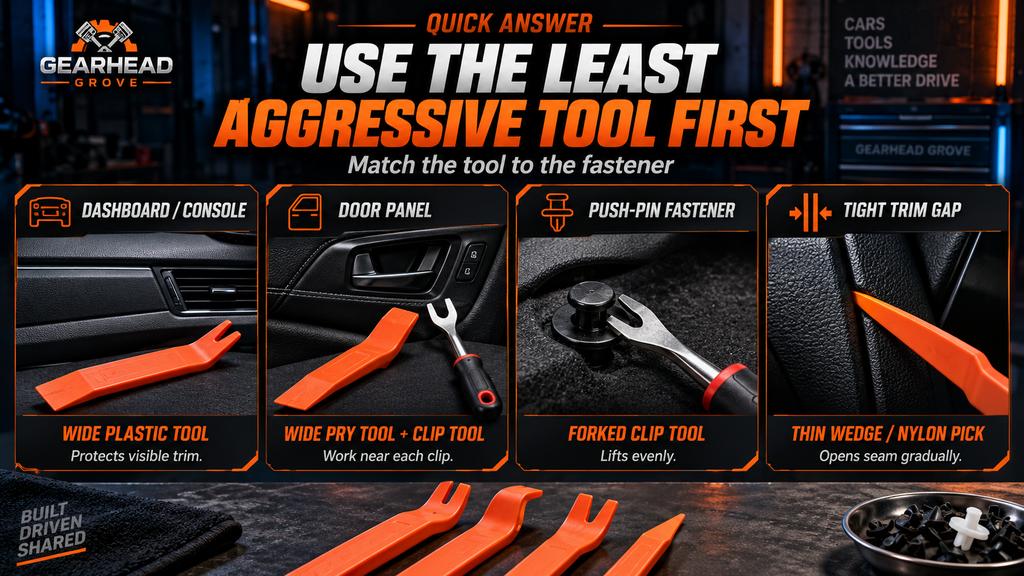
| Job | Best starting tool | Why it fits |
|---|---|---|
| Dashboard or console trim | Wide plastic trim removal tool | Its broad nylon edge distributes pressure and is less likely to mar visible plastic, vinyl, or piano-black trim. |
| Door panel | Wide pry tool, then forked clip tool | Open the edge carefully, then work close to each door-panel clip instead of flexing the entire panel. |
| Push-pin fastener | Forked clip removal tool | The fork can straddle the stem and lift the retainer more evenly than a narrow screwdriver blade. |
| Tight trim gap | Thin wedge or angled nylon pick | A slim profile creates an opening gradually without forcing a thick tool into a delicate seam. |
TOOL TYPES
What each automotive trim removal tool is for
Complete kits can include many shapes, but most DIY jobs start with just three profiles. Choose by the surface you need to protect, the width of the available gap, and whether you are releasing a panel edge or a specific fastener.
Plastic trim removal tool
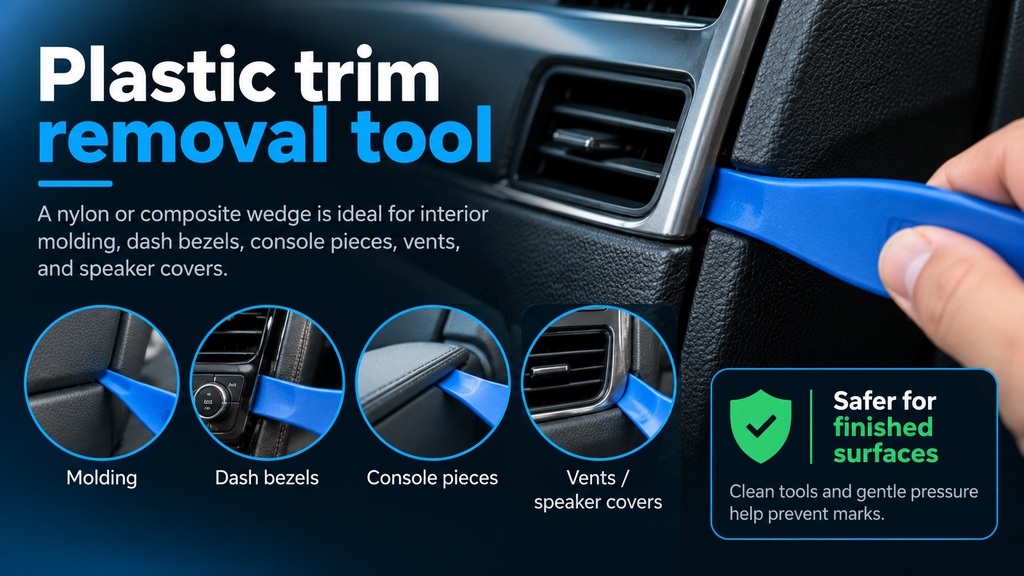
A nylon or composite wedge is the everyday choice for interior molding, dash bezels, console pieces, vents, and speaker covers. Plastic tools can still leave marks if dirty or forced, but they are the safer default around finished surfaces.
Forked clip removal tool
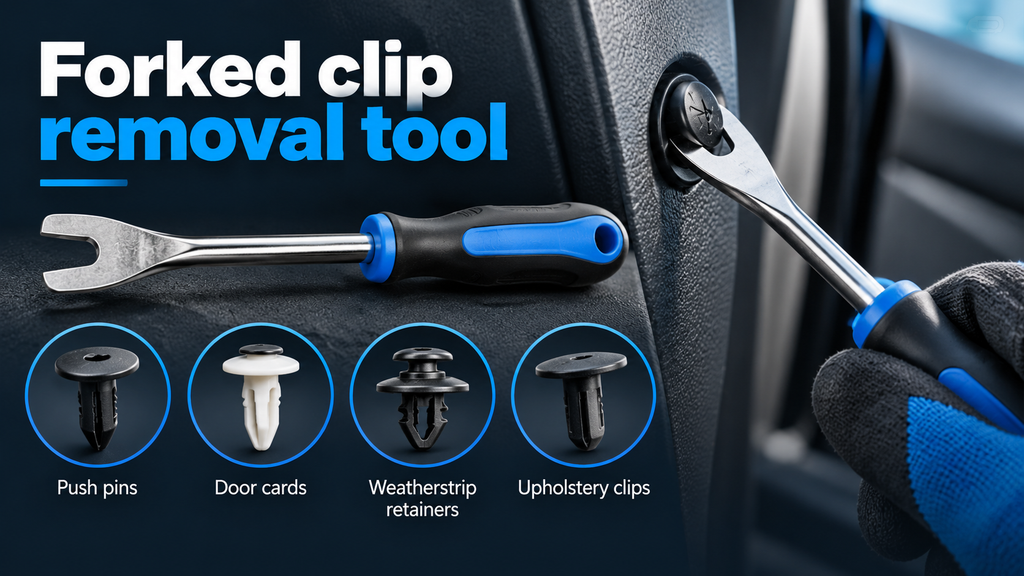
A forked clip removal tool is shaped to reach around a clip stem or retainer head. It is particularly useful for door cards, push pins, weatherstrip retainers, and upholstery-style clips when you can position it close to the fastener.
Thin wedge or angled tool
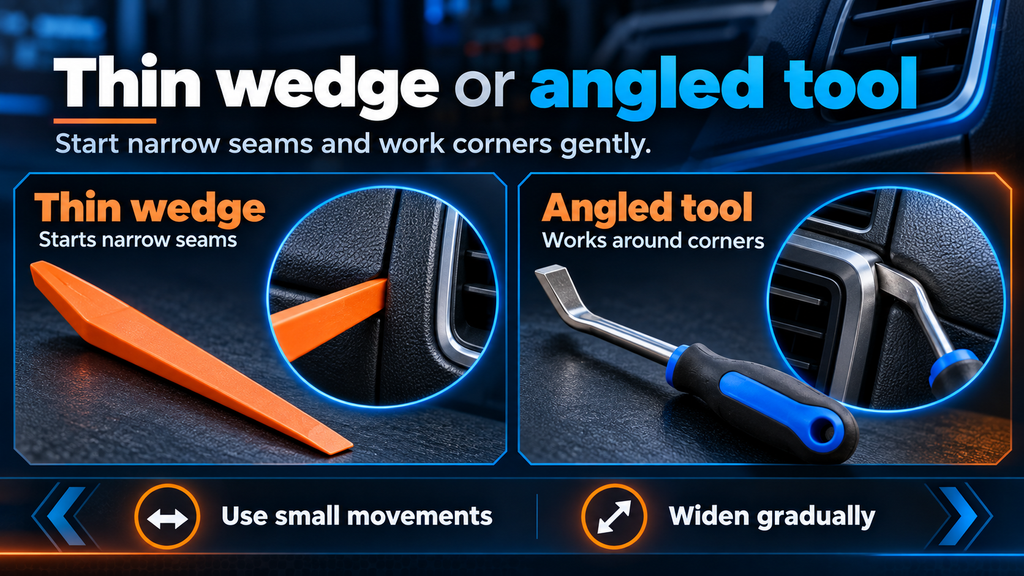
Slim wedges help start a narrow seam, while angled tools can turn leverage around a corner or behind a small bezel. Use small movements and widen the opening gradually instead of twisting hard in one place.
CLIP REMOVAL
Remove clips close to the fastener, not from the middle of the panel
A panel bends most when force is applied far away from its attachment point. Once you have created a small gap, look or feel along the panel edge for the next clip. Position your clip removal tool as near to that clip as possible, then apply steady pressure in the direction the fastener releases.
If the panel will not release with controlled pressure, assume there is another fastener until proven otherwise. Hidden screws are common behind pull handles, switch trim, reflectors, rubber mats, and small cosmetic caps.
Push pins and Christmas-tree clips
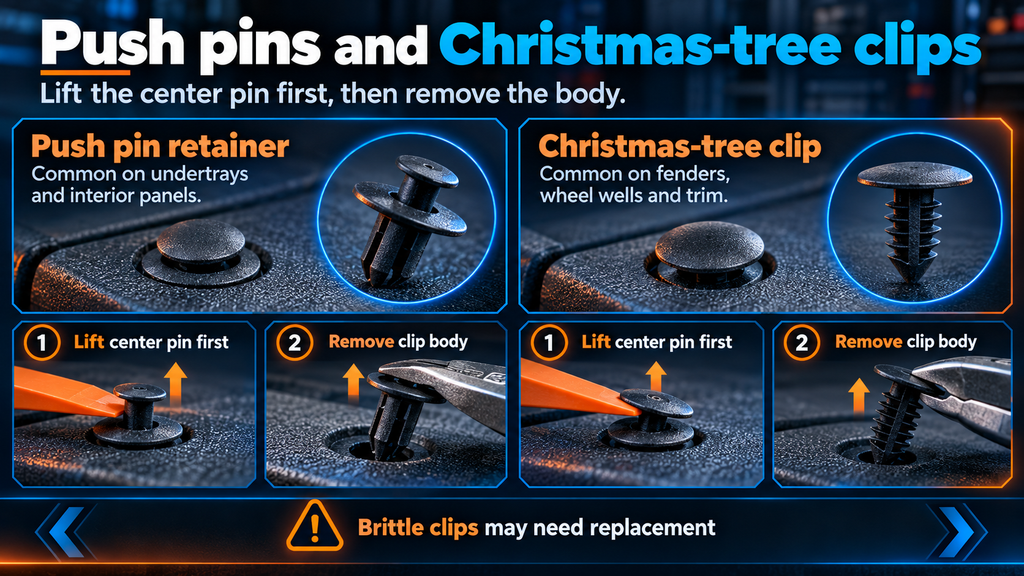
Many retainers have a center pin that expands the outer body. Lift the center section first when the design allows, then remove the body. If the pin is flush and the clip is brittle, have replacements ready rather than relying on every original fastener to survive.
Door-panel and upholstery clips
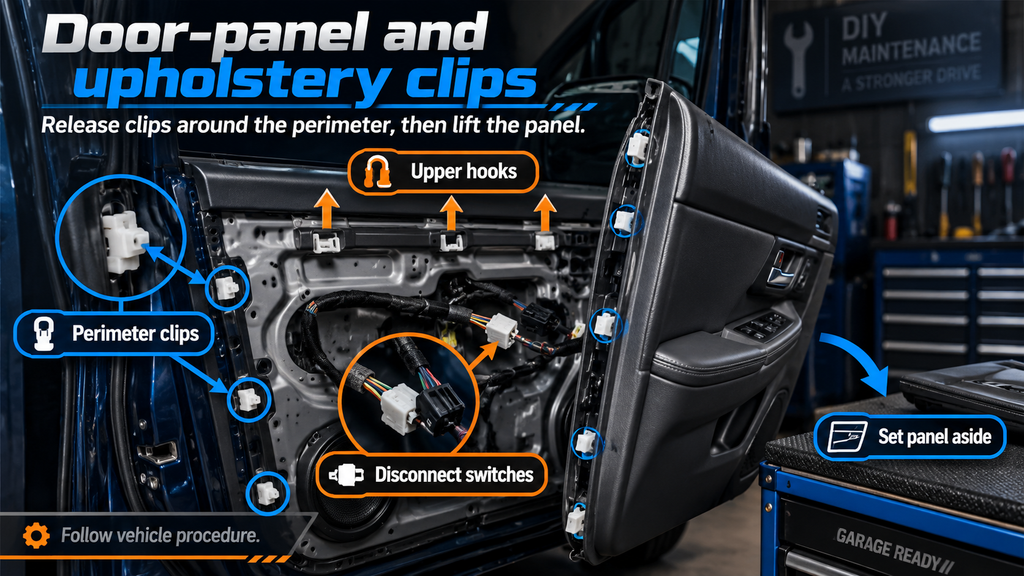
Door cards often use clips plus screws and upper hooks. Release clips around the perimeter, then lift the panel only as directed by the vehicle procedure. Disconnect switches and cables carefully before setting the panel aside.
WORK DELIBERATELY
Safe panel removal is controlled leverage, not brute force
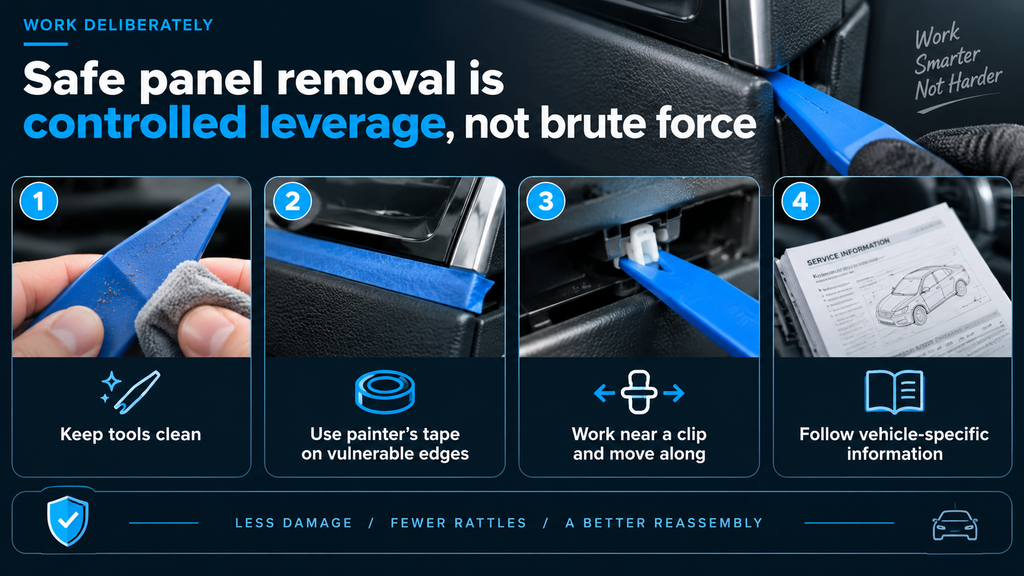
Treat every panel as if it has a hidden attachment, a fragile mounting tab, and a wire behind it. These habits help limit cosmetic damage and reduce the chance of creating a loose panel or future rattle during reassembly.
- Clean the trim tool first. Small grit caught on a wedge can scratch glossy trim before you notice it.
- Use painter’s tape around vulnerable edges when working near piano-black, painted, leather, or chrome-finished surfaces.
- Apply pressure near a clip and move from fastener to fastener instead of bending a long unsupported section.
- Follow vehicle-specific service information around airbags, pillar trim, seat-belt hardware, screens, and electrical connectors.
PROTECT THE FINISH
Plastic versus metal trim tools: when each makes sense
For visible cabin trim, plastic usually wins because it is more forgiving. Metal can provide useful leverage on heavy-duty exterior retainers or stubborn clips, but it raises the risk of gouging paint, denting trim, or concentrating force on a mounting tab. If metal is truly necessary, protect the contact area and use the smallest amount of force needed.
Use plastic first around dashboard trim, door inserts, console panels, screens, leather, vinyl, and painted accents.
Avoid using a screwdriver as a general-purpose trim tool; its narrow steel edge easily leaves a permanent pressure mark.
Keep spare clips on hand when working on older vehicles, especially those exposed to heat, sun, or previous repairs.
Before reinstalling, inspect each clip and panel tab. Replace damaged retainers so the panel seats evenly and does not rattle.
BASIC KIT
What is worth having in a basic trim tool kit?
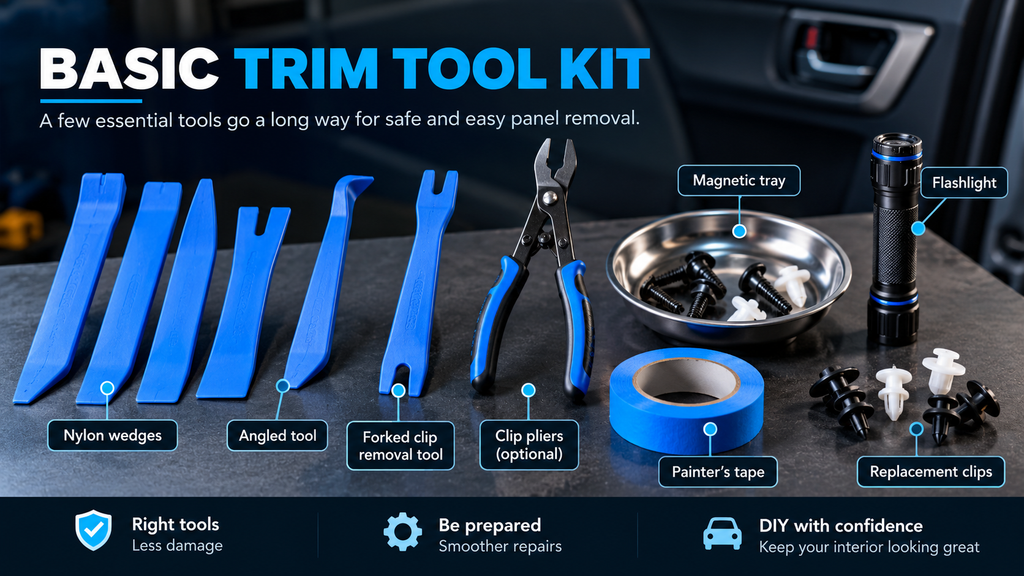
For most DIY installations and interior repairs, start with a small set of clean nylon wedges in different widths, one thin starting wedge, one angled tool, and a forked clip removal tool. Add clip pliers if you regularly remove door cards or body fasteners. A magnetic tray, painter’s tape, flashlight, and a handful of vehicle-appropriate replacement clips are often as useful as another specialty pry tool. Buy by tool shape and material quality rather than by the largest number of pieces in a kit.
COMMON QUESTIONS
Automotive trim removal tool FAQs
Are plastic trim removal tools strong enough?
For most interior panels, yes. A quality plastic trim removal tool is strong enough when used close to the clip and after all screws are removed. If it bends excessively, reassess the attachment point rather than immediately switching to metal.
Can trim clips be reused?
Many clips can be reused if they release cleanly and retain their shape. Replace clips with bent stems, cracked heads, weak locking tabs, or missing sealing washers. Reusing damaged clips is a common source of loose trim and rattles.
Why will my trim panel not come off?
The most common causes are a hidden screw, an unremoved switch panel, a cable or electrical connector, or a panel that must slide upward after clips release. Pause, inspect the service procedure for your exact vehicle, and do not pull hard enough to crack the panel.