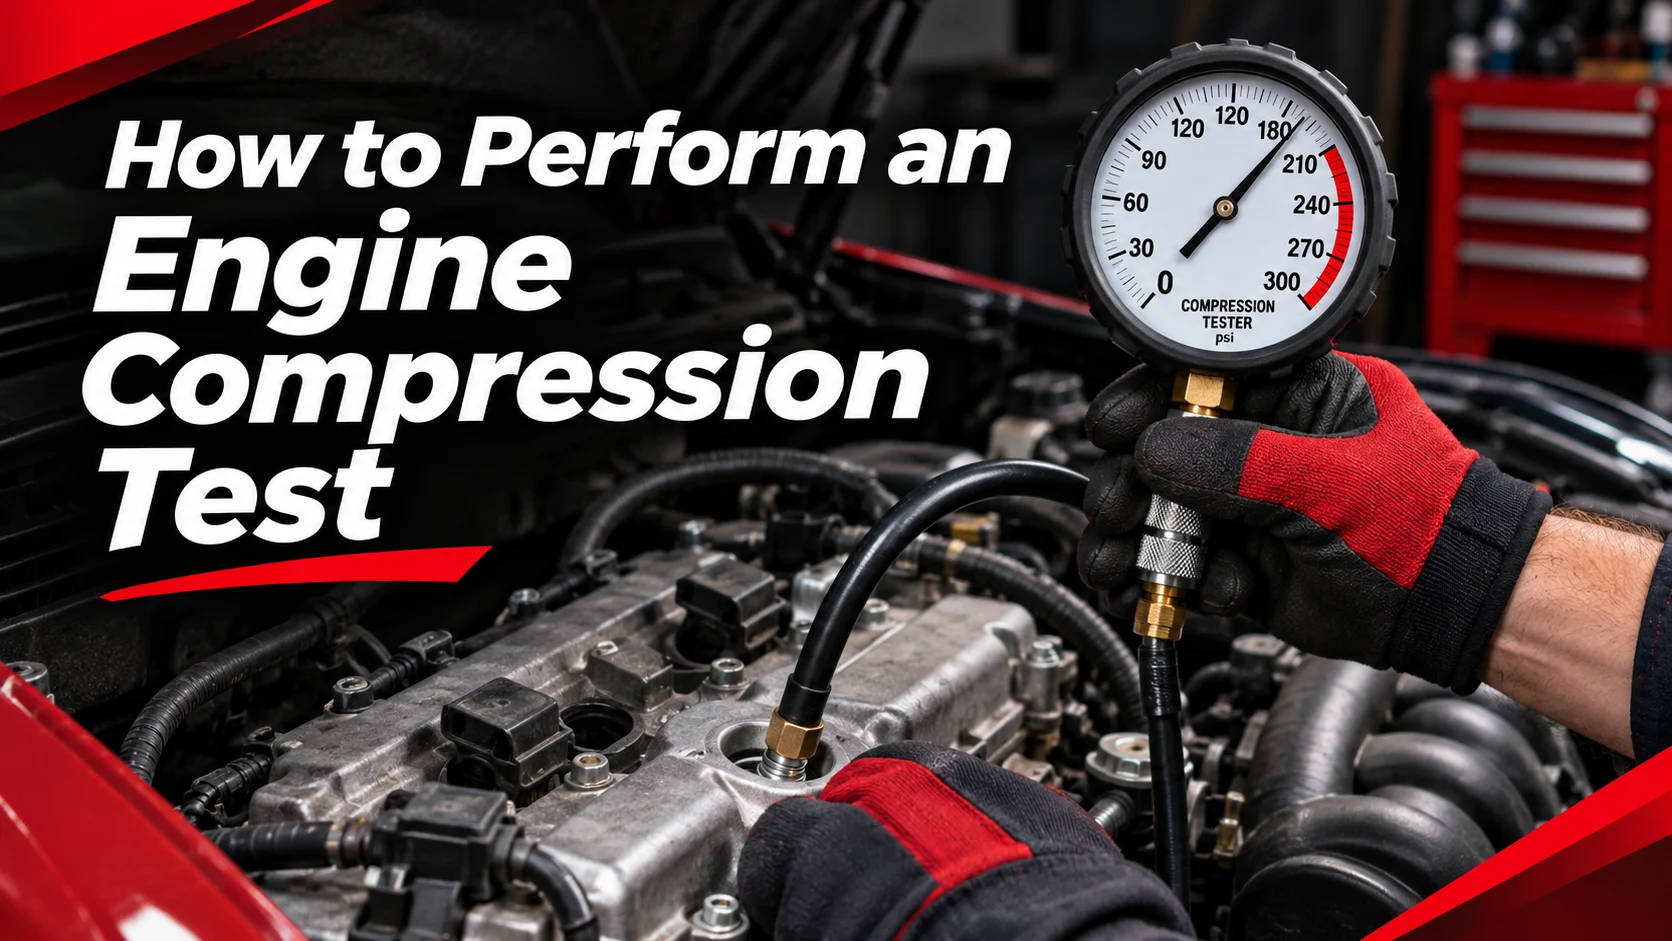

An engine that misfires, struggles to accelerate, or burns oil may have a problem inside one or more cylinders. But how can you tell whether the issue involves worn piston rings, leaking valves, or another mechanical fault? An engine compression test is one useful way to begin investigating these problems.
The test measures the pressure each cylinder produces while the starter turns the engine. With a compression tester, a few basic tools, and the correct service information, many DIY car owners can perform this diagnostic check at home.
Quick Answer: How to Do a Compression Test
Warm the engine if the manufacturer specifies it, then turn it off and safely disable the fuel and ignition systems. Remove all spark plugs, install a compression gauge in the first cylinder, and crank the engine for the specified number of compression strokes. Record the maximum reading, repeat the process for every cylinder, and compare the results with your vehicle’s service specifications.
Safety first: This guide focuses on conventional gasoline engines. Diesel engines, hybrids, and some modern electronically controlled vehicles require different procedures or special equipment. Always follow the factory service manual. Never attempt this test on a high-voltage hybrid system without the required training.
What Is an Engine Compression Test?
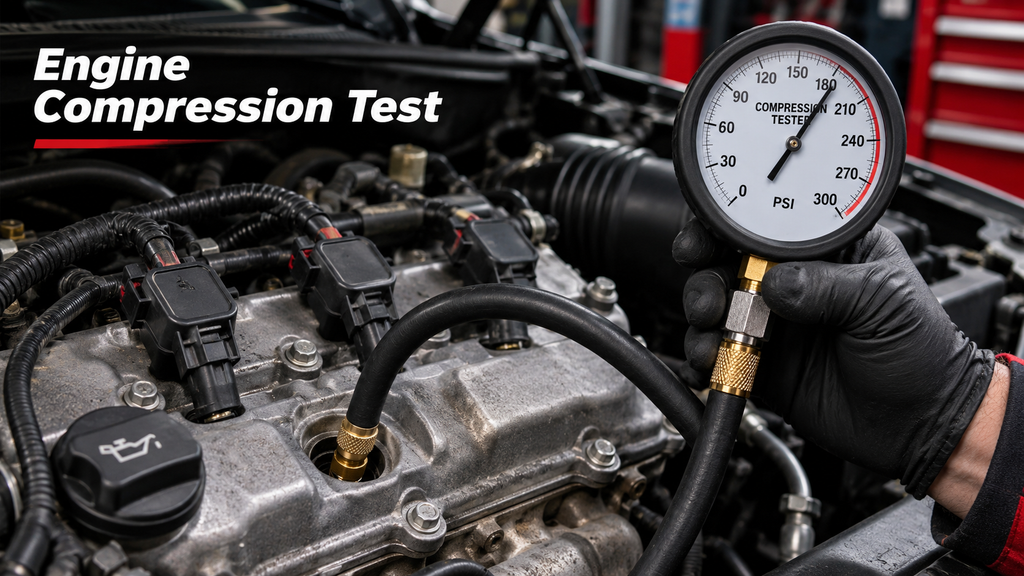
An engine compression test measures the pressure created inside a cylinder as the piston moves upward during the compression stroke. This pressure helps evaluate how effectively the cylinder seals.
A properly functioning cylinder depends on several components working together, including the piston, piston rings, cylinder walls, intake valves, exhaust valves, and cylinder head gasket.
When these components cannot seal correctly, compressed air can escape. The resulting pressure loss may contribute to misfires, reduced power, rough running, or starting problems.
A compression reading is usually displayed in pounds per square inch (PSI). The tester records the peak pressure produced during cranking.
However, compression pressure is not the same as an engine’s compression ratio. Compression ratio describes the relationship between cylinder volumes, while a compression gauge measures actual cranking pressure.
When Should You Perform a Compression Test?
A compression check is especially useful when an engine has persistent performance problems that basic maintenance and electronic diagnostics have not explained.
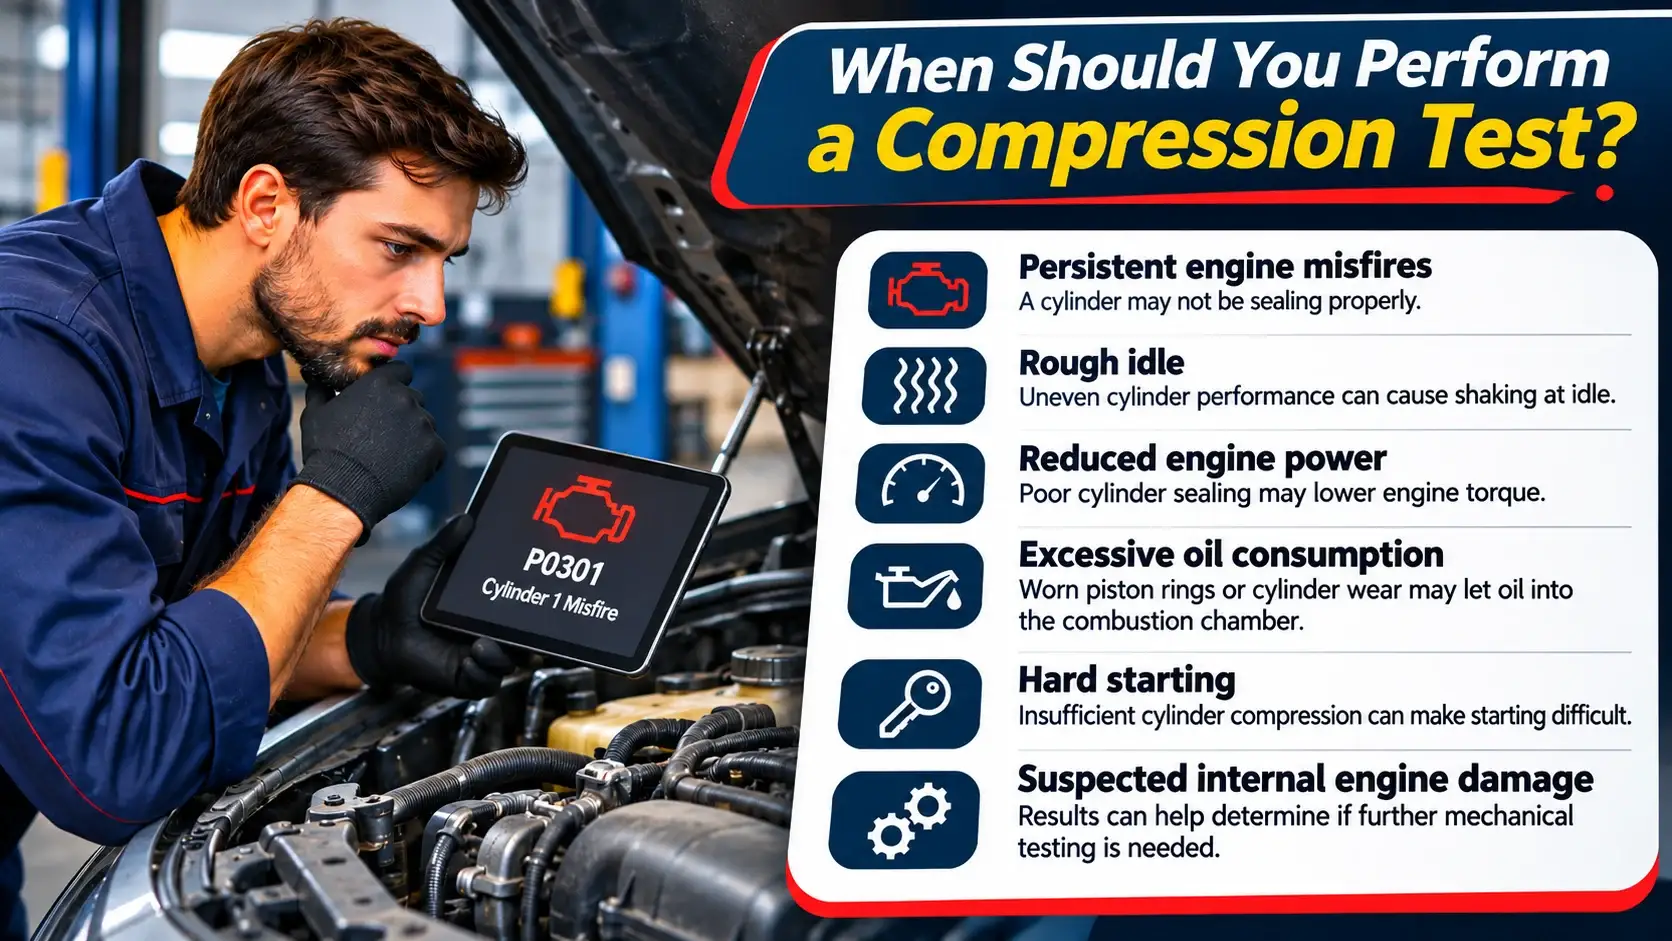
Common reasons to investigate cylinder compression include:
- Persistent engine misfires: A cylinder may fail to produce adequate pressure because of a mechanical sealing problem.
- Rough idle: Uneven cylinder performance can cause noticeable shaking when the vehicle is stationary.
- Reduced engine power: Poor cylinder sealing may reduce the engine’s ability to produce torque.
- Excessive oil consumption: Worn piston rings or cylinder wear may contribute to oil entering the combustion chamber.
- Hard starting: Insufficient cylinder compression can make starting difficult, although many other faults can cause the same symptom.
- Suspected internal engine damage: Compression results can help determine whether further mechanical testing is warranted.
An OBD-II trouble code such as P0301 identifies a misfire associated with cylinder one, but it does not prove that cylinder has low compression. Spark plugs, ignition coils, injectors, and other components should also be considered during diagnosis.
Tools Needed for an Engine Compression Test
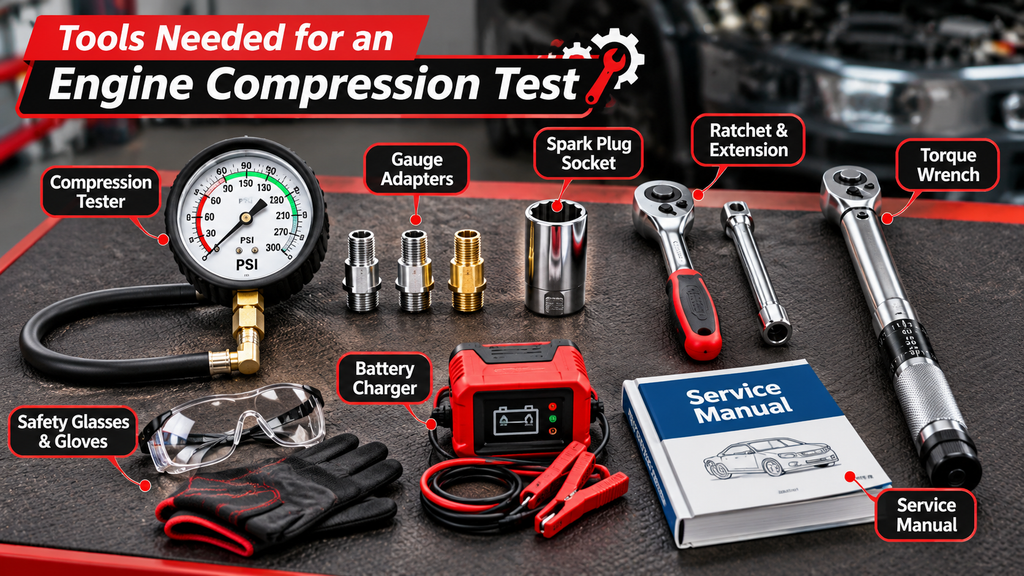
Before beginning, gather the correct tools and review the service procedure for your exact engine.
| Tool | Purpose |
|---|---|
| Compression tester | Measures pressure inside each cylinder. |
| Correct gauge adapter | Connects the tester to the spark plug opening. |
| Spark plug socket | Removes and reinstalls spark plugs. |
| Ratchet and extension | Helps reach recessed spark plug wells. |
| Torque wrench | Tightens spark plugs to the specified torque. |
| Battery charger if needed | Helps maintain adequate battery charge. |
| Safety glasses and gloves | Help protect against debris and hot components. |
| Service manual | Provides the correct test procedure and specifications. |
For most home mechanics, a screw-in compression tester is preferable to a handheld rubber-tip gauge because it provides a secure connection during cranking. Confirm that the adapter has the correct thread size and length for your engine.
How to Perform an Engine Compression Test: Step by Step
The following procedure describes a typical dry compression test on a conventional gasoline engine. The manufacturer’s instructions take priority, especially for fuel disabling, electronic throttle operation, and the number of cranking strokes.
Step 1: Warm Up the Engine and Park Safely
Many manufacturers recommend measuring compression after the engine reaches normal operating temperature. A warm engine can provide readings that better represent normal running conditions.
Park on level ground, select Park or Neutral as appropriate, apply the parking brake, and switch the engine off.
Allow hot components to cool enough for safe access. Some vehicles require cold-engine testing, so always check the specific procedure before proceeding.
Step 2: Disable the Ignition and Fuel Systems
The engine must crank without starting. Follow the manufacturer’s prescribed method for disabling ignition and fuel delivery.
Depending on the vehicle, this may involve removing specified fuses, disconnecting designated electrical connectors, or using a scan tool’s compression-test mode.
Do not assume that removing a fuel-pump fuse automatically disables every injector or ignition circuit. Some modern vehicles require special procedures.
Important: Keep ignition sources away from the work area, follow fuel-pressure precautions, and do not crank an engine with exposed live ignition components.
Step 3: Remove All Spark Plugs
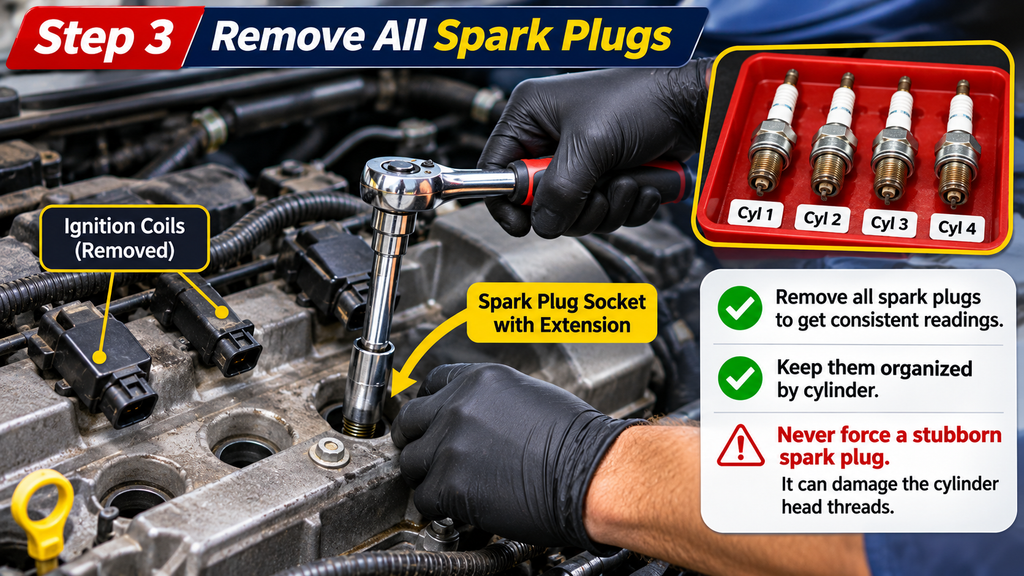
Locate the ignition coils or spark plug wires. Remove them according to the service instructions, then clean loose dirt from around the spark plug openings before removing the plugs.
Remove all spark plugs using the appropriate socket. Taking out every plug reduces resistance during cranking and helps produce more consistent readings.
Keep the plugs organized by cylinder if you plan to inspect their condition. Protect the open holes from dropped objects and debris.
Never force a stubborn spark plug. Damaged threads in an aluminum cylinder head can lead to costly repairs.
Step 4: Install the Compression Tester
Choose the correct adapter and carefully thread it into the first cylinder’s spark plug opening. Start the adapter by hand to avoid cross-threading the cylinder head.
Tighten the connection according to the tester’s instructions. The fitting must seal properly, but overtightening can damage the threads or adapter.
Position the gauge where it can be observed safely, away from moving belts, pulleys, fans, and hot surfaces.
Step 5: Crank the Engine and Read the Gauge
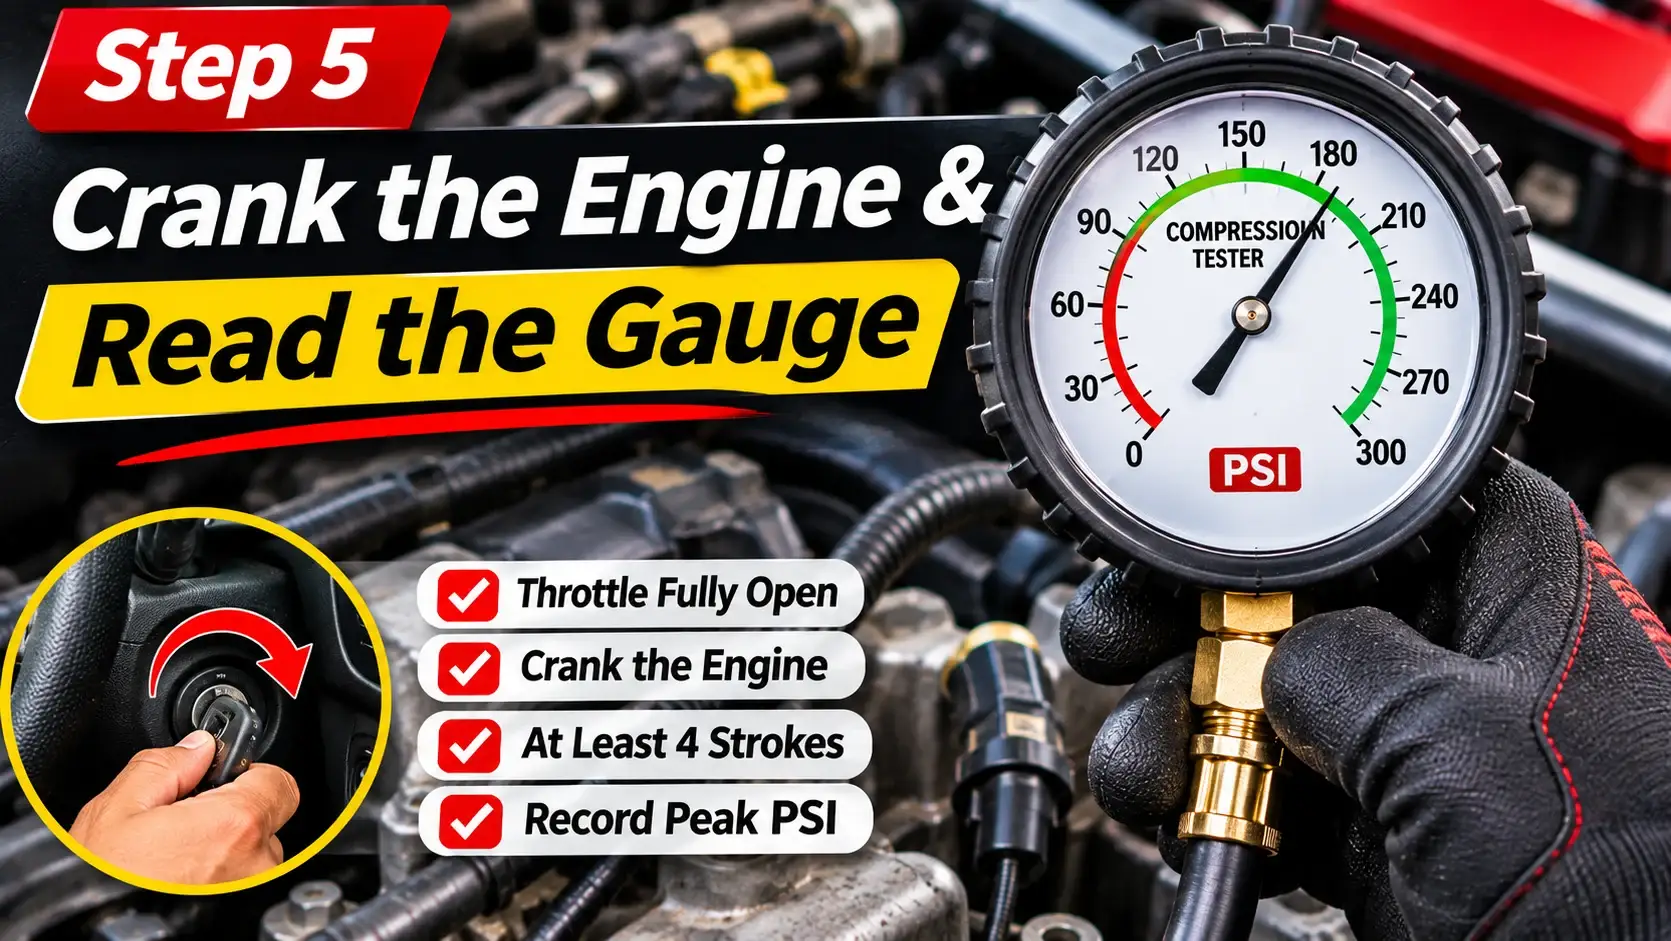
Many gasoline-engine procedures require the throttle to be fully open during testing. Follow the vehicle’s specified method, since electronic throttle bodies may not respond like older cable-operated systems.
With the ignition and fuel systems disabled, have an assistant crank the engine while you observe the pressure gauge from a safe position.
Several manufacturer procedures specify at least four compression strokes per cylinder. Use the number stated in your manual and maintain consistent conditions for every cylinder.
The needle should rise in increments before stabilizing near its highest reading. Record the peak pressure and, when possible, how quickly pressure builds.
Step 6: Repeat the Test on Every Cylinder
Release the gauge pressure using its relief valve. Carefully remove the tester and move it to the next cylinder.
Repeat the same procedure, keeping the number of cranking strokes, throttle conditions, gauge, and battery condition as consistent as possible.
Record every cylinder result. If a reading seems unusually low, repeat that measurement to check for a loose adapter, poor seal, weak battery, or procedural error.
Helpful tip: Label each result by the manufacturer’s cylinder number rather than assuming the cylinders are numbered from left to right.
Step 7: Compare Results and Reassemble
Compare the measurements with the compression specifications for your exact engine. Pay attention to both the absolute pressure and the differences between cylinders.
After testing, remove the gauge, reinstall the spark plugs using the correct tightening procedure and torque, and reconnect the ignition and fuel systems.
Make sure all connectors, hoses, and covers are properly restored before attempting to start the vehicle.
How to Read Engine Compression Test Results
Understanding the readings is just as important as performing the test correctly.
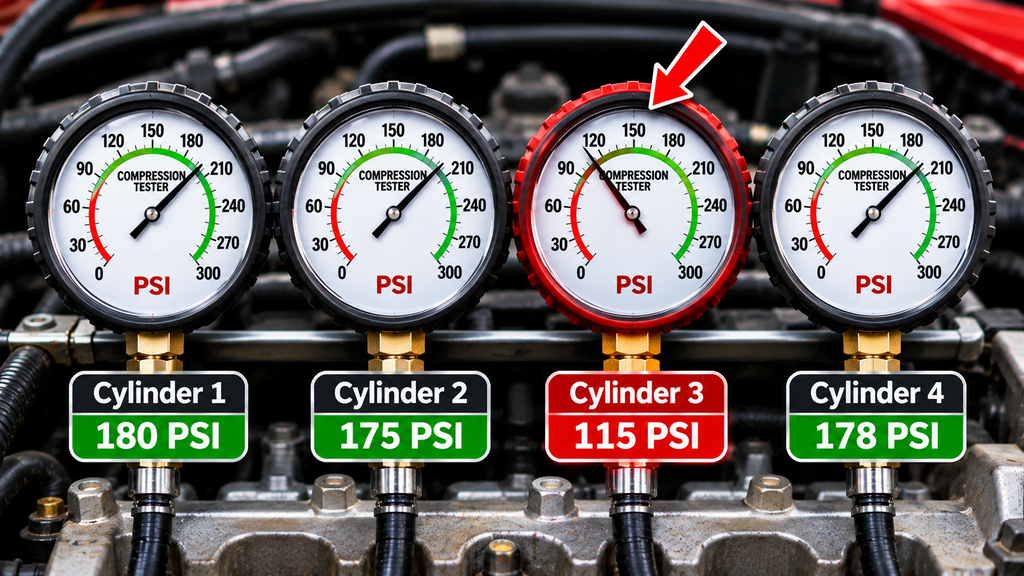
For example, suppose a four-cylinder gasoline engine produces the following readings:
| Cylinder | Reading | Initial Observation |
|---|---|---|
| 1 | 175 PSI | Similar to cylinders 2 and 4 |
| 2 | 180 PSI | Highest reading |
| 3 | 115 PSI | Substantially lower |
| 4 | 178 PSI | Similar to cylinders 1 and 2 |
Illustrative readings only. These numbers are not factory specifications for a particular vehicle.
In this example, cylinder three is noticeably lower than the others. That difference warrants further investigation, but it does not identify the failed component by itself.
What Is Normal Engine Compression PSI?
There is no single normal compression pressure for every gasoline engine. Acceptable readings vary with engine design, compression ratio, valve timing, altitude, cranking speed, and test conditions.
Some gasoline engines produce cranking readings around 120–200 PSI, but this broad illustrative range is not a pass-or-fail standard. An engine may have a legitimate specification outside it.
Always use the manufacturer-specified minimum pressure and allowable difference between cylinders.
How Much Variation Between Cylinders Is Acceptable?
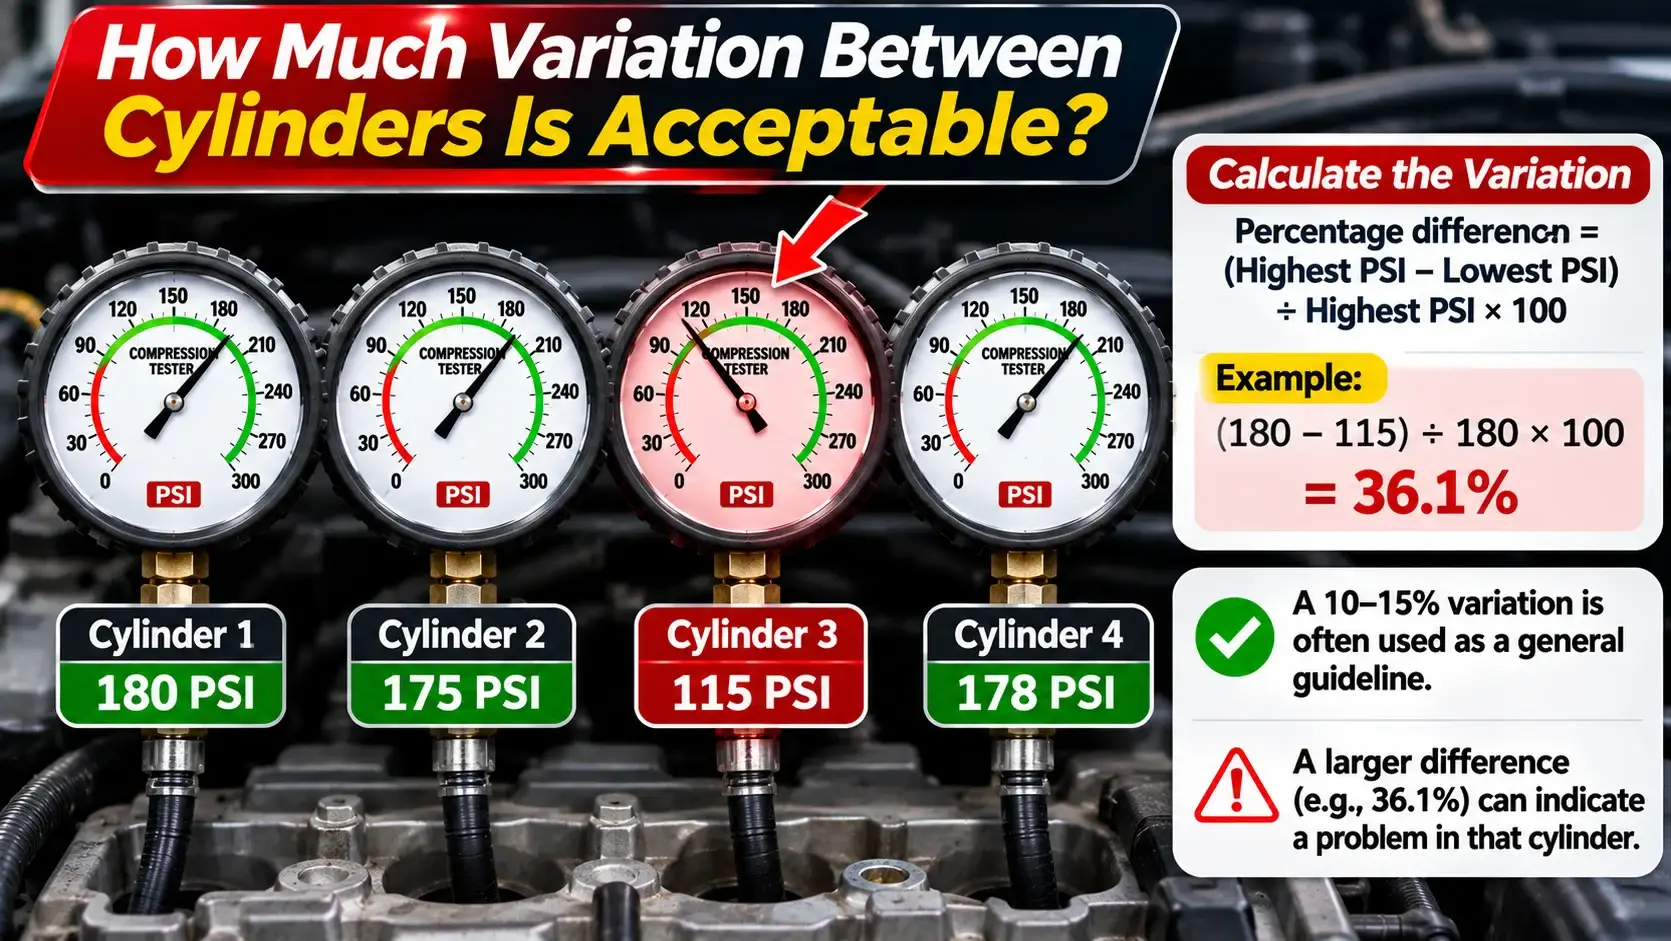
Cylinder-to-cylinder consistency is an important diagnostic clue. Some service procedures use a percentage of the highest cylinder reading, while others specify a maximum difference in PSI or kPa.
A commonly discussed 10–15% variation is only a rough screening guideline, not a universal manufacturer requirement.
To calculate the percentage difference between the highest and lowest readings:
Percentage difference =
(Highest PSI − Lowest PSI) ÷ Highest PSI × 100
Using the example above:
(180 − 115) ÷ 180 × 100 = approximately 36.1%.
That is a substantial difference and suggests cylinder three should be investigated further.
Dry vs. Wet Compression Test: What’s the Difference?
A dry compression test is the standard initial measurement. It checks cylinder pressure without deliberately adding oil to the combustion chamber.
A wet compression test repeats the measurement after introducing a manufacturer-approved small quantity of engine oil into a low-compression cylinder.
| Test | How It Works | Main Purpose |
|---|---|---|
| Dry test | Measures cranking pressure without added oil. | Identifies low or uneven compression. |
| Wet test | Repeats a low reading after adding the specified amount of oil. | Provides clues about piston-ring or cylinder-wall sealing. |
How Do You Interpret a Wet Compression Test?
If compression rises noticeably after adding the specified oil quantity, piston-ring or cylinder-wall leakage becomes more likely. The oil may temporarily improve sealing between the piston rings and cylinder wall.
If compression changes very little, leaking valves, a head-gasket problem, or another mechanical fault may be responsible.
Neither result is conclusive. Excess oil can distort readings and create a risk of engine damage. Do not add an arbitrary amount of oil; follow the engine-specific diagnostic procedure.
What Causes Low Engine Compression?
Low cylinder pressure generally indicates that the cylinder is not trapping and compressing air as expected, or that the test conditions were incorrect.
1. Worn Piston Rings
Piston rings help seal the gap between the piston and cylinder wall. Worn, damaged, or stuck rings may allow pressure to escape into the crankcase.
Possible accompanying symptoms include oil consumption, blow-by, and reduced power. A wet compression test may provide useful clues.
2. Leaking Intake or Exhaust Valves
A burned, bent, damaged, or improperly seated valve can allow compressed air to escape through the intake or exhaust system.
A cylinder leak-down test can help identify whether air is escaping past these valves.
3. Damaged Cylinder Head Gasket
A damaged head gasket can allow pressure to escape between cylinders or into other passages. Two adjacent cylinders with unusually low compression may raise suspicion of a gasket leak.
However, low compression alone cannot confirm head-gasket failure.
4. Damaged Pistons or Cylinder Walls
Cracked pistons, damaged ring lands, or excessive cylinder-wall wear can interfere with proper sealing and cause compression loss.
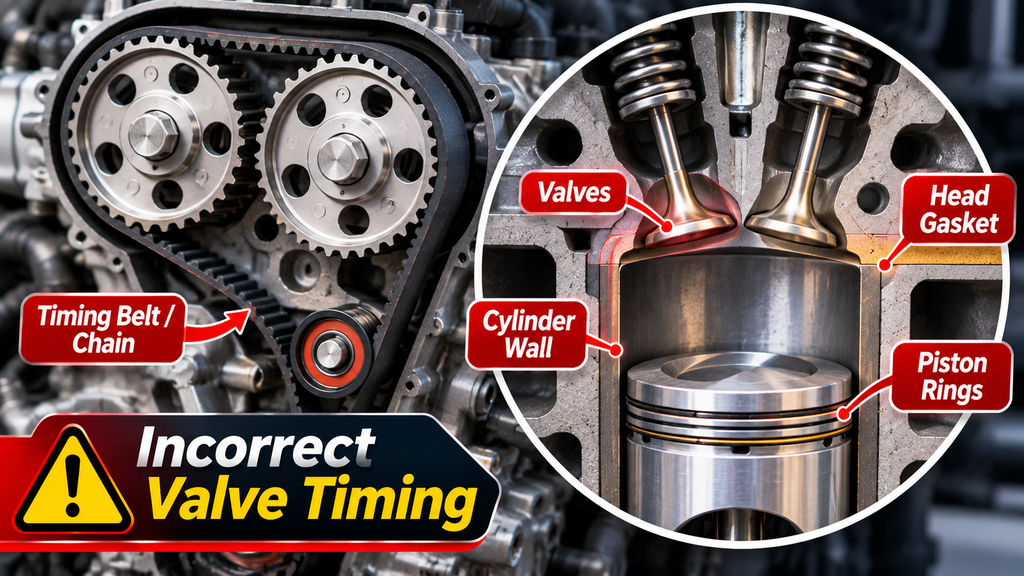
5. Incorrect Valve Timing
A worn or incorrectly installed timing belt or chain, slipped timing components, or other valve timing problems can affect cylinder pressure. Severe timing faults may produce low readings across multiple cylinders.
Common Compression Testing Mistakes to Avoid
Even a healthy engine can produce misleading measurements if the test is performed incorrectly.
- Testing with a weak battery: Slow or inconsistent cranking can affect pressure readings.
- Leaving spark plugs installed: This may change cranking conditions and make comparisons less consistent.
- Using the wrong adapter: A poorly fitting adapter may leak or damage spark plug threads.
- Ignoring throttle instructions: Restricted airflow may reduce readings on engines that require an open throttle.
- Using inconsistent cranking strokes: Each cylinder should be measured using the prescribed, repeatable procedure.
- Failing to disable fuel or ignition: This can cause unsafe operation or unreliable results.
- Using generic PSI thresholds: A reading cannot be judged accurately without the engine’s factory specification.
- Assuming low compression proves one fault: Further tests may be needed to locate the source of pressure loss.
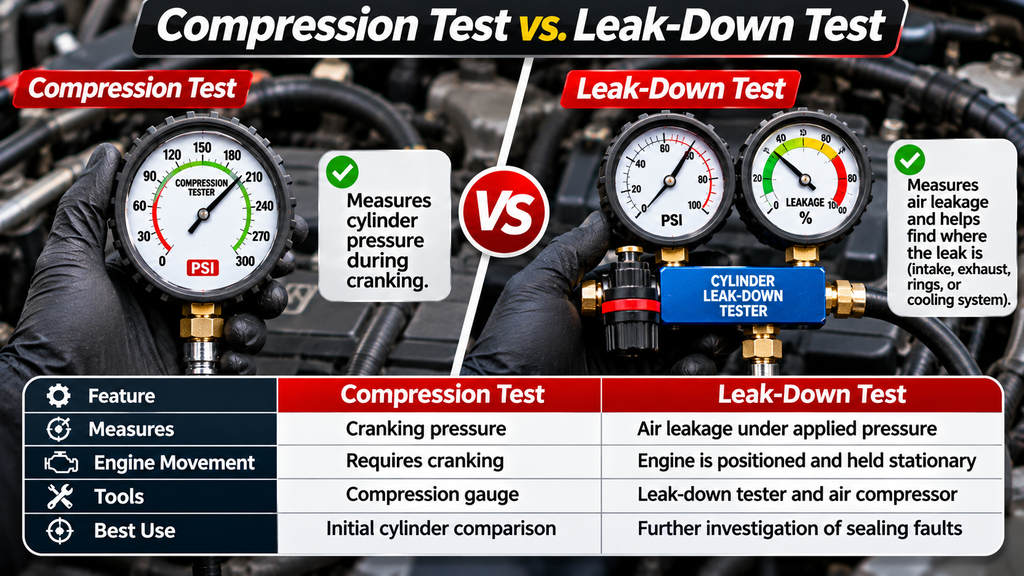
Compression Test vs. Leak-Down Test
Both tests evaluate engine cylinder sealing, but they measure different things.
A compression test measures the pressure a cylinder develops while the engine cranks. It is useful for identifying low pressure and comparing cylinders.
A cylinder leak-down test introduces regulated compressed air into a cylinder, typically positioned at top dead center on its compression stroke, and measures leakage.
By checking where air escapes, a technician may identify likely leakage paths through the intake valves, exhaust valves, piston rings, or cooling system.
| Feature | Compression Test | Leak-Down Test |
|---|---|---|
| Measures | Cranking pressure | Air leakage under applied pressure |
| Engine movement | Requires cranking | Engine is positioned and held stationary |
| Tools | Compression gauge | Leak-down tester and air compressor |
| Best use | Initial cylinder comparison | Further investigation of sealing faults |
A leak-down test requires additional precautions because pressurized air can rotate the engine unexpectedly. If you are unfamiliar with the procedure, have a qualified technician perform it.
What Should You Do If Compression Is Low?
If one or more cylinders show unusually low pressure, do not immediately assume the engine needs rebuilding or replacement.
Use the following diagnostic sequence:
- Verify the measurement. Repeat the test and check gauge connections, cranking speed, and test conditions.
- Check factory specifications. Confirm whether the pressure or cylinder variation is actually outside the allowed range.
- Review other symptoms. Consider misfire codes, oil consumption, coolant loss, overheating, and mechanical noises.
- Consider additional testing. Use a manufacturer-approved wet test, leak-down test, or other diagnostic procedure where appropriate.
- Confirm the cause before repairing. Internal engine repairs can be expensive, so make decisions based on combined diagnostic evidence.
If the engine has severe knocking, unexplained overheating, heavy smoke, or major coolant loss, avoid continuing to drive it until the problem has been evaluated.
Frequently Asked Questions
Can I do a compression test myself?
Yes. Many DIY mechanics can test conventional gasoline engines with a suitable gauge and basic tools. You must understand the vehicle-specific fuel, ignition, and cranking procedures before starting.
How long does an engine compression test take?
A straightforward test may take approximately 30–60 minutes, but engines with difficult spark plug access or special electronic procedures can require considerably longer.
Should you perform a compression test on a hot or cold engine?
Many manufacturers specify a warmed-up engine, but some require other conditions. Follow the service manual and take precautions around hot engine components.
Do you have to remove all spark plugs?
Most conventional gasoline-engine procedures specify removing all spark plugs. This reduces cranking resistance and helps make readings consistent between cylinders.
Is 150 PSI good compression?
A reading of 150 PSI may be acceptable on some engines and outside specification on others. Compare it with the manufacturer’s minimum pressure and allowable cylinder variation.
Can an engine run with low compression?
Yes. Depending on the severity and number of affected cylinders, an engine may still run while experiencing rough idle, reduced power, misfires, or hard starting.
Can a compression test identify a blown head gasket?
It can reveal patterns consistent with head-gasket leakage, including low readings in adjacent cylinders. However, confirmation may require leak-down, cooling-system, or other tests.
How many times should I crank the engine?
Several manufacturer procedures specify at least four compression strokes per cylinder, while others use a different count or a stabilized gauge reading. Follow your engine’s instructions and keep the procedure consistent.
Final Thoughts
An engine compression test is a valuable diagnostic tool when your vehicle develops persistent misfires, reduced power, or other symptoms that suggest internal mechanical problems.
For reliable results, use the correct equipment, follow the factory testing procedure, maintain consistent cranking conditions, and compare all cylinder readings with the manufacturer’s specifications.
Remember that low compression is a finding, not a complete diagnosis. When the results are abnormal, confirm the cause with appropriate follow-up testing before committing to major engine repairs.