

Learn how to drill through concrete safely with the right drill, carbide-tipped masonry bit, depth, pressure, and dust-control routine, plus what to do when the bit stops moving.
Before drilling: check the wall, protect yourself, and control dust
Do not drill blind into a concrete wall
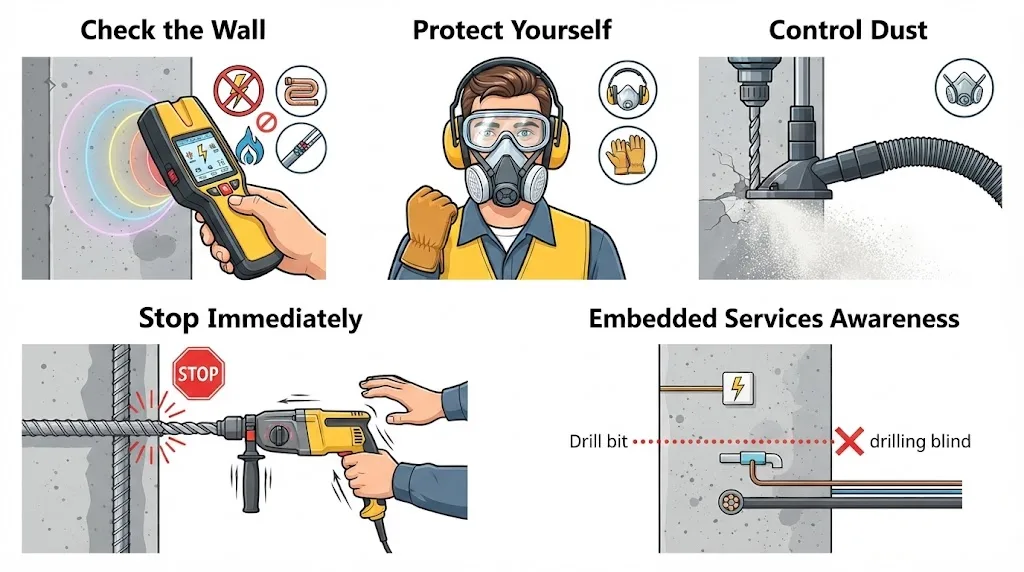
Check for electrical wiring, plumbing, gas lines, post-tension cables, and other embedded services before drilling. Wear eye protection; use hearing protection as needed; and control silica-containing concrete dust with suitable collection, cleanup, and respiratory protection for the task. Stop immediately if resistance changes unexpectedly or you suspect a service or structural reinforcement.
Choose the right drill and concrete drill bit
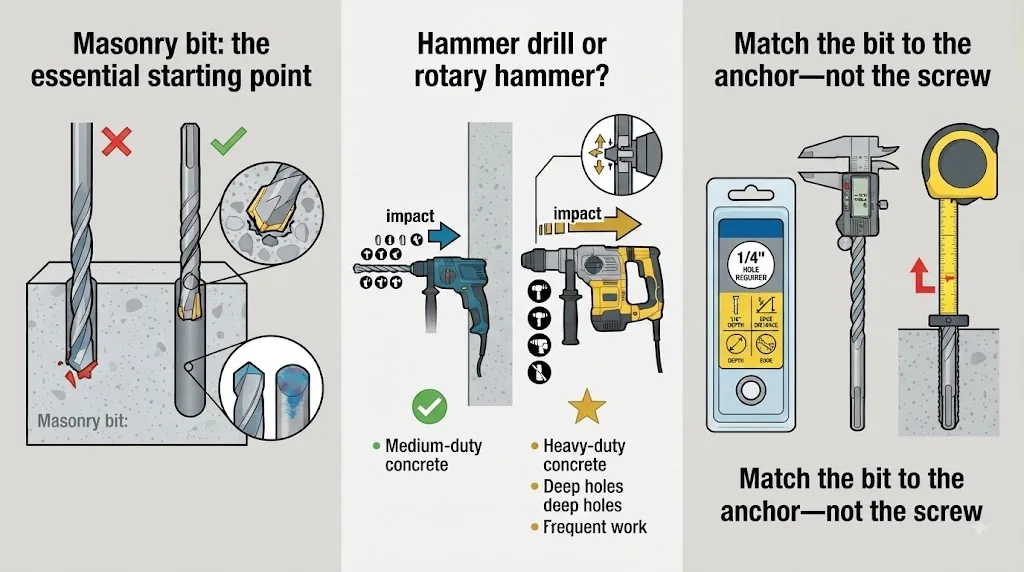
Concrete is a hard, abrasive mix of cement and aggregate. Standard wood or twist bits are not the right choice. Use a masonry bit with a carbide cutting tip, and match the bit diameter exactly to the anchor manufacturer’s stated hole size.
Masonry bit: the essential starting point
A carbide-tipped masonry bit crushes and cuts the concrete as it turns. Replace a bit with a rounded, chipped, blue-discolored, or badly worn tip; a worn bit creates heat and can stall before reaching depth.
Hammer drill or rotary hammer?
Hammer mode adds rapid impacts behind the rotating bit, helping it break concrete efficiently. For larger holes, deeper embedment, dense concrete, or frequent work, a rotary hammer with SDS-plus bits generally delivers more impact energy and less effort.
Match the bit to the anchor—not the screw
For a shelf bracket, read the anchor package first. It specifies hole diameter, minimum embedment, edge-distance limits, and cleaning instructions. Mark the required drilling depth on the bit with tape or set the drill’s depth stop; allow any extra depth specified for dust or anchor clearance.
How to drill through concrete, step by step
Use a steady, controlled approach. Let the drill and carbide bit do the breaking; forcing the tool harder usually creates heat, poor dust clearing, and unnecessary wear.
Mark the location and verify the fixing plan
Measure carefully, confirm the bracket or fixture location, and use a pencil or center punch to mark the hole. Keep adequate distance from slab edges, corners, and other anchors according to the anchor instructions.
Set the drill square to the surface
Fit the correct masonry bit. Hold the drill perpendicular to the surface unless the installation instructions specify otherwise. Start slowly to keep the bit from skating across smooth concrete, then engage hammer mode once the bit is seated.
Drill with moderate, steady pressure
Apply enough forward pressure to keep the carbide tip engaged, but do not lean your full weight into the tool. Pause periodically and withdraw the bit slightly so dust can escape. If the drill bogs down, reduce pressure and clear the hole instead of forcing it.
Reach the correct depth and clean the hole
Drill to the anchor’s specified embedment depth, using tape or a depth stop as a visual guide. Remove drilling dust with a vacuum, blower, or cleaning method required by the anchor manufacturer. Dust left in the hole can reduce anchor performance.
Install the anchor according to its instructions
Check that the hole is the correct diameter, depth, and cleanliness before inserting the anchor. Do not hammer, tighten, or load an anchor beyond the manufacturer’s instructions. If the anchor spins or will not seat, stop and reassess rather than enlarging the hole at random.
Real example: drilling for a shelf-bracket anchor
A repeatable anchor-hole workflow
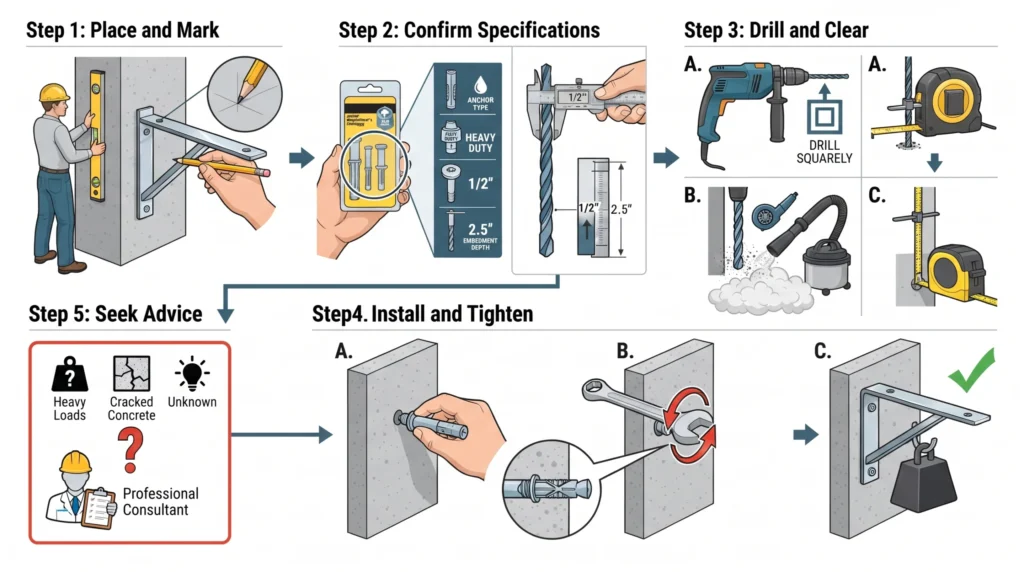
Place the bracket, mark each hole, and confirm the anchor type can carry the intended load in your base material. Use the manufacturer’s specified bit diameter and minimum embedment. Drill square, clear dust, test the hole depth, then install and tighten the anchor as directed. For heavy loads, unknown concrete condition, cracked concrete, or structural locations, seek qualified advice rather than relying on a generic anchor choice.
Which drill is best for concrete?
| Tool | Regular drill | Hammer drill | Rotary hammer |
|---|---|---|---|
| Best use | Small, shallow holes in relatively soft masonry. | Typical homeowner anchor holes and moderate concrete work. | Hard concrete, deeper holes, larger diameters, frequent drilling. |
| Progress | Slow; can overheat the bit and drill if pushed. | Good balance of speed, control, and availability. | Fastest with less user effort in demanding material. |
| Compatible bits | Carbide-tipped round-shank masonry bits. | Carbide-tipped masonry bits rated for hammer use. | SDS-plus or SDS-max bits matched to the tool. |
If the masonry bit stops drilling
Hard aggregate, heat, or a dull bit
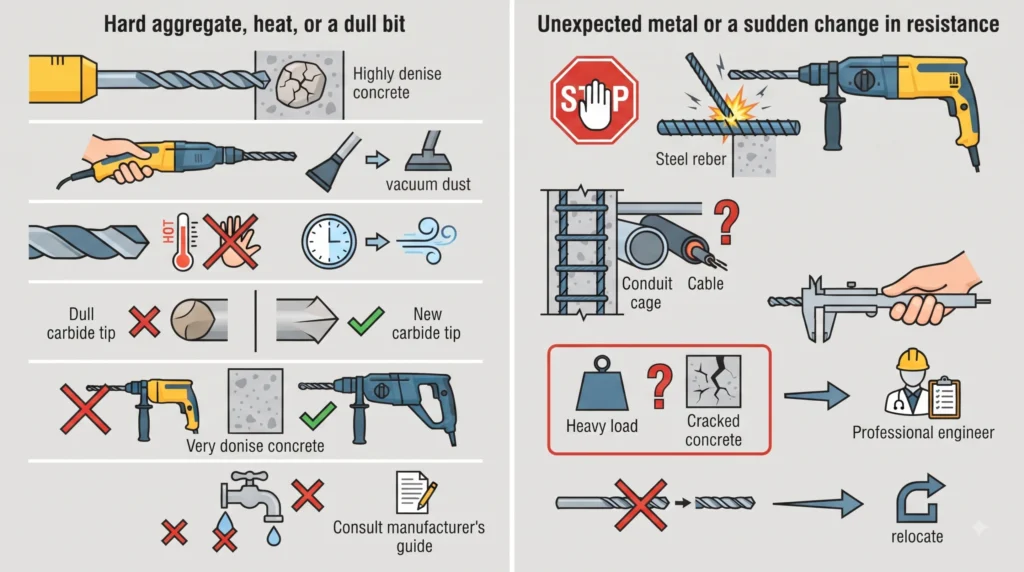
Back the bit out, vacuum dust, check that hammer mode is on, and inspect the carbide tip. Let a hot bit cool naturally; do not force it. A fresh bit and a rotary hammer may be the practical answer for very dense concrete. Water use depends on the tool, electrical safety, and manufacturer guidance—do not add water unless the equipment and work method are approved for it.
Unexpected metal or a sudden change in resistance
Stop drilling. You may have encountered reinforcing steel, conduit, or another embedded item. Do not casually drill through structural rebar or reroute without understanding the structure and installation requirements. Move the fixing only if the anchor layout and load plan allow it, or consult a qualified professional.
Concrete drilling FAQs
Do I need a hammer drill for concrete?
Not for every small hole, but a hammer drill is usually the sensible choice for ordinary concrete anchor work. A regular drill can sometimes manage a small shallow hole with a masonry bit, yet it is slower and more likely to overheat or stall in dense concrete.
How long does it take to drill into concrete?
A small anchor hole with a sharp bit and suitable hammer drill may take seconds to a few minutes. Hole diameter, depth, concrete age, aggregate hardness, bit condition, and tool power all change the result. If progress stops, do not keep forcing the drill.
Can drilling into concrete crack it?
It can chip the surface or contribute to cracking when holes are too close to an edge, too close together, oversized, or drilled into compromised material. Use the specified bit size, keep the drill square, avoid excessive force, and follow anchor guidance for edge distance and spacing.