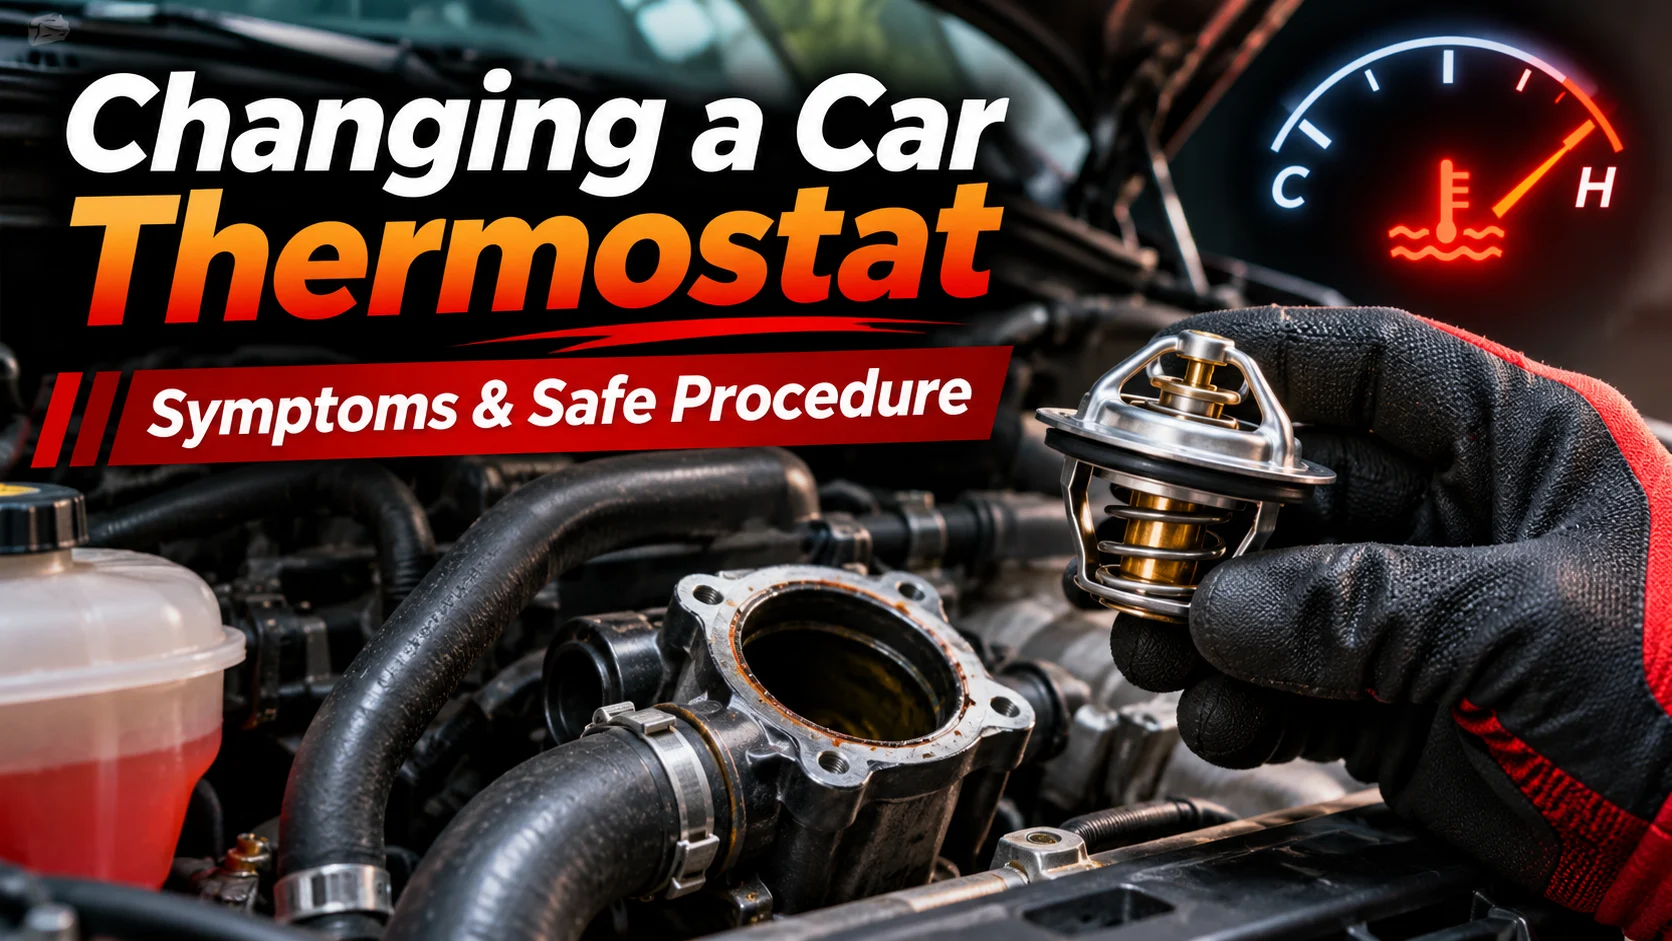

Changing a thermostat in a car may seem like a straightforward repair, but the first challenge is determining whether the thermostat is actually causing the problem. An engine that overheats, takes too long to warm up, or produces weak cabin heat may have a faulty thermostat. However, other cooling system problems can produce similar symptoms.
This guide explains how a car thermostat works, the warning signs of failure, how to check for possible thermostat problems, and the general process of replacing one safely. You will also learn about tools, replacement costs, common mistakes, and when professional assistance is the better option.
Quick Answer
To change a car thermostat, allow the engine to cool completely, locate the thermostat housing, drain coolant as required, remove the old thermostat, install a compatible replacement with a new seal, reassemble the housing, refill the cooling system, and remove trapped air according to the manufacturer’s instructions. Thermostat location, fastener torque, and bleeding procedures vary by vehicle.
Important Safety Warning: Never remove a radiator cap, coolant reservoir cap, or cooling system component while the engine is hot or the system is pressurized. Hot coolant can cause severe burns. If the temperature gauge indicates overheating, pull over safely and shut off the engine. Do not continue driving an overheating vehicle.
What Does a Car Thermostat Do?
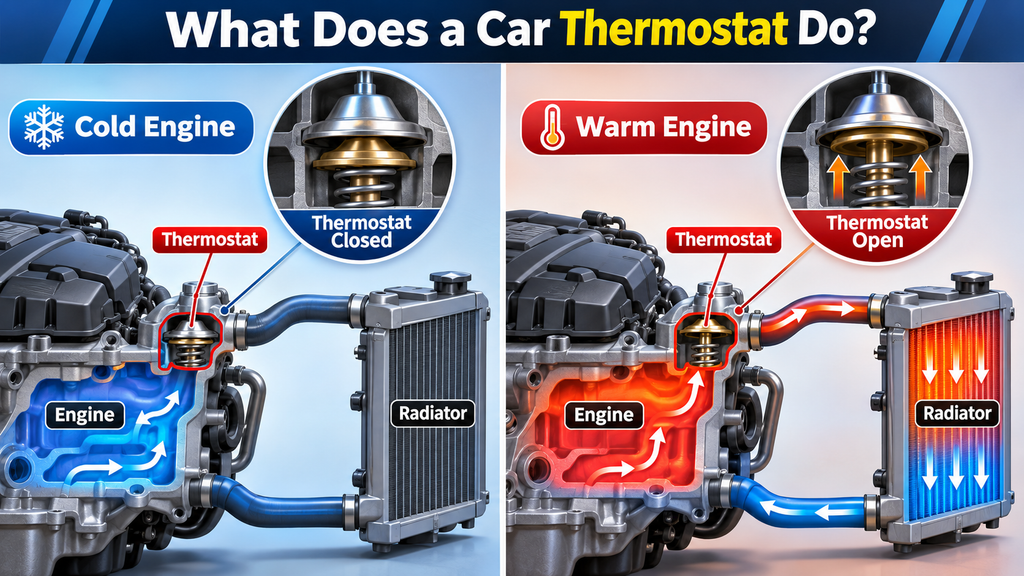
A car thermostat is a temperature-sensitive valve that helps regulate coolant flow through the engine cooling system. Its primary purpose is to help the engine reach and maintain its intended operating temperature.
When the engine is cold, the thermostat generally restricts coolant flow through the radiator. This allows the engine to warm up more quickly. As the coolant temperature rises, the thermostat begins opening, allowing more coolant to circulate through the radiator and release heat.
Most conventional automotive thermostats use a temperature-sensitive wax element to operate the valve. Some modern vehicles use electronically controlled or map-controlled thermostat systems that require additional diagnostic and service procedures.
Why Is the Thermostat Important?
A properly functioning thermostat helps support:
- Engine temperature control: Helps the cooling system maintain the intended operating temperature.
- Efficient warm-up: Allows the engine to reach normal operating temperature without unnecessary delay.
- Cabin heating: Supports heater performance as the engine warms up.
- Engine efficiency: Helps the engine operate within its intended temperature range.
- Emissions performance: Proper warm-up supports normal engine management and emission-control operation.
When the thermostat malfunctions, the engine may operate too hot or too cold. However, a thermostat cannot compensate for problems such as low coolant, a damaged water pump, or a malfunctioning cooling fan.
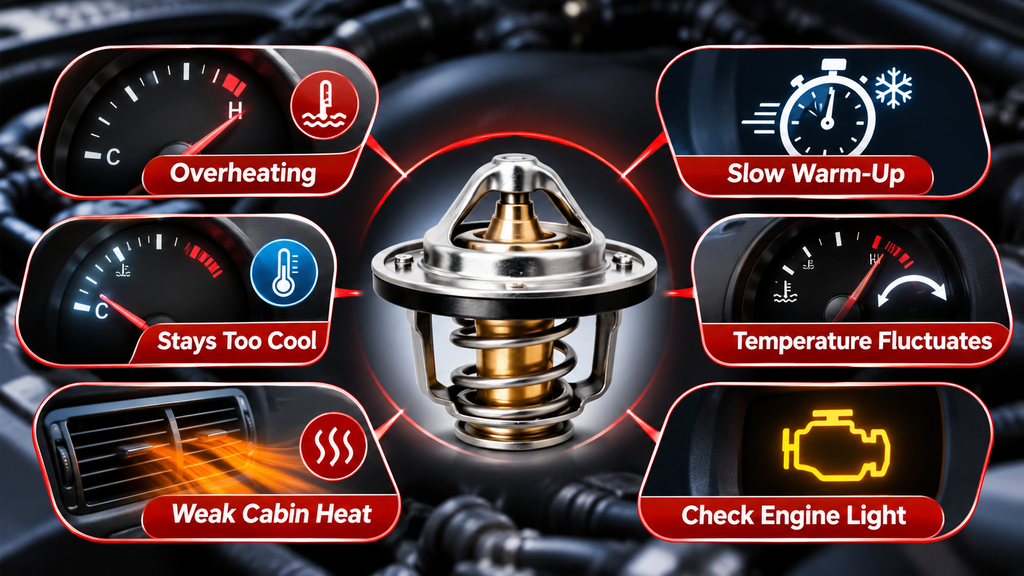
Symptoms of a Bad Car Thermostat
Recognizing the symptoms of a faulty thermostat is important before attempting a replacement. Some thermostat failures develop gradually, while others produce more obvious temperature problems.
1. Engine Overheating
An engine that becomes hotter than normal may have a thermostat that is stuck closed or does not open sufficiently. This can restrict coolant circulation through the radiator.
However, overheating can also result from coolant leaks, poor radiator airflow, cooling fan problems, water pump failure, or other mechanical issues. Overheating alone does not confirm thermostat failure.
2. Engine Takes Too Long to Warm Up
A thermostat stuck open may allow coolant to circulate through the radiator before the engine reaches its intended temperature. As a result, the engine may warm up slowly, particularly during cold weather or highway driving.
3. Temperature Gauge Reads Lower Than Normal
If the dashboard temperature gauge remains unusually low after normal driving, the thermostat may be opening too early or staying open. An inaccurate temperature sensor or gauge can produce a similar indication.
4. Temperature Gauge Fluctuates
Unusual temperature changes may occur if a thermostat operates inconsistently. However, trapped air, coolant loss, or faulty sensor readings can also cause fluctuating temperatures.
5. Weak Cabin Heater Performance
A thermostat stuck open can prevent the engine from reaching its expected operating temperature, reducing available cabin heat. Low coolant, heater core restrictions, air pockets, and climate-control faults may also cause weak heating.
6. Check Engine Light
Some vehicles monitor coolant temperature during warm-up. A diagnostic trouble code such as P0128 may indicate that the engine is not reaching its expected operating temperature within the required conditions.
Although a stuck-open thermostat is a possible cause, the code is not definitive proof that the thermostat needs replacement.
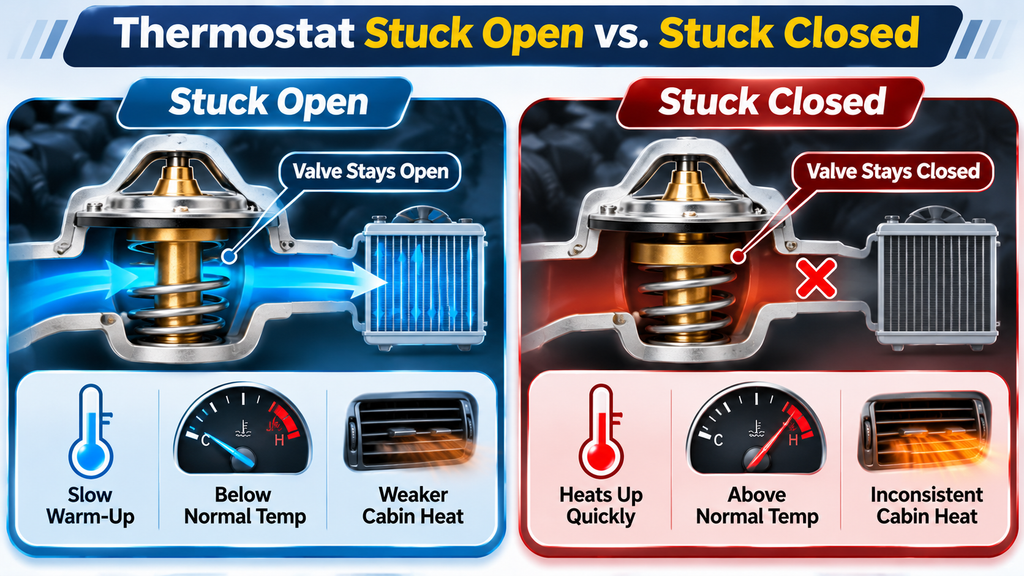
Thermostat Stuck Open vs. Stuck Closed
Two common thermostat failure conditions are a valve that remains open and one that remains closed. Understanding the difference can help narrow down the possible problem.
| Condition | Stuck Open | Stuck Closed |
|---|---|---|
| Warm-up | Often unusually slow | May become hot rapidly |
| Temperature | May stay below normal | May climb above normal |
| Cabin heat | May be weaker | May be inconsistent |
| Main concern | Engine running too cool | Serious overheating |
| Repair priority | Diagnose promptly | Stop driving if overheating |
These patterns are useful diagnostic clues, but neither condition can be confirmed from a dashboard temperature gauge alone.
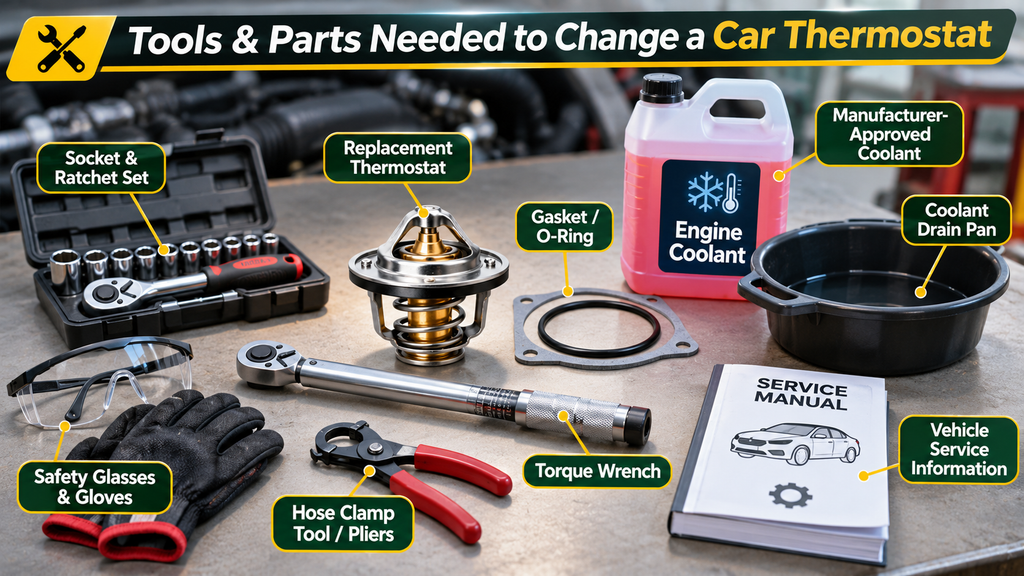
Tools and Parts Needed to Change a Car Thermostat
The tools required for thermostat replacement depend on your vehicle’s design and the location of the thermostat housing. Prepare the correct parts before opening the cooling system.
| Tool or Part | Purpose |
|---|---|
| Correct replacement thermostat | Replaces the faulty component |
| New gasket or O-ring | Seals the housing connection |
| Socket and ratchet set | Removes accessible fasteners |
| Torque wrench | Tightens fasteners to specification |
| Hose clamp tool or suitable pliers | Handles applicable hose clamps |
| Coolant drain pan | Collects drained coolant |
| Manufacturer-approved coolant | Refills the cooling system |
| Safety glasses and gloves | Provides basic personal protection |
| Vehicle service information | Provides exact instructions and specifications |
Some vehicles require specialty tools, a replacement thermostat housing assembly, a scan-tool-assisted procedure, or a vacuum coolant filling tool. Confirm these requirements before beginning.
How to Change a Thermostat in a Car: Step-by-Step Guide
The following procedure describes the general process for changing a conventional car thermostat. It is not a universal service procedure. Some thermostats are located behind engine accessories, integrated into coolant outlet assemblies, or installed in areas that require substantial disassembly.
Before beginning, consult the repair instructions for your vehicle’s exact year, make, model, and engine. If the procedure is unclear or requires work beyond your experience, have a qualified mechanic perform the repair.
Step 1: Let the Engine Cool Completely
Park the vehicle on a level surface, shut off the engine, and allow the cooling system to cool fully. A recently operated engine may retain dangerous heat and pressure for a considerable period.
Do not assume the cooling system is safe simply because the dashboard gauge has dropped. Follow the manufacturer’s instructions for confirming that the system can be opened safely.
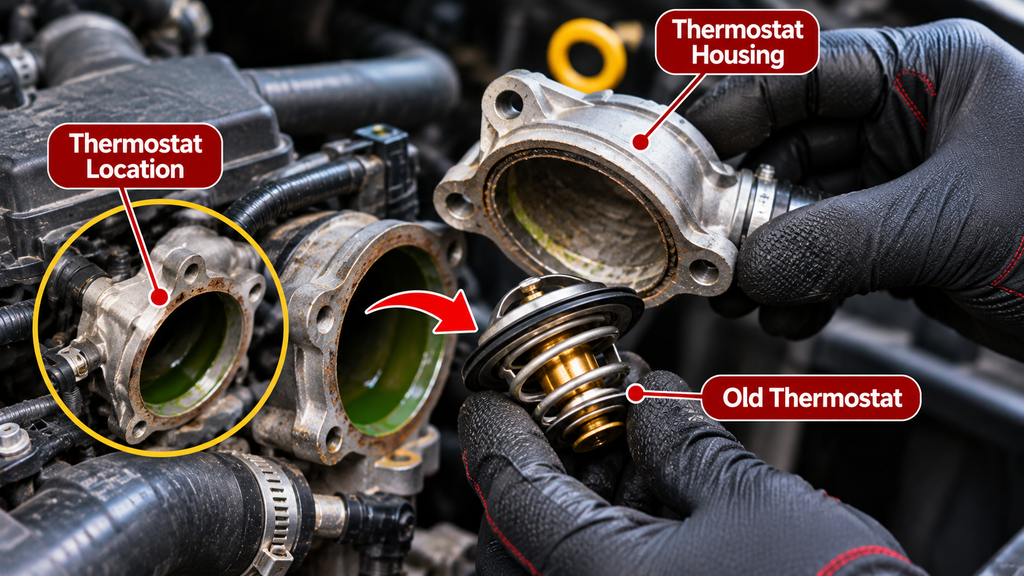
Step 2: Locate the Thermostat Housing
The thermostat is commonly positioned near an engine coolant outlet or inlet, often where a radiator hose connects to the engine. Its exact location varies.
On some vehicles, the thermostat is accessible near the top of the engine. On others, it may be located lower down or inside a larger housing assembly.
Identify the correct housing using vehicle-specific service information rather than assuming that the upper radiator hose always leads directly to the thermostat.

Step 3: Drain Coolant as Required
Place a suitable drain pan underneath the appropriate drain location. Follow the manufacturer’s instructions to drain enough coolant to prevent excessive spillage when the housing is removed.
Some replacement procedures require draining only part of the cooling system, while others require a more extensive drain. Use the designated drain method and avoid opening the system until it is completely cool.
Collect used coolant in a suitable container. Keep it away from children, pets, and storm drains. Dispose of it through an appropriate recycling or hazardous-waste facility in accordance with local requirements.
Step 4: Remove the Thermostat Housing and Old Thermostat
Remove any obstructing components identified in the service procedure. Where required, carefully disconnect the appropriate coolant hose and remove the thermostat housing fasteners.
Separate the housing carefully without damaging the sealing surfaces, attached wiring, or nearby components. Take note of the thermostat’s installed orientation and the placement of its gasket or O-ring.
Remove the old thermostat and inspect the housing for cracks, corrosion, distortion, and damaged sealing surfaces. If the housing is damaged or the thermostat is integrated into it, an assembly replacement may be necessary.
Important: Avoid prying against delicate aluminum or plastic sealing surfaces. Do not use excessive force on corroded fasteners or damaged housings.
Step 5: Install the New Thermostat and Seal
Compare the replacement thermostat with the original component. Confirm that it matches the specified application, operating temperature, design, and housing requirements.
Clean the accessible sealing surfaces using a method approved for the housing material. Remove old gasket material or residue carefully without gouging the surface or allowing debris into the cooling system.
Install the new thermostat in the correct orientation, following any alignment markings or vent-position instructions. Fit a new compatible gasket or O-ring as required.
Reinstall the housing and tighten fasteners in the specified sequence and to the manufacturer’s torque values.
Do not add gasket sealant unless the manufacturer specifically requires it. Excess sealant may interfere with sealing or contaminate coolant passages.
Step 6: Reassemble and Refill the Cooling System
Reconnect any hoses and reinstall the components removed for access. Check that clamps, connectors, and fasteners are properly secured.
Refill the cooling system with the coolant specified by the vehicle manufacturer. Use the required concentration and mixing instructions. Some vehicles require premixed coolant, while others specify a particular coolant-and-water mixture.
Do not select coolant based on color alone, and do not mix incompatible coolant formulations.
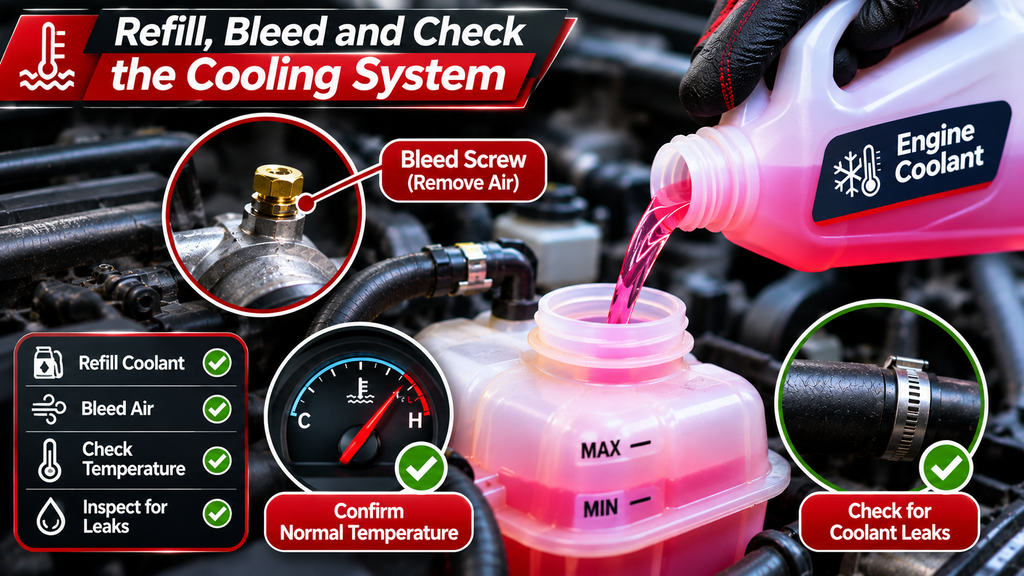
Step 7: Remove Trapped Air and Check for Leaks
Removing air from the cooling system is a critical part of the repair. Depending on the vehicle, the required procedure may involve designated bleed screws, a special filling sequence, a vacuum filling device, or additional electronic service functions.
Follow the exact manufacturer’s bleeding and refill instructions. Incorrect bleeding can leave air pockets that cause overheating, poor heater performance, and misleading temperature readings.
Once the cooling system has been filled and prepared correctly, perform the specified operational checks. Watch for abnormal temperature readings, leakage, warning lights, and poor heater performance.
After the engine has completely cooled again, check the coolant level according to the owner’s manual and correct it if necessary.
Post-Replacement Checklist
- The correct thermostat and seal have been installed.
- Housing fasteners meet the required torque specifications.
- All disconnected hoses and components are properly secured.
- The correct coolant has been added.
- The manufacturer’s air-bleeding procedure is complete.
- No coolant leaks are visible during approved checks.
- Engine temperature behaves normally during verification.
- Coolant level is checked again after complete cooling.
How Much Does It Cost to Change a Car Thermostat?
Car thermostat replacement costs depend on the vehicle, thermostat design, component accessibility, local labor rates, and whether additional cooling system repairs are required.
The following figures are broad illustrative estimates for the U.S. market, not verified quotes for a particular vehicle or repair shop.
| Expense | Estimated Cost |
|---|---|
| Basic replacement thermostat | $15–$60 |
| Housing or integrated assembly | $40–$200+ |
| Coolant and seals | $20–$70 |
| Professional labor | $100–$350+ |
| Typical combined repair estimate | Approximately $150–$450+, depending on vehicle |
Some complex vehicles can cost considerably more, especially if engine accessories or other components must be removed. Diagnostic fees and additional repairs can also increase the final bill.
How Long Does It Take to Replace a Thermostat?
On an accessible conventional thermostat, replacement may take an experienced technician roughly one to two hours. More complicated designs can require several hours, and a first-time DIY repair may take longer.
Coolant draining, refilling, bleeding, and final testing should all be included when planning the repair.
Should You Change a Car Thermostat Yourself or Visit a Mechanic?
DIY thermostat replacement can be practical on vehicles with an easily accessible conventional thermostat and straightforward cooling system service requirements.
However, not every thermostat replacement is a beginner-level job.
DIY May Be Suitable When
- The problem has been diagnosed.
- The thermostat is easily accessible.
- You have appropriate tools.
- Service instructions are available.
- You understand safe coolant handling.
- You can complete the required bleeding procedure.
A Mechanic Is Preferable When
- The engine has severely overheated.
- The diagnosis is uncertain.
- The thermostat is difficult to access.
- Specialized tools are required.
- The cooling system has recurring air pockets.
- Leaks or temperature problems remain after repair.
If the engine has already experienced significant overheating, ask a professional to evaluate possible secondary damage before assuming a thermostat replacement will restore normal operation.
What Should You Do After Replacing a Car Thermostat?
After installation, verify that the cooling system operates normally before considering the repair complete.
Follow the manufacturer-approved warm-up and inspection procedure, check for leaks, and confirm that the engine temperature remains within the expected range. Inspect the coolant level again only after the engine has fully cooled.
If the temperature rises abnormally, shut down the engine and investigate. Possible causes include trapped air, coolant loss, installation errors, or a separate cooling system problem.
Do not continue driving an overheating car to see whether the issue improves on its own.
Frequently Asked Questions
Is changing a thermostat in a car difficult?
It depends on the vehicle. Some conventional thermostats are easily accessible, while others require removal of additional components and specialized cooling system procedures.
Can I drive my car with a bad thermostat?
A thermostat stuck closed can cause serious overheating, and driving an overheating vehicle risks engine damage. A stuck-open thermostat may cause slow warm-up and reduced efficiency. Both conditions require diagnosis and appropriate repair.
Do I have to drain coolant to change a thermostat?
Most thermostat replacements require draining at least some coolant. The amount depends on the thermostat’s location and the manufacturer’s repair instructions.
Should I replace the thermostat gasket too?
A new gasket or O-ring is generally required when servicing a thermostat that uses a replaceable seal. Follow the manufacturer’s instructions and never reuse a damaged seal.
Can a bad thermostat cause the check engine light to come on?
Yes. Some vehicles may set a coolant-temperature-related trouble code, such as P0128, when the engine does not reach its expected operating temperature. Other faults can also trigger the code.
Will changing the thermostat fix overheating?
Only if the thermostat is responsible for the overheating. Cooling fan faults, coolant leaks, radiator restrictions, water pump problems, and other issues can produce the same symptom.
How often should a car thermostat be replaced?
Many vehicles do not have a fixed routine thermostat replacement interval. Replacement is generally based on confirmed malfunction, leakage, damage, or a manufacturer-specific service recommendation.
Why is my car overheating after a thermostat replacement?
Possible causes include trapped air, low coolant, incorrect thermostat installation, an incompatible replacement part, or an unrelated cooling system problem. Shut off the engine if it overheats and investigate before driving again.
Can I change a car thermostat without a mechanic?
Yes, on some vehicles, provided you have the correct tools, verified diagnosis, service instructions, and ability to refill and bleed the cooling system properly. Complex or uncertain repairs are best handled by a qualified technician.
Final Thoughts
Changing a thermostat in a car can restore proper temperature regulation when a failed thermostat is the confirmed cause of the problem. The process generally involves cooling the engine, accessing the thermostat housing, replacing the component and its seal, and correctly refilling and bleeding the cooling system.
The most important step is diagnosing the problem before replacing parts. An overheating engine, slow warm-up, or weak cabin heater does not always mean the thermostat has failed.
Always use the correct replacement components, follow the service instructions for your specific vehicle, and take cooling system safety seriously. When the repair involves complex disassembly, specialized tools, or uncertain symptoms, professional diagnosis is the safer choice.