
Replacing a CV axle becomes necessary when a constant-velocity joint wears out, the axle becomes damaged, or a torn protective boot allows grease to escape and contamination to enter. A failing CV axle may cause clicking during turns, vibration under acceleration, or grease around a wheel. However, these symptoms do not automatically prove that the axle is faulty.
This guide explains how to recognize possible CV axle problems, what the replacement process involves, how much replacing a CV axle costs, and when professional help is the safer option
Quick Answer: Replacing a CV axle usually involves removing the wheel, disconnecting the necessary suspension or hub components, removing the old axle, installing the correct replacement, and tightening all fasteners to vehicle-specific specifications. Professional replacement costs vary widely. Many common aftermarket repairs cost several hundred dollars per axle, while some OEM repairs can exceed $1,000.
What Is a CV Axle and What Does It Do?
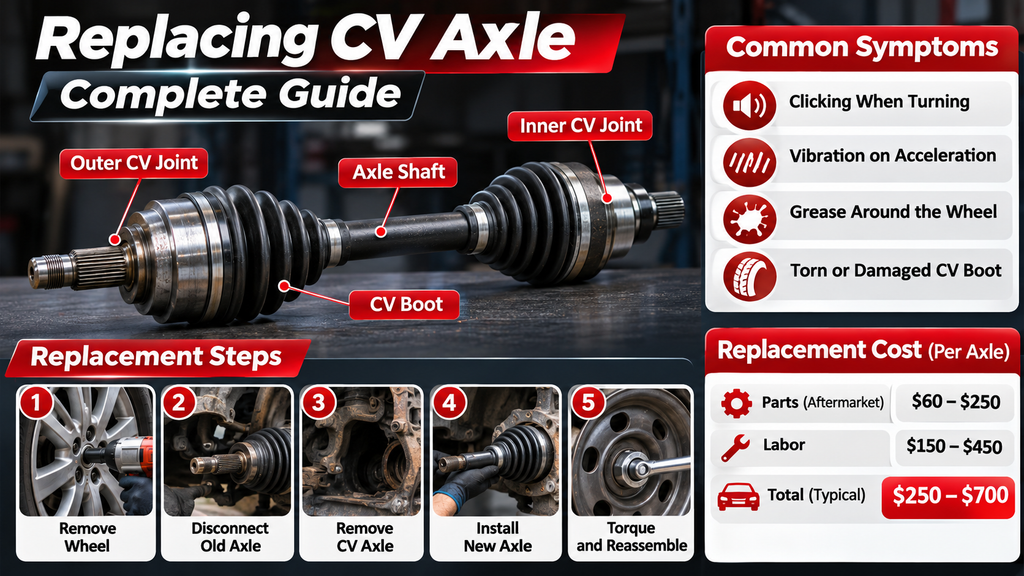
A CV axle, also called a constant-velocity axle or half-shaft, transfers engine power from the transmission or differential to a driven wheel.
CV axles are commonly found on front-wheel-drive vehicles, as well as many all-wheel-drive and four-wheel-drive vehicles. Their joints allow power to be transmitted while suspension components move. Front CV joints also accommodate steering movement.
A typical CV axle assembly contains:
- Axle shaft: Transfers rotational power.
- Inner CV joint: Accommodates suspension movement and changes in axle length.
- Outer CV joint: Allows the driven wheel to steer and move while transmitting power.
- CV boots: Flexible rubber or thermoplastic covers that retain grease and block dirt and moisture.
- Clamps: Secure the boots around the joints.
When a CV boot tears, lubricant can escape. Water and road debris may enter the joint, accelerating wear.

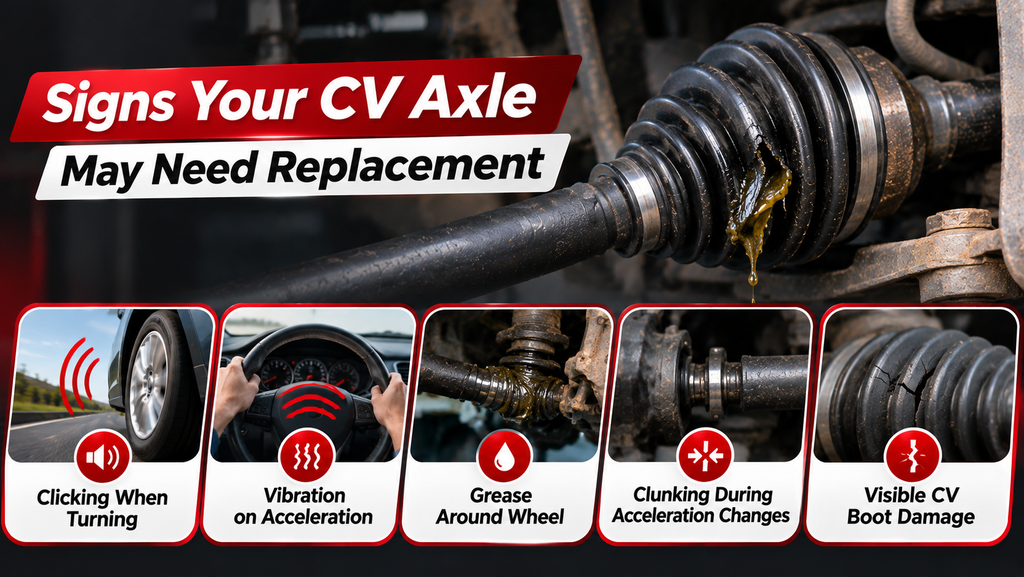
Signs Your CV Axle May Need Replacement
Recognizing possible CV axle problems early can help prevent additional damage and unexpected breakdowns. These symptoms should be investigated rather than used as a diagnosis by themselves.
1. Clicking or Popping While Turning
Repeated clicking during tight turns, especially while accelerating, is a common indication of wear in an outer CV joint.
Other suspension and steering components can also produce clicking sounds, so an inspection is necessary.
2. Vibration During Acceleration
A damaged inner CV joint or axle assembly may cause vibration or shuddering when power is applied.
However, worn engine mounts, wheel problems, tires, and other drivetrain faults can produce similar symptoms.
3. Grease Around the Wheel or Suspension
A torn CV boot can release grease onto the inside of the wheel, suspension, or surrounding components.
Finding grease suggests that a boot inspection is needed. A torn boot does not always mean the entire axle must be replaced if the joint is still healthy.
4. Clunking During Acceleration Changes
A worn drivetrain component may create a clunk when shifting between acceleration and deceleration. Possible causes include CV joints, engine mounts, transmission mounts, and suspension components.
5. Visible CV Boot Damage
Cracks, tears, loose clamps, or missing grease are warning signs that the CV joint may no longer be properly protected.
How to Diagnose a Bad CV Axle
Before replacing a CV axle, confirm the likely cause of the problem. Replacing an axle without proper diagnosis may waste money and leave the original issue unresolved.
- Listen to the symptoms. Note whether clicking occurs during turns, whether vibration changes with acceleration, and which side appears affected.
- Inspect both CV boots. Look for tears, missing clamps, grease leakage, or contamination.
- Check for joint damage. A qualified technician can assess looseness, wear, binding, and abnormal movement using the appropriate inspection procedure.
- Check competing causes. Wheel bearings, tires, suspension joints, mounts, and other drivetrain components should be considered.
- Verify the repair requirement. Confirm which axle or joint is faulty before purchasing replacement parts.
Important: Never reach underneath a vehicle supported only by a hydraulic jack. Use approved lifting points, properly rated jack stands, and stable ground. Do not perform unsafe rotating-wheel tests on an improperly supported vehicle.

Replacing CV Axle Cost: Parts and Labor
The cost of replacing a CV axle depends on the vehicle, the axle location, replacement-part quality, labor rates, and whether additional components require repair.
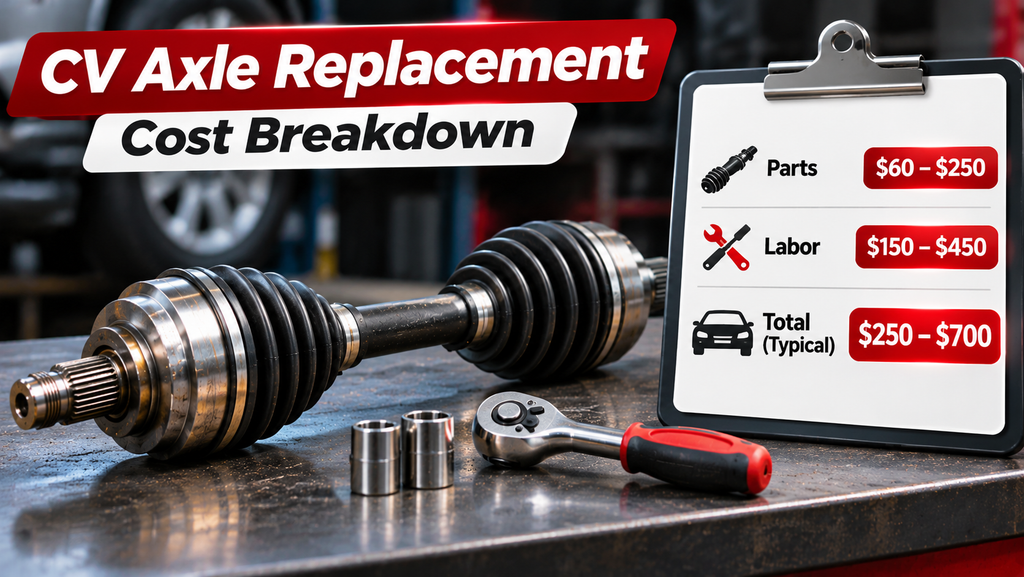
For many common passenger cars, a single CV axle replacement using aftermarket parts may cost roughly $250 to $700 at an independent repair shop. This is a broad planning estimate, not a guaranteed national average. OEM axles, dealerships, and specialized vehicles may cost considerably more.
Estimated CV Axle Replacement Cost Breakdown
| Expense | Estimated Cost (USD) |
|---|---|
| Aftermarket CV axle assembly | $60–$250 |
| Professional labor | $150–$450 |
| Typical independent-shop total | $250–$700 |
| OEM/dealership repair | $600–$1,200+ |
| DIY replacement parts | $60–$250, excluding tools and extras |
These are approximate U.S. planning ranges for a single axle, primarily for common vehicles. They are not an itemized estimate for a specific make and model. Labor and part ranges should not be interpreted as fixed amounts that always add up to the listed total.
For comparison, RepairPal’s September 2026 national CV axle replacement estimator lists approximately $1,283 to $1,381 for parts and labor. Its estimated parts component is substantially higher than the aftermarket parts range above. This demonstrates how vehicle mix and part selection can change published averages.
Taxes, diagnostic fees, seals, fluids, additional hardware, and related repairs may increase the final bill.
What Affects CV Axle Replacement Cost?
Vehicle Make and Model
Some vehicles use relatively inexpensive axles that are easy to access. Others require specialized parts or additional disassembly.
OEM vs Aftermarket Parts
Original equipment parts often cost more. Quality aftermarket axles can offer an alternative, but fitment, construction, warranty, and supplier reputation should be checked.
Labor Rates
Repair shops charge different hourly rates depending on location, equipment, and experience. Labor time also depends on vehicle design, corrosion, and accessibility.
Additional Repairs
A leaking transmission seal, damaged fastener, worn suspension component, or fluid loss may require additional work.
Front vs Rear Axle
On all-wheel-drive vehicles, front and rear axle assemblies may differ in construction and service requirements. Pricing depends on the particular axle being replaced.
Tools and Parts Needed for CV Axle Replacement
Replacing a CV axle generally requires intermediate mechanical experience and vehicle-specific service information.
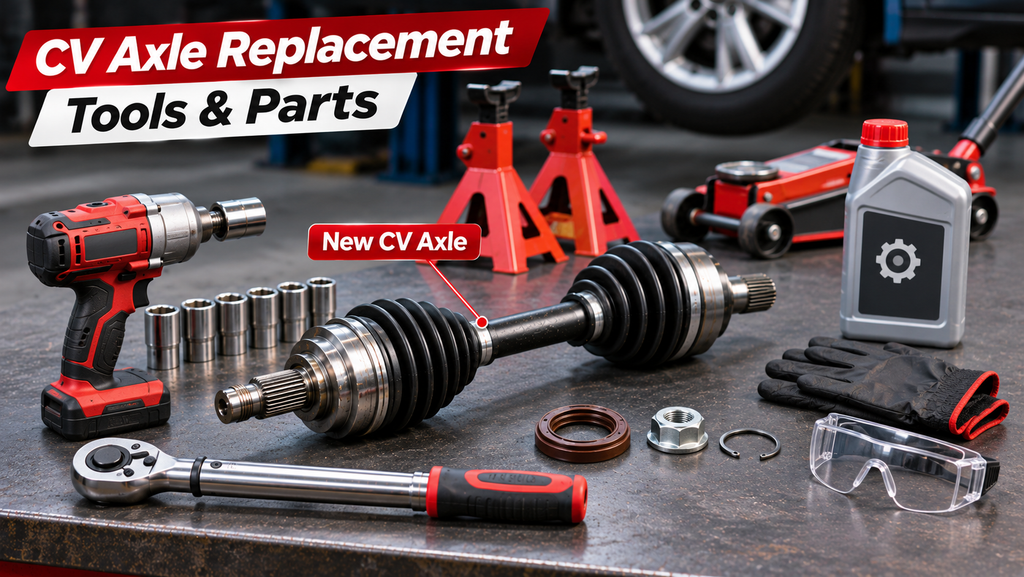
Common Tools
- Floor jack and properly rated jack stands
- Wheel chocks
- Socket and ratchet set
- Correct axle-nut socket
- Breaker bar
- Calibrated torque wrench with an appropriate range
- Suitable ball-joint or tie-rod separator, if required
- Approved axle removal tool, if required
- Drain pan and protective equipment
- Vehicle-specific factory service instructions
Replacement Parts
- Correct CV axle assembly for the vehicle and side
- New axle nut, circlip, or retaining hardware where required
- Replacement transmission seal if damaged or leaking
- Correct transmission or differential fluid if required
- Any additional one-time-use suspension fasteners specified by the manufacturer
Confirm compatibility using the VIN, model year, engine, transmission, drivetrain configuration, and the left or right axle position.
How to Replace a CV Axle: Step-by-Step Guide
The following describes the general process for replacing a front CV axle. Exact procedures vary by vehicle. Consult the factory service manual before starting, especially for suspension disassembly and axle-nut installation.
Step 1: Prepare the Vehicle
Park on a firm, level surface, switch off the engine, secure the vehicle against movement, and chock the appropriate wheels.
Review the manufacturer’s lifting, axle-nut, and suspension procedures before loosening any components.
Step 2: Loosen the Axle Nut as Directed
Some vehicles require the axle nut to be loosened while the vehicle is on the ground. Others have specific procedures to prevent wheel-bearing damage.
Remove locking devices or staked sections as instructed. Never apply an improvised method that could damage the hub or brakes.
Step 3: Raise and Support the Vehicle
Lift the vehicle at an approved jacking point and securely support it with jack stands at the manufacturer’s recommended locations.
Remove the wheel after verifying that the vehicle is stable.
Step 4: Disconnect the Necessary Components
Depending on the vehicle, the technician may need to disconnect a lower ball joint, tie-rod end, strut connection, or other specified suspension component.
Support the steering knuckle and brake components as necessary. Avoid stretching brake hoses, ABS wiring, or other connections.
Safety Warning: Suspension springs and other loaded components can store substantial energy. Do not disconnect spring-loaded parts without the correct service procedure and tools.
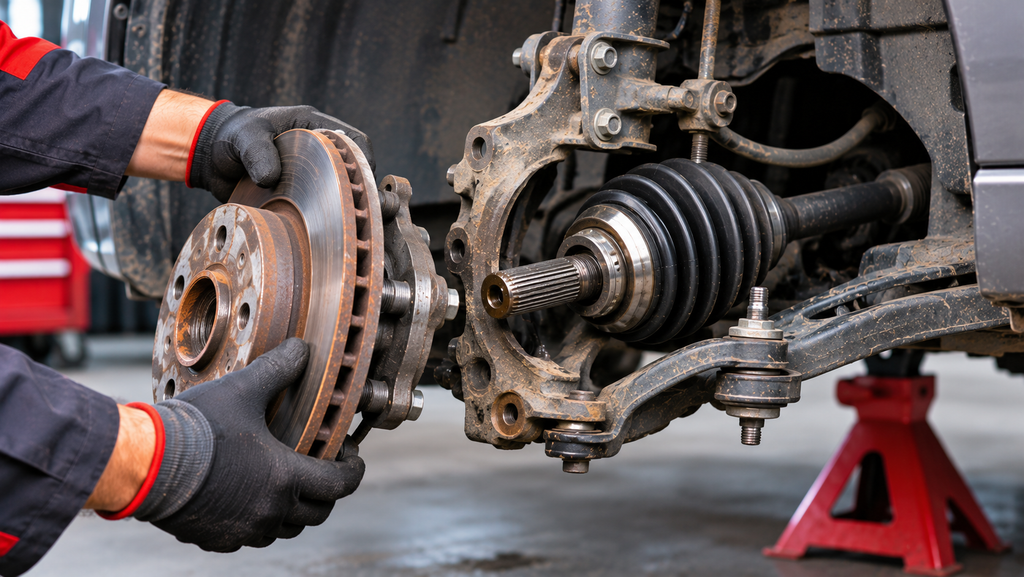
Step 5: Separate the Outer CV Joint From the Hub
Remove the axle nut and carefully disengage the outer axle splines from the wheel hub, following the manufacturer’s instructions.
A suitable puller may be required if the splines are seized. Avoid hammering directly on the threaded shaft or damaging the wheel bearing.
Step 6: Remove the Inner CV Joint
The inner end may be retained by a circlip, bolts, or another design-specific mechanism. Use the specified removal procedure.
Place a drain pan below the appropriate area if fluid leakage is possible. Take care not to damage the transmission or differential seals during removal.
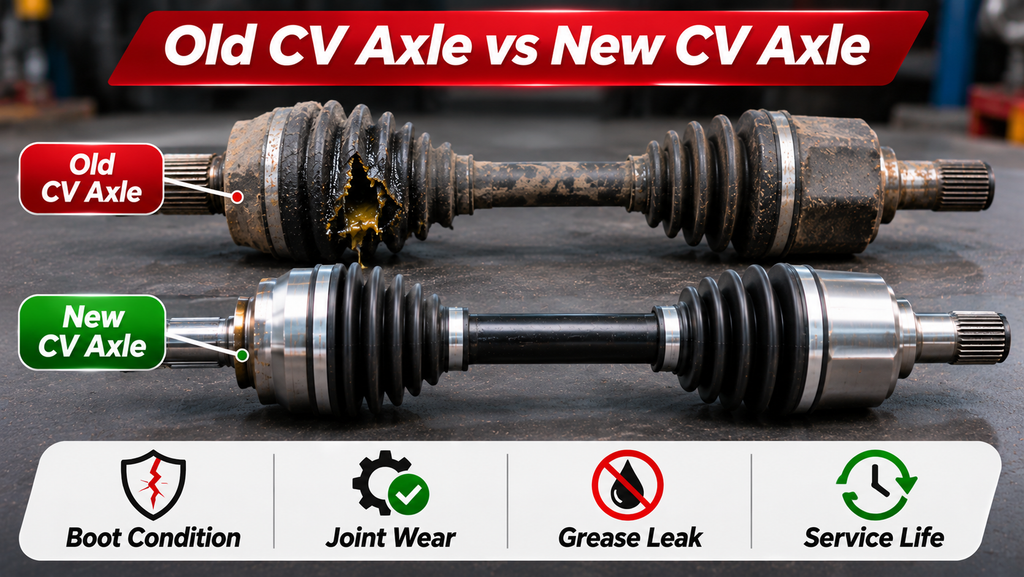
Step 7: Compare the Old and New Axles
Before installation, compare the replacement with the removed part. Check overall design, spline configuration, joint style, retaining hardware, and any relevant sensor features.
Do not install an axle that is visibly incompatible with the vehicle.
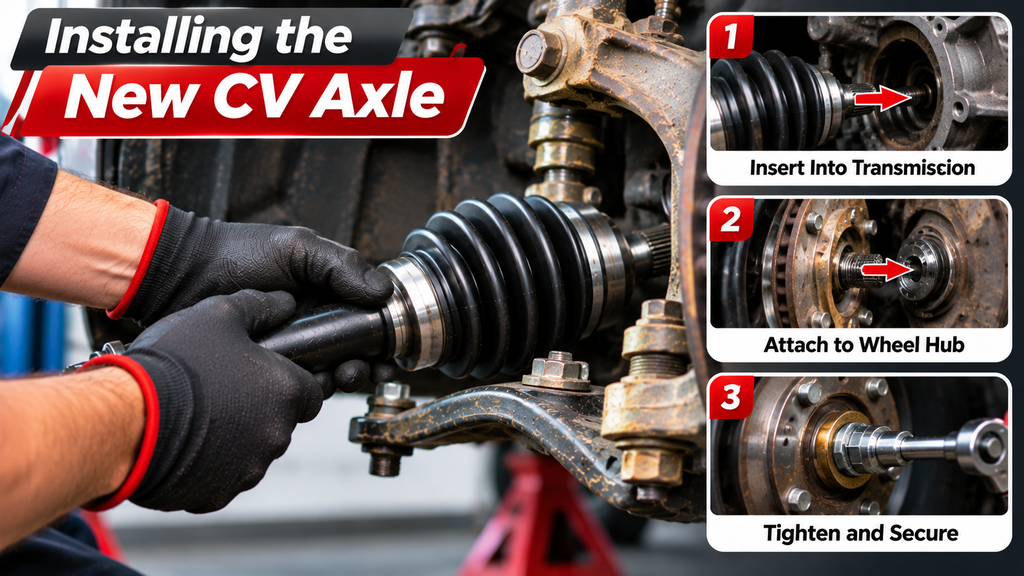
Step 8: Install the Replacement CV Axle
Inspect the mating surfaces and seals. Fit any required new retaining components, then install the inner axle end using the proper alignment and engagement method.
Make sure the retaining mechanism is fully engaged where applicable. Avoid forcing the axle or damaging the seal lips.
Step 9: Reassemble the Hub and Suspension
Position the outer joint in the wheel hub and reconnect the components removed during disassembly.
Use new fasteners where required. Tighten suspension and drivetrain fasteners using the manufacturer’s specified torque and tightening sequence.
The axle-nut procedure is particularly important because incorrect tightening may damage the wheel bearing or compromise the assembly. Some vehicles require a new nut or additional angle tightening.
Step 10: Perform Final Checks
Restore any lost transmission or differential fluid using the specified fluid and level checking procedure.
Check for leaks, damaged boots, loose connections, and interference. Refit the wheel and tighten the lug nuts to specification.
After confirming the repair is safe, perform an appropriate road test and reinspect the repaired area. A wheel alignment may be required if alignment-related components were disturbed or if the service manual specifies it.
Common Mistakes When Replacing a CV Axle
Even experienced DIY mechanics can encounter problems during axle replacement. Avoid these common mistakes:
- Incorrect axle fitment: Buying the wrong part for the vehicle or side.
- Improper axle-nut torque: Risking wheel-bearing or assembly damage.
- Reusing prohibited hardware: Reinstalling single-use nuts, clips, or bolts.
- Damaging transmission seals: Causing leaks during axle removal or installation.
- Incomplete inner-joint engagement: Failing to secure the retaining mechanism.
- Ignoring other faults: Replacing an axle without confirming the cause of the symptoms.
- Unsafe vehicle support: Working under a vehicle held only by a jack.
- Skipping final checks: Failing to inspect fluid levels, leaks, or fasteners.
How Long Does It Take to Replace a CV Axle?
On many passenger cars, a professional CV axle replacement may take approximately one to three hours for a single axle. More complicated vehicles or seized components may require additional time.
| Repair Situation | Approximate Time |
|---|---|
| Experienced mechanic, straightforward vehicle | 1–3 hours |
| Experienced DIY mechanic | 2–5 hours |
| First-time DIY repair | May take most of a day or longer |
| Complex or rusted components | Additional time required |
These times are broad estimates, not manufacturer labor allowances. Review the repair procedure before planning to complete the job in one session.
DIY vs Professional CV Axle Replacement
Whether you should replace a CV axle yourself depends on your mechanical experience, equipment, workspace, and ability to follow the correct service procedure.
When DIY May Be Reasonable
- You have relevant suspension and drivetrain repair experience.
- You have safe lifting equipment and the required tools.
- You have access to the correct service information.
- You can identify correct replacement parts and torque specifications.
- You can safely inspect and test the finished repair.
When to Choose a Professional Mechanic
- You are unsure whether the axle is faulty.
- You lack suitable lifting equipment or specialized tools.
- Suspension components are seized or difficult to remove.
- You are unfamiliar with axle-nut or suspension fastener procedures.
- The repair involves complex AWD or 4WD components.
Recommendation: If this is your first major suspension or drivetrain repair, a qualified mechanic is generally the safer option.
Can You Drive With a Bad CV Axle?
Continuing to drive with a damaged CV axle may create a risk of joint failure. A completely failed CV joint can interrupt power delivery and leave the vehicle stranded. Severe mechanical damage can also cause additional hazards.
If you notice heavy vibration, loud knocking, a rapidly worsening noise, or signs of significant mechanical damage, stop in a safe location and arrange professional assistance instead of continuing to drive.
A torn boot without obvious joint damage may not require the same immediate response, but it still needs prompt inspection to prevent contamination and wear.
There is no reliable universal mileage or time limit for driving with a failing CV axle.
Should You Replace One CV Axle or Both?
CV axles generally do not need to be replaced in pairs simply because one has failed. If the opposite axle is in good condition, replacing only the faulty axle may be sufficient.
However, inspect both sides for torn boots, grease leakage, abnormal wear, and other signs of damage before making the final decision.
Can You Replace Only the CV Boot?
A boot-only repair may be possible if the damage is discovered early and the joint has not suffered significant wear or contamination.
If the joint already makes noise or has substantial internal damage, replacing the complete axle assembly is often the more practical repair.
Frequently Asked Questions About Replacing a CV Axle
How much does replacing a CV axle cost?
A common aftermarket repair at an independent U.S. shop may cost around $250–$700 per axle. Some OEM or specialized repairs exceed $1,000. Actual costs depend on vehicle, parts, labor, and additional required work.
Is replacing a CV axle difficult?
CV axle replacement is generally an intermediate automotive repair. It requires appropriate tools, safe vehicle support, correct replacement parts, and vehicle-specific service procedures.
How long does a CV axle last?
A CV axle may last well beyond 100,000 miles, and some last the vehicle’s lifetime. There is no guaranteed service life because boot condition, road conditions, operating loads, and other factors affect durability.
Can a bad CV axle cause vibration?
Yes. A worn inner CV joint or damaged axle can cause vibration during acceleration. However, tire, mount, wheel, and other drivetrain problems can cause similar symptoms.
Does replacing a CV axle require an alignment?
Not always. An alignment may be recommended if alignment-related suspension components were disturbed or if manufacturer instructions require it.
Is it necessary to replace both CV axles?
No. Both axles do not automatically require replacement together. Inspect each axle and replace components based on their condition.
Can a CV axle be repaired instead of replaced?
Sometimes a damaged boot can be replaced before the CV joint becomes worn. If the joint or shaft is damaged, complete axle replacement may be preferable.
What happens if a CV axle fails completely?
A completely failed CV joint may prevent power from reaching the affected driven wheel, potentially leaving the vehicle unable to move. Additional mechanical damage is possible.
Final Thoughts
Replacing a CV axle is an important drivetrain repair that should begin with an accurate diagnosis. Clicking during turns, vibration under acceleration, and leaking CV boots are useful warning signs, but they do not always mean that an axle must be replaced.
Before starting the repair, confirm the correct replacement part, review the vehicle’s service procedure, and understand the required tools and safety precautions.
Comparing written estimates from reputable repair shops can help you understand the real cost of replacing a CV axle and avoid unnecessary expenses.
Whether you choose DIY replacement or professional service, proper installation and final inspection are essential for safe, reliable vehicle operation.