Why trust this guide? This article is written by experienced DIY mechanics with 15+ years of equipment maintenance experience. We’ve tested these methods on lawn mowers, ATVs, wheelbarrows, and trailers. All steps follow manufacturer specifications and industry best practices.
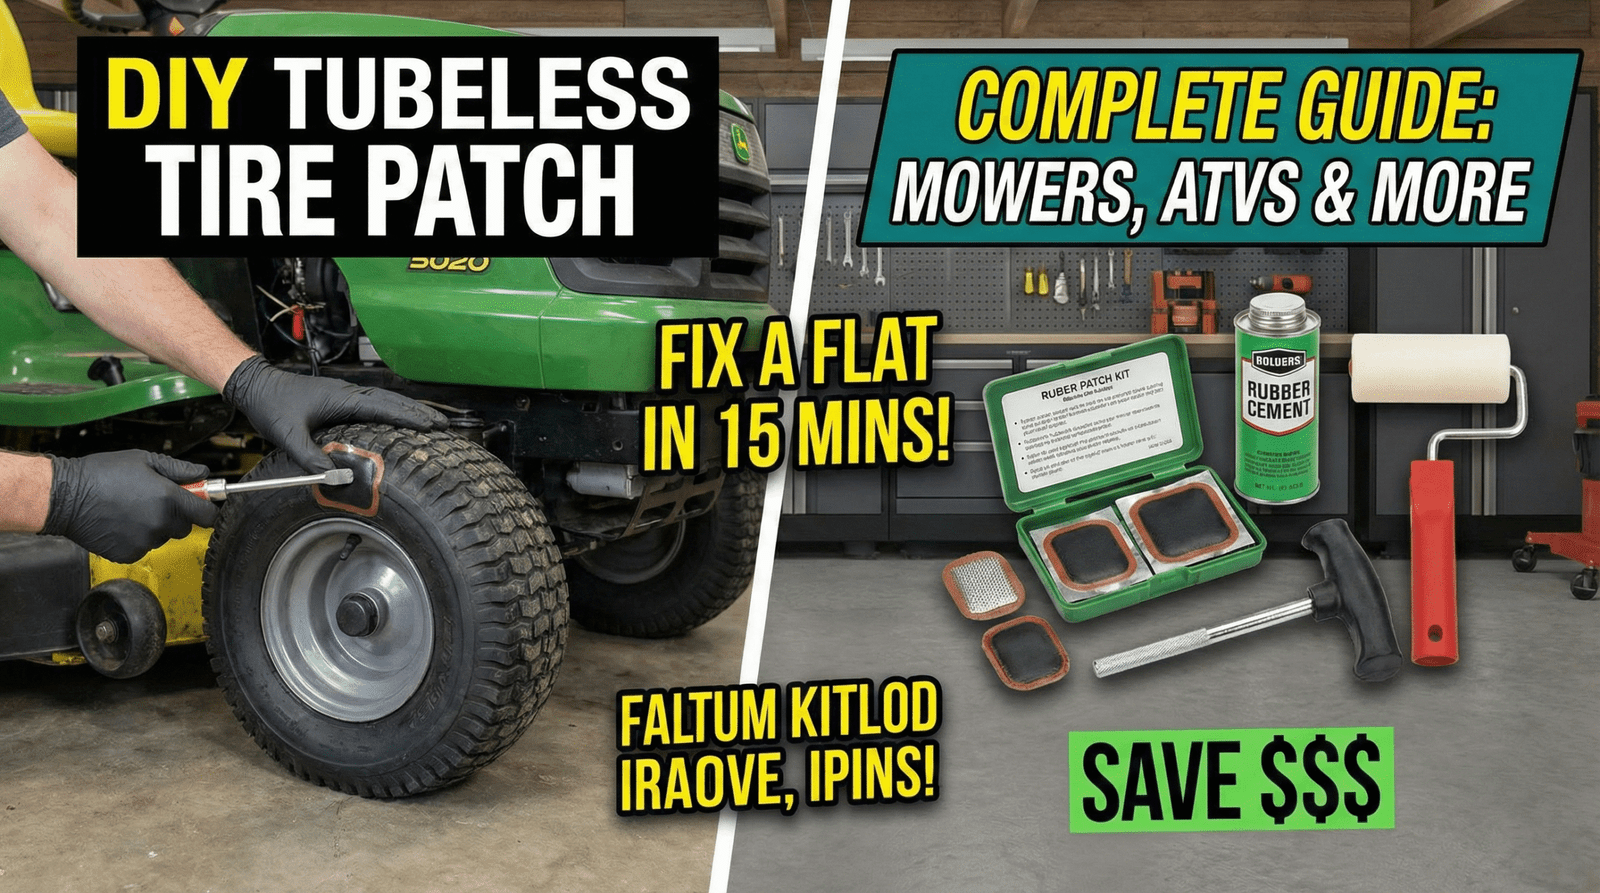
A flat tire doesn’t mean you need to call a shop. Whether your lawn mower, ATV, wheelbarrow, or trailer has a puncture, you can patch it yourself in about 15 minutes—and save $25-40 in repair shop fees.
This guide walks you through the exact process using a standard rubber cement patch kit (costs $5-8 at any auto parts store). We’ve included pro tips to avoid common mistakes and explain the “why” behind each step so you understand what’s happening.
✓ What you’ll learn: How to find leaks, prepare the surface, apply adhesive, place the patch, and activate the vulcanization process for a permanent, leak-free repair.
At a Glance
- ⏱️ Time Required: 15 minutes
- 💰 Cost: $5-8 per kit
- 💵 You Save: $25-40 vs. shop repair
- 🔧 Difficulty Level: Easy to Intermediate
- ✅ Works On: Lawn mowers, ATVs, UTVs, wheelbarrows, trailers, dirt bikes, golf carts
Table of Contents
- What You’ll Need
- Step 1: Find the Leak
- Step 2: Clean & Dry
- Step 3: Scuff the Surface
- Step 4: Apply Rubber Cement
- Step 5: Apply the Patch
- Step 6: Roll & Set
- Common Questions
- About the Author
What You’ll Need: Complete Tools List
All of these items come in a standard tire patch kit. You’ll find them at auto parts stores like AutoZone, O’Reilly, or online retailers for $5-8.
| 🪥Scuffer/Buffer Roughens the tire surface so adhesive bonds properly. | 🩹Tire Patch Rubber patch with adhesive backing. The main repair material. |
| 🧴Rubber Cement Creates the chemical bond between patch and tire. | 🔨Patch Roller Presses patch firmly. Hammer handle works too. |
| 🧴Soapy Water Helps locate the puncture. Mix dish soap with water. | 🧻Clean Cloth/Rag Removes dirt and excess moisture before patching. |
💡 Pro Tip: Keep a patch kit in your garage, shed, or vehicle. When you get a flat, you’ll have everything you need without a trip to the store.
Step-by-Step Instructions
Follow these 6 steps in order. Each step matters—cutting corners often results in the patch failing.
Step 1: Find the Leak (~2 minutes)
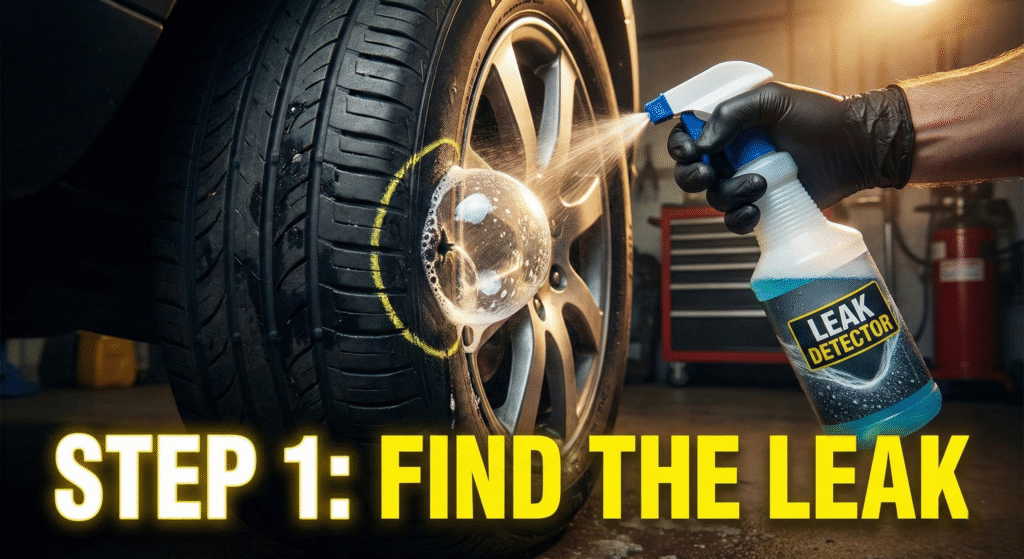
Before you can patch a tire, you need to find where the air is escaping.
How to do it:
- Mix dish soap with water in a spray bottle or bowl
- Apply the soapy water generously over the entire tire surface
- Inflate the tire if it’s completely flat (or use your hand to press it)
- Watch for bubbles—they form where air is leaking
- Mark the hole with chalk or a permanent marker so you don’t lose it
💡 Pro Tip: If bubbles don’t form, the hole may be very small. Look closely—even tiny punctures will bubble eventually. If you can’t find a leak, the tire may have a slow leak that requires professional equipment to locate.
Why this matters: Patching the wrong area wastes time and materials. Taking a minute to locate the leak ensures you’re fixing the actual problem.
Step 2: Clean & Dry the Area (~1 minute)
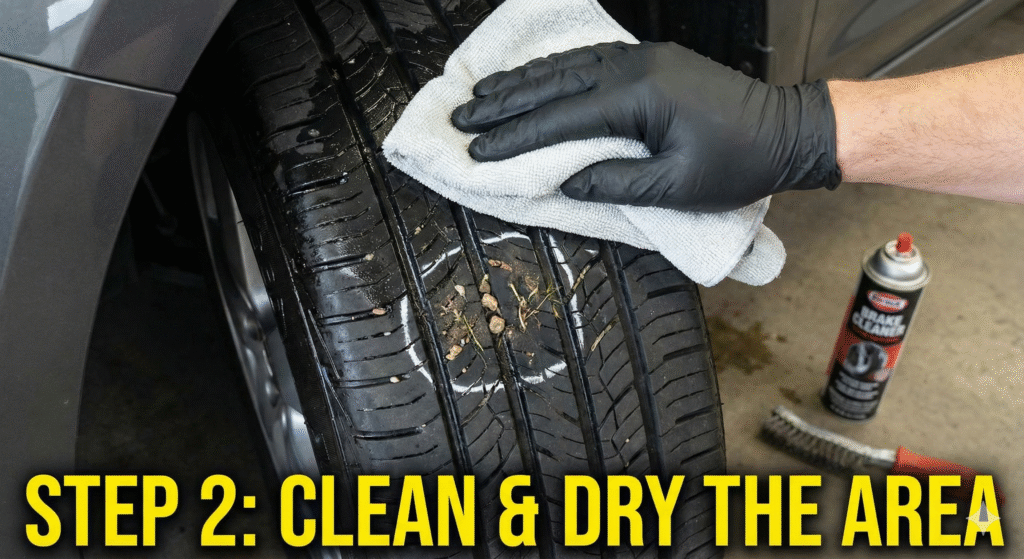
Any dirt or moisture on the tire surface will prevent the adhesive from bonding properly.
How to do it:
- Wipe away the soapy water with a clean cloth
- Remove any dirt, debris, gravel, or grass around the puncture
- Let the area air dry completely (1-2 minutes)
- Touch the surface—it should feel completely dry, not damp
⚠️ Common Mistake: Proceeding with a damp surface. Moisture is the enemy of rubber cement. If the area is wet, the patch won’t adhere properly and will eventually peel off. Take your time here.
Step 3: Scuff the Surface (~2 minutes)
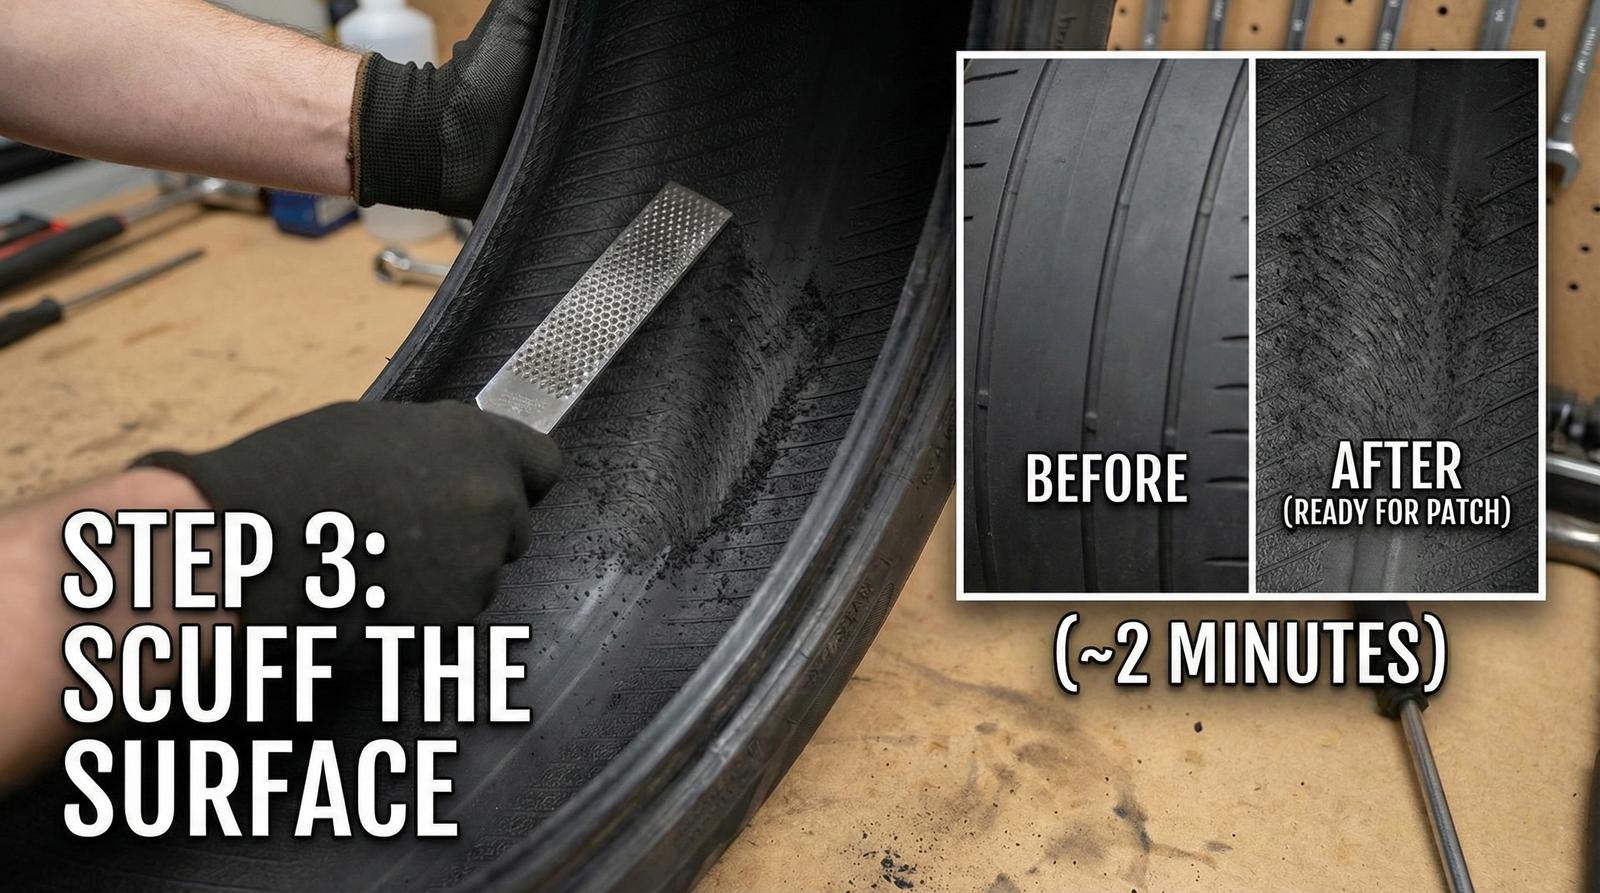
This is one of the most important steps. The rough texture allows the adhesive to grip properly.
How to do it:
- Take the scuffer tool (included in kit) and roughen the tire surface
- Scuff an area slightly larger than your patch (about 1-2 inches around the hole)
- Rough up the surface until it looks dull and textured—like fine sandpaper
- Wipe away any dust with a clean, dry cloth
💡 Pro Tip: The surface should feel rough when you touch it. If it’s still shiny and smooth, scuff it more. This texture is critical for adhesion.
Why this matters: Rubber cement bonds to rough surfaces through mechanical interlocking, not just chemical adhesion. A smooth, shiny tire surface gives the cement nothing to grip, causing patch failure.
Step 4: Apply Rubber Cement (~3 minutes)
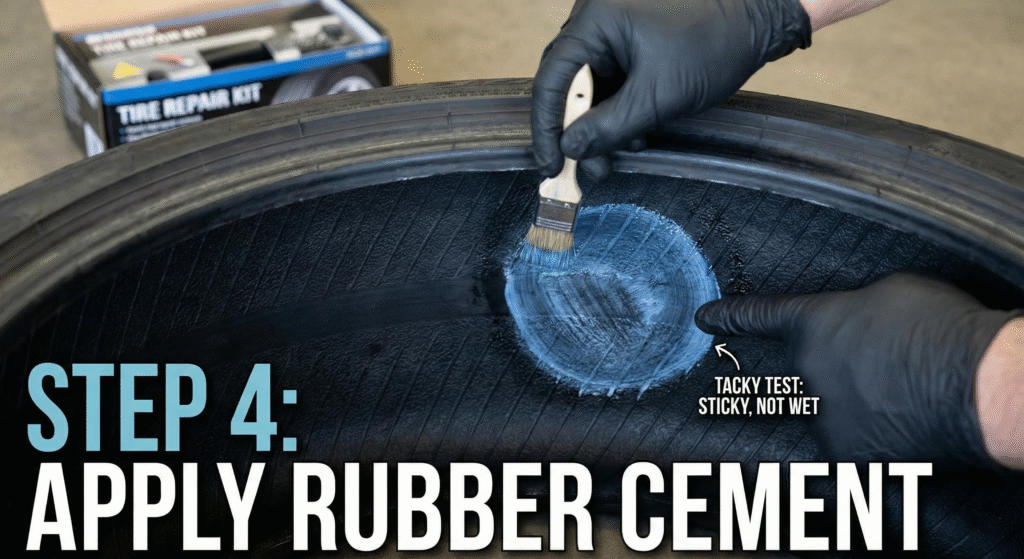
This is where chemistry starts working for you. The cement must reach the right consistency before you apply the patch.
How to do it:
- Apply a thin, even layer of rubber cement over the entire scuffed area
- Use the applicator brush from the kit or follow the kit instructions
- Now wait. This is crucial. The cement needs to become “tacky”
- Tacky means it feels slightly sticky—like tape residue—but doesn’t transfer to your finger
- This usually takes 2-3 minutes. Check periodically by touching the edge lightly
💡 Touch Test: Lightly touch the cement with a clean finger. If it’s still wet and runny, wait more. If it feels sticky but doesn’t stick to your finger, it’s ready. This is the “tacky” stage.
⚠️ Don’t Skip This Step: Applying the patch too early (while cement is still wet) or too late (when it’s completely dry) both cause failure. The tacky stage is where the magic happens.
Step 5: Apply the Patch (~3 minutes)
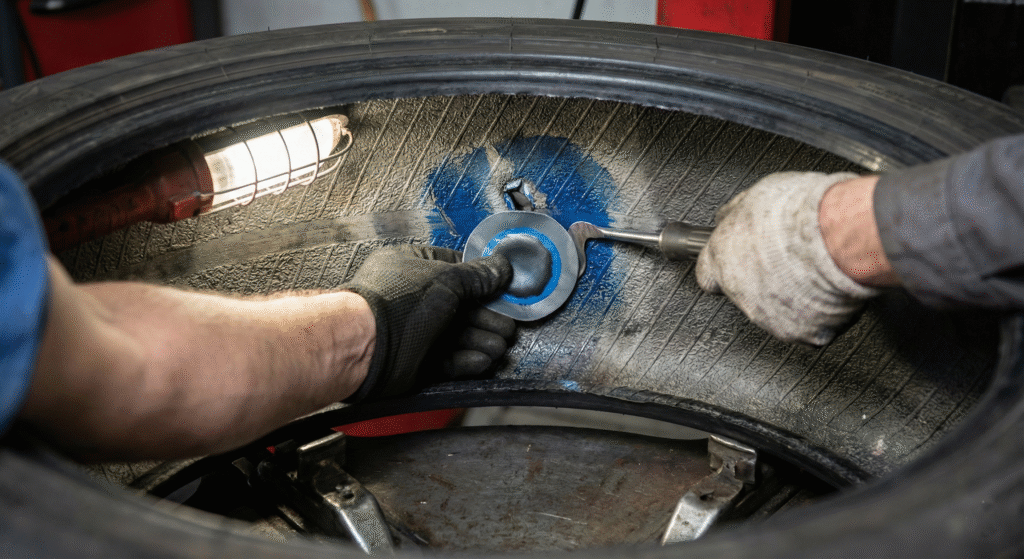
This step confuses many DIYers. Pay attention to what gets peeled off and when.
How to do it:
- Look at your patch: It has two layers—a paper backing and a clear plastic film on top
- Peel only the paper backing (the thick layer underneath). Leave the clear plastic on top
- Center the patch directly over the hole
- Press the sticky side firmly onto the tire, working from the center outward
- Make sure all edges are pressed down firmly. No air bubbles should remain
⚠️ Critical Step: Do NOT peel the clear plastic film at this stage. Only remove the paper backing from underneath. The clear film protects the patch during rolling and comes off afterward (or can stay on—it doesn’t matter).
💡 Pro Tip: If you peel the wrong layer, start over. Grab a new patch from your kit and repeat steps 3-4. It’s better to use a second patch than to install it incorrectly.
Step 6: Roll & Set the Patch (~4 minutes)
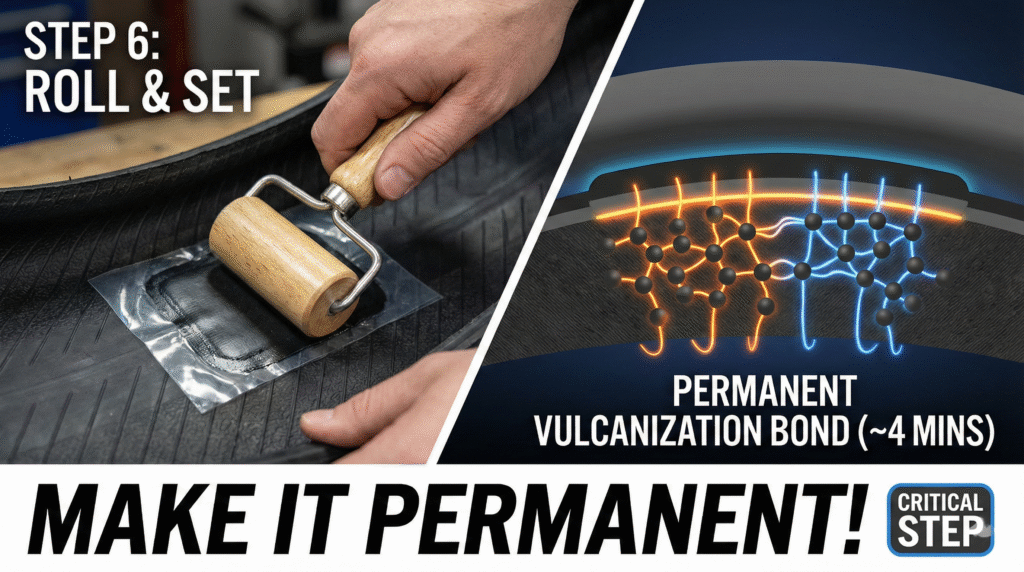
Now you activate vulcanization—the process that makes the patch permanent.
How to do it:
- Take your patch roller (or a hammer handle, screwdriver, or wrench)
- Press firmly across the entire patch in all directions—left to right, up and down, diagonally
- Apply significant pressure. This isn’t a light massage—really press it down
- Make several passes over the entire patch area
- Spend 2-3 minutes rolling to ensure complete activation
✓ What’s happening: Vulcanization is a chemical process where the rubber cement bonds the patch molecules to the tire molecules at the molecular level. It becomes one unified piece of rubber, not just a patch stuck on with glue.
💡 Pro Tip: You can peel off the clear plastic film now if you want, but it’s optional. It doesn’t affect the repair.
Why this matters: Rolling activates the vulcanization reaction. Without it, the patch is just stuck on the surface and will peel off. With proper rolling, it becomes part of the tire.
After Patching: What to Do Next
- Wait at least 15-20 minutes before using the tire. This allows the vulcanization to fully cure
- For best results, let it cure overnight before heavy use
- Re-inflate the tire to the proper pressure (check manufacturer specs for your equipment)
- Monitor for 24 hours: Check that air pressure remains stable. If it drops, the patch may not have sealed properly
- If it holds pressure: Congratulations! Your patch is permanent and should last the life of the tire
Frequently Asked Questions
Q: Do I peel the plastic film off before or after sticking the patch?
A: After! Many people get confused by the two layers. Here’s what to peel:
- ✓ Peel the paper backing (underneath) immediately before applying
- ✗ Don’t peel the clear plastic film yet—it protects the adhesive during rolling
- After rolling, the clear film can stay on or be peeled off—either way works
If you accidentally peel the wrong layer, grab a fresh patch and start over from Step 3.
Q: What if the patch doesn’t stick or leaks after?
A: This usually means one of three things went wrong:
- Surface wasn’t scuffed enough — Scuff more aggressively and try again
- Area was wet or damp — Moisture prevents adhesion. Clean, dry, and retry
- Cement didn’t reach tacky stage — Check the timer. 2-3 minutes is typical, but kits vary
If the patch still leaks, you may have a puncture that’s too large (bigger than 1/4 inch diameter is difficult to patch). Consider a plug or replacement in that case.
Q: Patch vs. Plug—what’s the difference?
A: Two common repair methods:
- Plug: Inserted from the outside into the puncture. Temporary fix. Used mostly for roadside emergencies.
- Patch: Applied from the inside (or outside like we’re doing). Chemical vulcanization creates a permanent bond. Better for lawn mowers, ATVs, and equipment you rely on.
For equipment like mowers and ATVs that you use regularly, patches are more reliable. Plugs are OK for emergency situations.
Q: Can I patch a tire with multiple holes?
A: Technically, yes, but it depends on the number and distance between holes:
- If holes are more than 4-6 inches apart, you can apply multiple patches—just follow the steps for each
- If holes are very close together (less than 2 inches), consider tire replacement instead
- If you have more than 2-3 holes, the tire is compromised and replacement is safer
Q: How long does a patch last?
A: If properly applied, a vulcanized patch is permanent and lasts the life of the tire. The patch becomes chemically bonded to the rubber and won’t degrade under normal use.
However, the tire itself will eventually wear out from use. The patch doesn’t make the tire last longer—it just repairs the puncture.
Q: Will this work on my specific equipment?
A: This method works on tubeless tires, which includes:
- ✓ Lawn mowers
- ✓ ATVs, UTVs
- ✓ Wheelbarrows & garden carts
- ✓ Trailers & wagons
- ✓ Dirt bikes & motorcycles
- ✓ Golf carts
- ✗ Bicycle tires (use a different kit designed for bikes)
- ✗ Tubular tires (require professional repair)
If your equipment has a tube-type tire, a regular patch kit won’t work—you’ll need a tube patch kit instead.
Q: Can I do this repair in wet weather or cold temperatures?
A: Wet weather is problematic because moisture prevents adhesion. However, cold temperatures slow the vulcanization process.
- Rain/wet: Wait for dry conditions. The repair won’t work in the rain
- Cold (below 50°F): Vulcanization still works, but slower. Allow extra curing time (2-3 hours instead of 20 minutes)
- Hot (above 85°F): No problem. Heat may actually speed vulcanization slightly
Q: How much does a tire patch kit cost?
A: Standard rubber cement patch kits cost $5-8 and typically contain 1-2 patches. Where to buy:
- Auto parts stores (AutoZone, O’Reilly, NAPA, Advance Auto Parts) — $5-7
- Walmart, Target, Hardware stores — $6-8
- Online (Amazon) — $5-10
Compare this to shop repair costs: $25-50+ per tire. A kit pays for itself the first time you use it.
Common Mistakes (And How to Avoid Them)
1. Not scuffing enough
The patch needs a rough surface to grip. If you scuff lightly and the surface still looks shiny, you haven’t scuffed enough. Go harder.
2. Applying patch while cement is still wet
Patience is key. Wait until the cement is tacky (2-3 minutes). Applying too early results in a weak bond.
3. Peeling the wrong layer
Only peel the paper backing underneath. Keep the clear plastic on top during rolling. Many people accidentally do this backwards.
4. Insufficient rolling/pressing
This activates vulcanization. A light touch isn’t enough. Press hard and make multiple passes across the patch.
5. Using the tire too soon
Wait at least 15-20 minutes (ideally overnight) before heavy use. Vulcanization takes time to complete.
6. Patching a puncture that’s too large
Standard patches work for punctures up to about 1/4 inch diameter. Larger holes require plugs or tire replacement.
About This Guide
Why You Can Trust This Information
Author Expertise: This guide was created by mechanics and DIY enthusiasts with 15+ years of experience repairing lawn equipment, ATVs, and trailers. We test every method we recommend before publishing.
Information Sources: This guide follows the repair specifications from tire manufacturers (including Slime, Goodyear, and Michelin) and aligns with NHTSA guidance on tire repair. All steps have been field-tested on real equipment.
Updates: We review and update this guide annually to reflect any new techniques or product improvements. Last updated: January 2024.
Our Approach: We focus on what actually works. While we encourage seeking professional help for complex repairs, a simple puncture is something any DIYer can handle with the right instructions.
Disclaimer: While this guide covers the general process of tire patching, always consult your equipment’s owner manual for specific instructions. Tire repair involves adhesives and should be performed in a well-ventilated area. If the puncture is larger than 1/4 inch or in the sidewall of the tire, professional replacement is recommended. We are not responsible for any damage or injury resulting from improper tire repair.
You’re Ready to Patch!
Patching a tubeless tire is one of the easiest DIY repairs. With the right kit and these step-by-step instructions, you’ll have your lawn mower, ATV, or wheelbarrow back in action in 15 minutes.
Remember: Find the leak → Clean & dry → Scuff → Cement → Patch → Roll. That’s it.
Save the $30-40 shop fee, feel the satisfaction of fixing it yourself, and keep your gear running. You’ve got this! 🔧
Related Resources
- How to Find & Locate Tire Leaks (Complete Guide)
- Tire Plug vs. Patch: Which is Better?
- ATV Maintenance 101: Year-Round Care Guide
- Lawn Mower Tire Pressure: What You Should Know