Tired of those annoying black marks ruining your white bumper? You aren’t alone. In the chaos of urban traffic—where bike mirrors and tight parking spots are a daily reality—car scratches are almost inevitable.
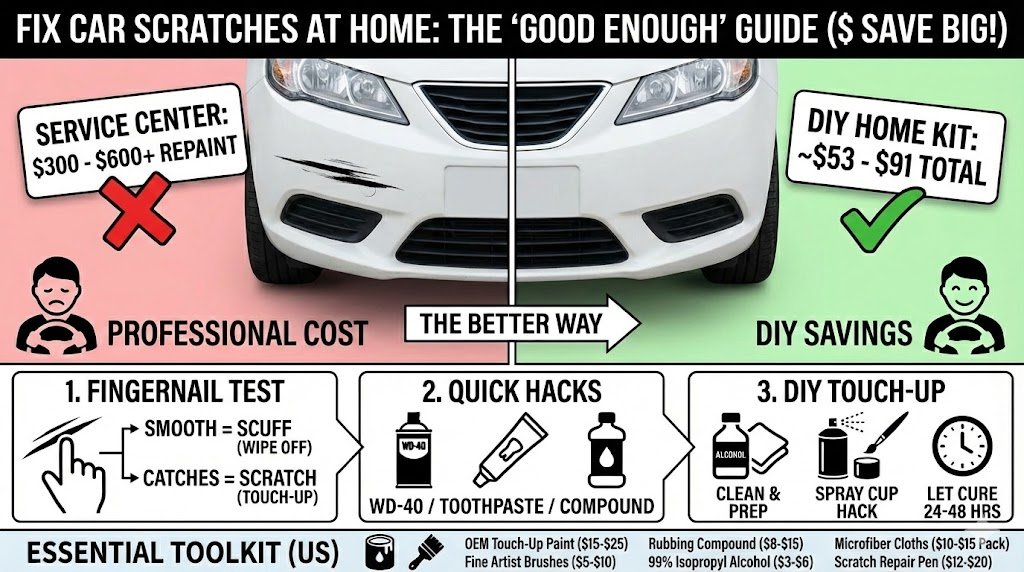
But before you rush to a service center and drop ₹5,000+ to repaint an entire panel for a thumb-sized mark, there’s a better way. This guide is for the busy driver who wants results, not perfection. We’re going the “no-sanding, no-primer” route.
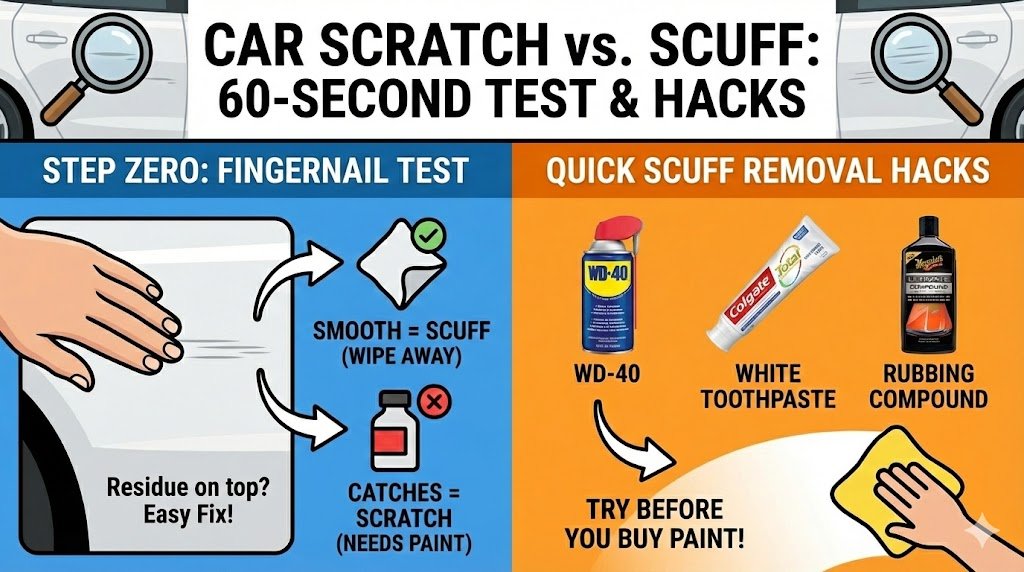
Step Zero: Is It a Scratch or Just a Scuff?
Before you buy paint, you need to know what you’re dealing with. Many “scratches” are actually paint transfer—residue from whatever hit your car that’s sitting on top of your clear coat.
The 60-Second Fingernail Test
Run your fingernail across the mark (perpendicular to the scratch).
Nail glides smoothly? It’s a scuff or paint transfer. You can likely wipe it off!
Nail catches/snags? It’s a real scratch that has penetrated the clear coat. You’ll need touch-up paint.
Quick Scuff Removal Hacks
If it’s just a scuff, try these before doing anything else:
WD-40: Spray on a microfiber cloth, wait 30 seconds, and wipe in circles.
Rubbing Compound: A small amount of 3M or Meguiar’s works wonders.
White Toothpaste: In a pinch, the mild abrasives in basic white toothpaste can act as a light polish.
The No-Sanding DIY Touch-Up Guide
If your nail caught in the scratch and you can see black plastic or metal underneath, follow these steps.
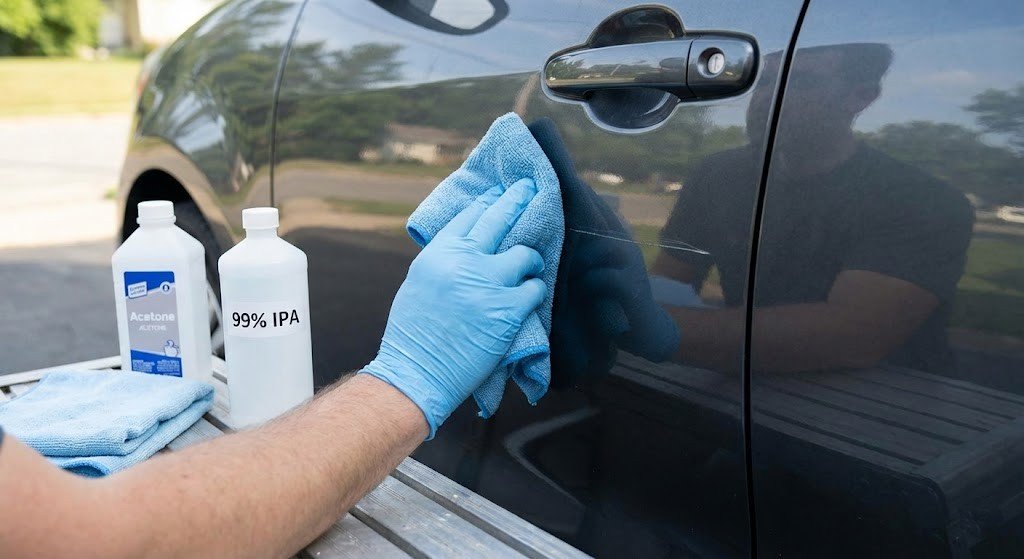
1. Clean & Prep
Paint will not stick to wax, grease, or dirt. Use Isopropyl Alcohol (IPA) or acetone on a clean microfiber cloth to thoroughly clean the scratch. Let it dry completely. Skip this, and your hard work will peel off in a week.
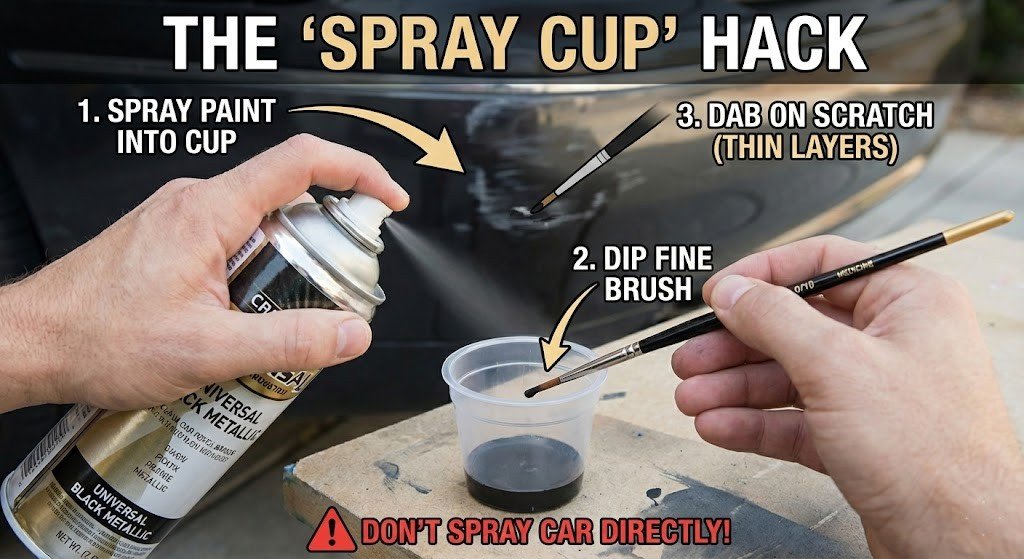
2. The “Spray Cup” Hack
This is the secret to a clean finish without the mess of overspray.
Don’t spray the car directly.
Do spray a small amount of your matching paint into a plastic bottle cap or medicine cup.
The Technique: Use a fine-tip artist brush (size 0/10) to dab the paint from the cup into the scratch. Build it up in thin layers rather than one big glob.
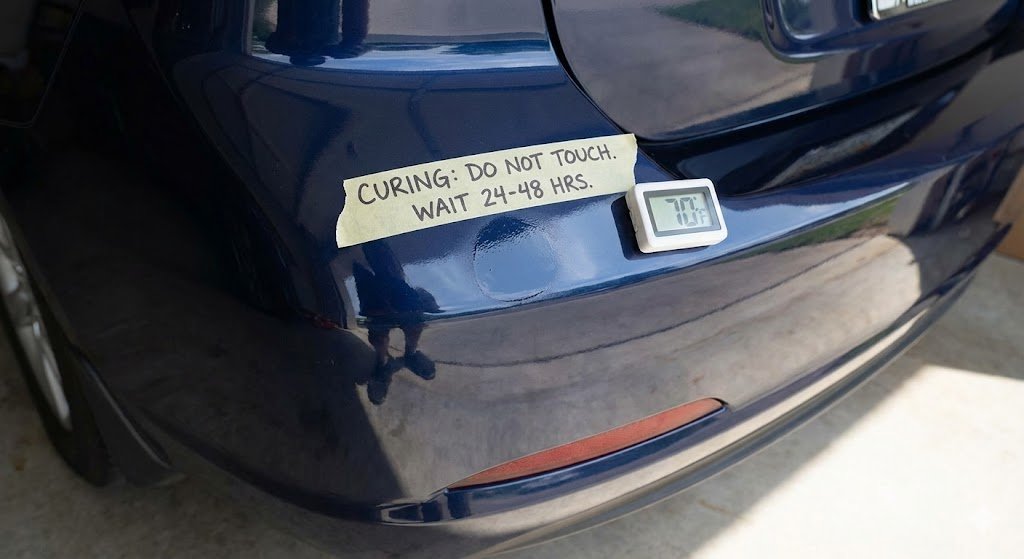
3. Let It Cure
Patience is the hardest part.
Wait 24–48 hours before touching the area.
Keep the car in the shade; direct UV can interfere with the drying process of fresh touch-ups.
Expectation Check: This won’t be invisible from 2 inches away, but from 5 feet? Those ugly black marks will be gone.
Essential Toolkit (Available in USA)
You don’t need a professional workshop. These items are all available on Amazon or at local auto stores:
Item
US Brand Example
Estimated Price (USD)
OEM Touch-Up Paint
Dupli-Color / ACDelco
$15.00 – $25.00
Fine Artist Brushes
Hobby Lobby / Amazon (set)
$5.00 – $10.00
Rubbing Compound
Meguiar’s / Turtle Wax
$8.00 – $15.00
99% Isopropyl Alcohol
CVS / Walgreens / Walmart
$3.00 – $6.00
Microfiber Cloths
Chemical Guys / AmazonBasics
$10.00 – $15.00 (Pack)
Scratch Repair Pen
Quixx / Dr. ColorChip
$12.00 – $20.00
💡 Pro Tip: To find your exact color code, check the sticker on your driver-side door jamb or inside the fuel flap. Look for codes like “ZC” (Maruti Arctic White) or “PW” (Pearl White).
Frequently Asked Questions
Will this void my warranty?
Cosmetic touch-ups on bumpers and panels do not affect your mechanical warranty. If you’re nervous, stick to the plastic bumper areas.
Can I just use white correction fluid (Whitener)?
Please don’t. It will turn yellow in the sun, crack, and look significantly worse than the scratch within weeks. Spend the ₹300 on actual car paint.
How long does the fix last?
If you prepped the surface correctly with alcohol, the fix can easily last 1–2 years.
Ready to reclaim your car’s look? Stop staring at that eyesore every morning. Grab your supplies and tackle that scratch this weekend!
Would you like me to help you find the specific paint code for your car model?
Usama
Usama is an ASE-Certified Automotive Technician with over 10 years of hands-on experience in tire diagnostics, suspension systems, and vehicle safety. Having successfully repaired, patched, and replaced thousands of tires, he writes strictly to empower drivers with transparent pricing and protect them from unsafe repair shop practices.