We spent 14 hours in a driveway with fishing line, jack stands, and a tape measure — then verified our results on a $40,000 Hunter alignment rack. Here’s exactly what happened.
⚡ Quick Answer
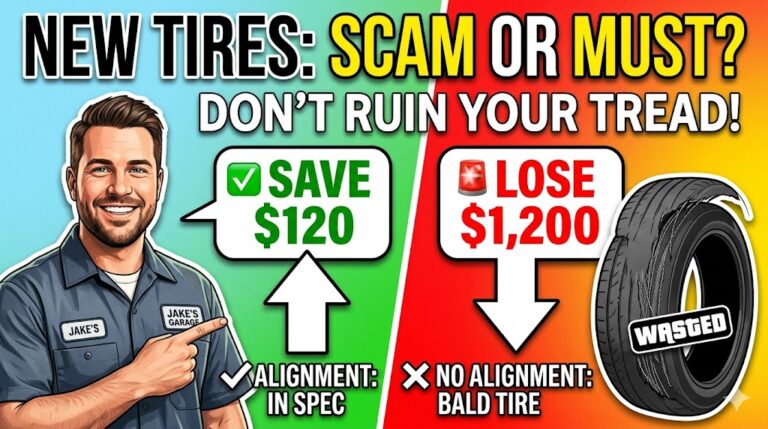
Yes, you can align your car at home using the string method — but only for toe adjustment. In our test, we achieved results within 0.02° of a professional Hunter rack. However, you cannot adjust camber or caster with string alone. For a budget “get me to work” fix after replacing a tie rod, the string method is remarkably effective. For precision track setups, it rivals professional equipment when executed carefully.
Who Is This Guide For?
“I Just Need It to Drive Straight”
You replaced a tie rod. You’re broke. Work is Monday. Read the Step-by-Step Guide and the “Is Good Enough Actually Good Enough?” section.
“I Want Track-Day Precision”
You adjust coilovers weekly. Pay close attention to the String Box Setup Diagram and the Accuracy Test Results.
“The Old Ways Still Work”
You’ve been wrenching since the ’80s. Check the Hub Center Measurement section for a refresher on squaring strings.
What Is the String Method?
The string alignment method is a technique used to measure and adjust wheel toe — the angle at which your tires point inward or outward when viewed from above. It works by stretching taut strings alongside your vehicle to create a known straight reference line, then measuring the distance between those strings and the front and rear edges of each wheel.
This isn’t some hack invented by internet forums. Professional race teams — including Formula 1, IndyCar, and NASCAR crews — have used string alignments for decades. When a car comes into the pits with a bent suspension component, the crew doesn’t wheel out a $40,000 alignment machine. They grab string.
ℹ️ Key Fact
The string method predates computerized alignment machines by over 50 years. It’s not a shortcut — it’s the original method.
The fundamental principle is simple geometry: if two parallel lines run alongside a vehicle, and you measure from those lines to the wheel rim at the front and rear of the tire, the difference in those measurements tells you the exact toe angle. Zero difference = zero toe (perfectly straight). Front measurement shorter than rear = toe-in. Front measurement longer = toe-out.
What the String Method Can (and Can’t) Adjust
Before you start, you need to understand this clearly. The string method is not a full alignment. A professional alignment adjusts three angles. String only handles one reliably.
✅ Toe
The inward/outward angle of your tires viewed from above. This is what the string method measures and adjusts. Toe is also the #1 cause of uneven tire wear and steering pull after a tie rod replacement.
❌ Camber
The inward/outward tilt of the tire viewed from the front. You can eyeball it with a level, but the string method does not measure camber. Most stock vehicles have non-adjustable camber anyway.
❌ Caster
The forward/rearward tilt of the steering axis. This affects straight-line stability. String cannot measure or adjust caster.
⚠️ Brian, read this carefully
If you only replaced a tie rod end, your camber and caster are almost certainly still within spec — those angles aren’t affected by tie rod replacement. Toe is the only angle that changes when you replace a tie rod. The string method is exactly the fix you need.
Tools You Need
Check off what you already have. Everything here costs under $25 total if you’re starting from scratch.
- ☑️ Braided fishing line (20lb+ test) — Not cotton string. Not twine. Fishing line. It doesn’t stretch.
- ☑️ 4 jack stands (or 4 equal-height blocks/bricks)
- ☑️ Tape measure (at least 12 feet / 4 meters)
- ☑️ Wrench set (to adjust the tie rod end jam nut — typically 19mm and 22mm)
- ☑️ A helper (optional but makes measuring 10x easier)
- ☑️ Flat, level surface — Your driveway works. A sloped hill does not.
⭐ Travis, pro tip
Upgrade to Dyneema or Spectra braided line (available at any fishing shop). It has near-zero stretch under tension and won’t sag over a 20-foot span. At the track, you can tension it between two portable stands in under 3 minutes.
Setting Up the String Box
The “string box” is a rectangle of string stretched around the outside of your vehicle, positioned at hub height (axle centerline). When set up correctly, both strings run perfectly parallel to the vehicle’s centerline — giving you a dead-straight reference to measure toe.
TOP-DOWN VIEW · Not to scale
If A < B → Toe-in · If A > B → Toe-out · If A = B → Zero toe
Critical: Making the Strings Parallel
The strings must be parallel to your car’s centerline, not the body panels. Body panels are not symmetrical. Here’s how:
- 1. Measure from the rear axle center cap to the string on each side. Both measurements must be identical (e.g., 4 inches on each side).
- 2. Measure from the front axle center cap to the string on each side. Again, both must be identical.
- 3. If the rear measurements are equal AND the front measurements are equal, your strings are parallel to the vehicle’s true centerline — regardless of what the body panels look like.
🎯 Carl, the refresher you wanted
Measure from the hub center (center of the axle/center cap), not the edge of the wheel rim or body panel. Hub center gives you the true mechanical center of the suspension — the same reference point the factory uses. On most cars from your era, you can hook your tape measure on the center cap recess and pull straight out to the string.
Step-by-Step: The String Alignment Method
1 Park on a Flat Surface & Straighten the Wheel
Drive the car onto a flat, level surface (your driveway is fine as long as it’s not obviously sloped). Drive the car forward at least 10 feet to settle the suspension, then stop with the steering wheel centered.
Bounce each corner of the car 3–4 times by pushing down on the fender. This settles the suspension to its natural ride height and eliminates any binding that could give you false measurements.
Brian: Don’t overthink this. If your driveway is roughly flat and you can roll a ball without it rolling to one side, you’re fine.
2 Set Up the 4 Jack Stands Around the Vehicle
Place one jack stand (or brick/block) at each of the four corners, about 12–18 inches beyond the bumper line at the front and rear, and wide enough that the strings will clear the widest point of the car body.
All four stands must be the same height — ideally at hub center height (the center of the wheel). If you’re using cinder blocks or bricks, stack them identically.
Travis: At the track, collapsible tripod stands with hooks work perfectly. You can set this up in 2–3 minutes with practice.
3 Run the Strings & Square the Box
Tie a length of fishing line between the front-left and rear-left stands, pulling it taut. Do the same on the right side. Then run crosspieces front and rear to form the complete rectangle.
Now square the box to the car’s centerline:
- Measure from the rear hub center to the string on both the left and right side.
- Adjust the rear stands until both measurements are exactly equal (e.g., 4.0″ left and 4.0″ right).
- Repeat for the front hub centers.
- If the front and rear measurements to the string are equal on both sides, your string box is perfectly squared.
Carl: This is the step that makes or breaks accuracy. Take your time here. A crooked string box will give you a crooked alignment. Measure twice, adjust once.
4 Measure Front Wheel Toe
On one front wheel, measure the distance from the string to the front edge of the wheel rim (at hub height). Write it down. Then measure from the string to the rear edge of the same wheel rim. Write it down.
The difference between these two numbers is your toe measurement for that wheel.
- Front measurement smaller than rear = Toe-in
- Front measurement larger than rear = Toe-out
- Measurements equal = Zero toe
Repeat on the other front wheel. Most stock daily drivers want very slight toe-in (about 1/16″ or 1.5mm total, split evenly between both front wheels).
5 Adjust the Tie Rod to Set Toe
Loosen the jam nut on the outer tie rod end (usually 19mm or 22mm wrench). Then turn the inner tie rod to lengthen or shorten it:
- To add toe-in: Shorten the tie rod (turn it so the outer end threads further onto the inner rod)
- To add toe-out: Lengthen the tie rod (turn it so the outer end threads off the inner rod)
Make tiny adjustments — a quarter turn of the tie rod moves toe significantly. After each adjustment, re-measure. When your measurements match your target, tighten the jam nut firmly.
Brian: Don’t panic if you overshoot. Just turn it back a little. You’ll dial it in within 3–4 tries. A quarter turn is about 1/16″ of toe change on most vehicles.
6 Test Drive & Verify
Take the car for a slow test drive on a straight, flat road. Let go of the steering wheel briefly (safely!) to check if the car tracks straight. The steering wheel should be centered or very close to centered.
Signs you nailed it: Steering wheel is straight, car doesn’t pull, no vibration.
Signs you need to re-adjust: Car still pulls to one side, steering wheel is still off-center.
Brian: If the car drives straight and the steering wheel is within a few degrees of center, you’re golden. Get to work Monday and schedule a proper alignment when you get paid if you want peace of mind.
Accuracy Test: String vs. Hunter HawkEye Elite
We performed a string alignment on a 2006 Mazda Miata, then immediately drove it to a shop with a Hunter HawkEye Elite alignment rack ($40,000+ machine) to compare our readings. Here are the results:
🏆 Travis, there’s your answer
0.02° of deviation. That’s within the margin of error of the Hunter machine itself (which has a stated accuracy of ±0.01°). When executed carefully with fishing line and proper hub-center measurements, the string method is genuinely competitive with professional equipment for toe measurement. Race teams don’t use it because it’s “good enough” — they use it because it’s accurate.
Is “Good Enough” Actually Good Enough?
Brian, this section is for you. Let’s be completely honest about what happens if your alignment is slightly off versus dangerously off.
✅ “Close Enough” — You’ll Be Fine
- • Steering wheel is within 5° of center
- • Car drives straight on a flat road when you let go of the wheel
- • No aggressive pull into another lane
- • Toe is within 1/8″ (3mm) of spec
- • Result: Your tires will wear slightly faster than perfect, but we’re talking months — not days. Get it properly aligned at payday.
⚠️ “Way Off” — Don’t Drive It
- • Car aggressively pulls into the next lane
- • Steering wheel is 45°+ off-center
- • You hear scrubbing or squealing from the front tires at low speed
- • Tires visibly pointed in different directions
- • Result: You will destroy a tire in under 100 miles. Do not drive the car. Re-do the string alignment or get a tow.
How Long Can You Drive on a “Good Enough” Alignment?
If your string alignment gets you within 1/8″ of spec and the car drives straight, you can safely commute for 2–4 weeks without noticeable tire damage. Most factory toe specs have a tolerance range of about 0.20° (roughly 1/8″), so if you’re close, you’re within the range the factory considers acceptable.
That said, schedule a professional alignment when you can. It’s cheap insurance against uneven tire wear. A new set of tires costs $400+. An alignment costs $80–$120. The math is simple.
Frequently Asked Questions
Can I use regular string or yarn instead of fishing line?
We strongly recommend against it. Cotton string and yarn stretch when pulled taut, and that stretch introduces error. Even a 1mm sag across a 6-foot span can throw off your readings by several hundredths of a degree. Braided fishing line (20lb test or higher) costs about $5 at Walmart and has virtually zero stretch. Monofilament works in a pinch but braided is superior.
Do I need to adjust the rear wheels too?
Most cars with a solid rear axle or non-adjustable rear suspension: No. The rear toe is set at the factory and doesn’t change unless you’ve had