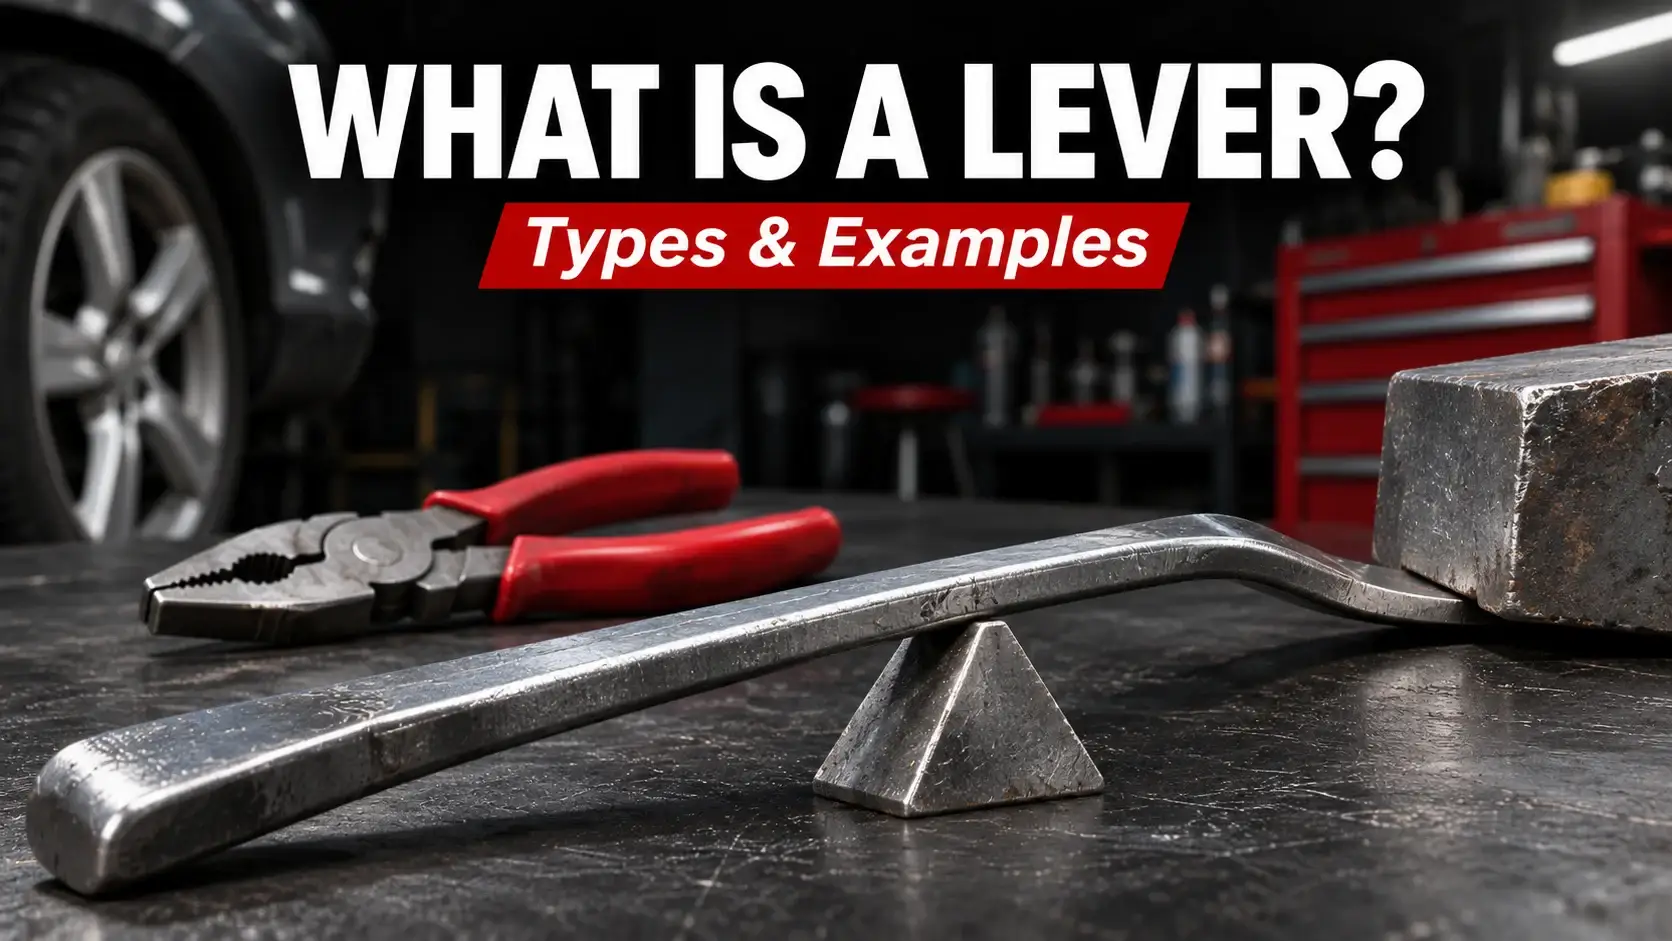

A lever is a rigid bar or arm that turns around a pivot, called a fulcrum, to transmit force. Familiar lever examples include a seesaw, wheelbarrow, and tweezers; in a garage, the same principle appears in pliers, pry bars, and brake-pedal mechanisms.
Physics reference: OpenStax: simple machines and lever mechanics.
The Three Parts of a Lever
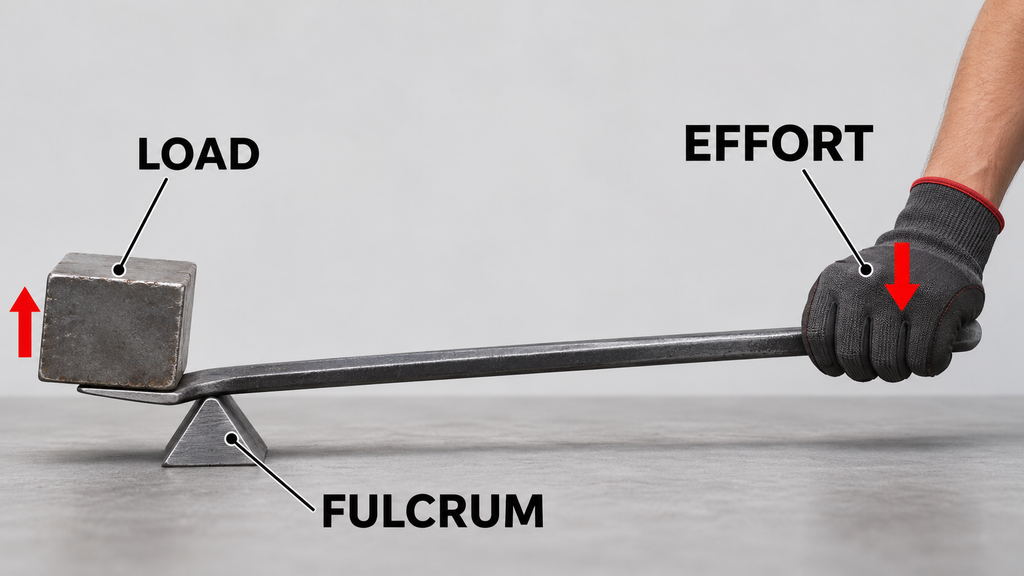
Before identifying a lever type, locate these three features:FulcrumThe point or axis around which the lever turns.EffortThe input force, such as your hand squeezing a handle.LoadThe resistance the lever acts against. It can be an object’s weight, a gripping resistance, or a pushrod resisting movement.
For example, when a pry bar lifts an edge, your hand supplies the effort, the bar’s supporting contact is the fulcrum, and the object being lifted provides the load. The load does not have to be a loose weight hanging from the bar.
Reference: OpenStax: effort, resistance, and lever arms.
What Are the Three Types of Levers?
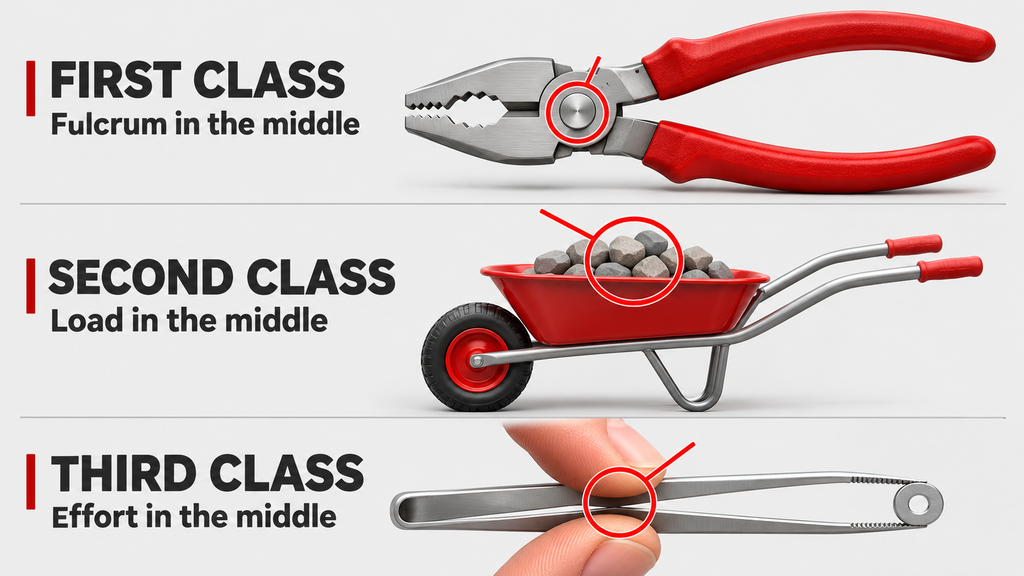
The class depends on which feature sits between the other two. First class has the fulcrum in the middle; second class has the load; third class has the effort.
| Type | Middle feature | Everyday example | How to recognize it |
|---|---|---|---|
| First class | Fulcrum | Seesaw or scissors | The effort and load act on opposite sides of the pivot. |
| Second class | Load | Wheelbarrow | The load sits between the wheel axle and the handles you lift. |
| Third class | Effort | Ordinary squeeze tweezers | You squeeze between the joined end and the gripping tips. |
Classification and everyday examples: University of Colorado Boulder TeachEngineering: Levers That Lift.
Class does not mean quality or strength. In the usual ideal model, second-class levers multiply force, while third-class levers give greater movement at the load for a smaller movement where effort is applied. A first-class lever’s force advantage depends on its arm lengths.
Reference: OpenStax: input and output lever arms.
Lever Examples in Cars and Garage Tools
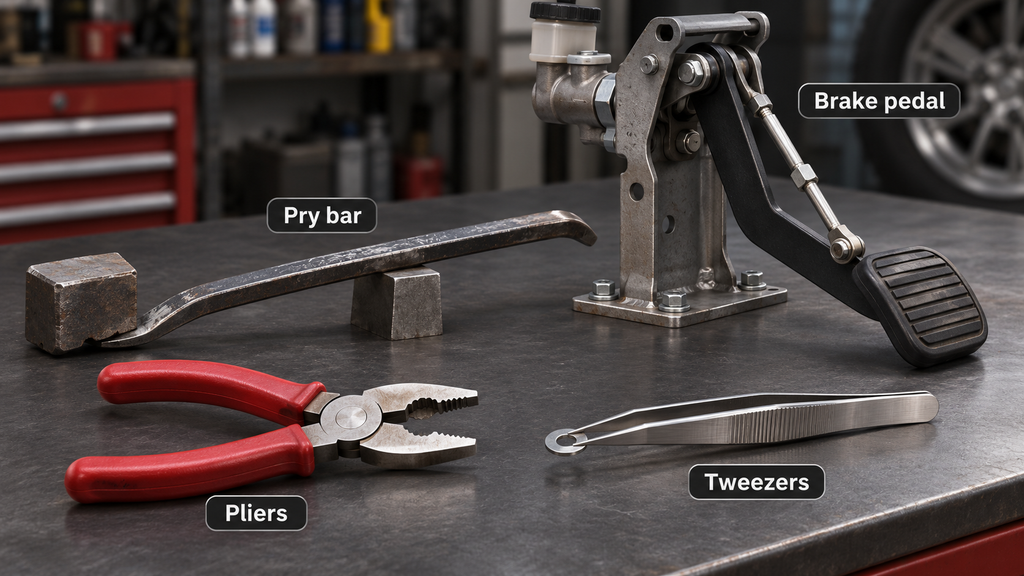
The following classifications apply the rules above to specific arrangements. Identify the actual pivot and force locations before classifying a different design.
Ordinary Pliers: First-Class Lever Action
Each half of ordinary single-pivot pliers acts as a lever: the joint lies between your hand on the handle and the gripping contact at the jaw. Trace one half at a time to see the arrangement clearly. Compound-action and locking tools need a closer look at their additional links.
A Pry Bar: First Class in This Setup
When the bar rests on a support between your hand and the lifted edge, that support is the fulcrum. This makes the setup first class. The classification describes how the bar is being used, rather than a permanent label for every possible use.
A Brake Pedal: Its Layout Determines the Class
If the pushrod connection lies between the pedal pivot and footpad, the pedal has a second-class arrangement. If the pivot lies between the footpad and pushrod connection, it has a first-class arrangement. Wilwood documents both conventional and reverse-mounted layouts.
Pedal leverage is only one part of braking. Do not treat a lever calculation as permission to relocate a pushrod or change a pedal: linkage alignment and the complete brake-system design also matter.
Manufacturer reference: Wilwood: pedal ratios and different pivot arrangements.
Workshop Tweezers: Third-Class Lever Action
On ordinary squeeze tweezers, the joined end acts as the pivot region, your fingers apply effort farther along the arms, and the tips grip the object. This arrangement illustrates why a lever can be useful for handling small parts without multiplying force.
How Leverage Changes Force: A Worked Example
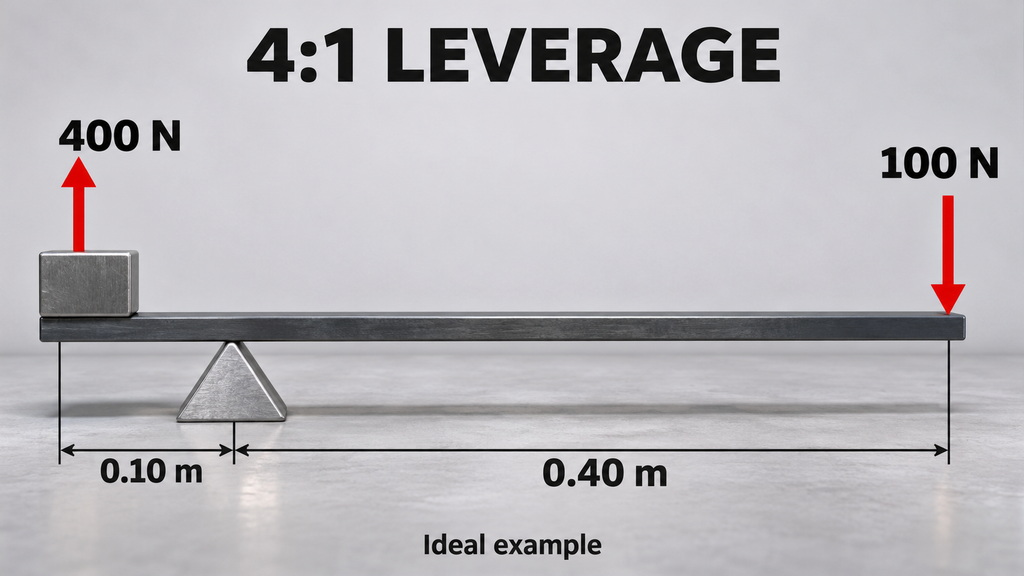
Mechanical advantage compares output force with input force. For an ideal lever in balance:
Output force ÷ input force = effort moment arm ÷ load moment arm
A moment arm is the perpendicular distance from the pivot to a force’s line of action. When forces act at right angles to a straight bar, you can use the distances along the bar.
Equation and measurement rule: OpenStax: perpendicular lever arms and force ratios.
Hypothetical example: A lever has a 0.40-meter effort arm and a 0.10-meter load arm, with both forces perpendicular to it.
- Ideal mechanical advantage: 0.40 ÷ 0.10 = 4.
- A 100-newton input balances a 400-newton load.
This calculation ignores friction, bar weight, and flex. It is an illustration, not a tool rating or a vehicle-lifting instruction.
The tradeoff is travel: multiplying force means moving the effort point farther than the load moves. A lever does not create energy, and real mechanisms lose some useful energy through effects such as friction.
Reference: OpenStax: force, distance, and machine efficiency.
How to Identify a Lever Without Guessing
- Choose one action. For example, gripping with pliers rather than turning the entire tool.
- Locate the pivot. Look for a joint, hinge, or supporting contact.
- Mark the effort and load. Find where force enters and where resistance acts.
- Check the middle feature. Fulcrum means first class, load means second class, and effort means third class.
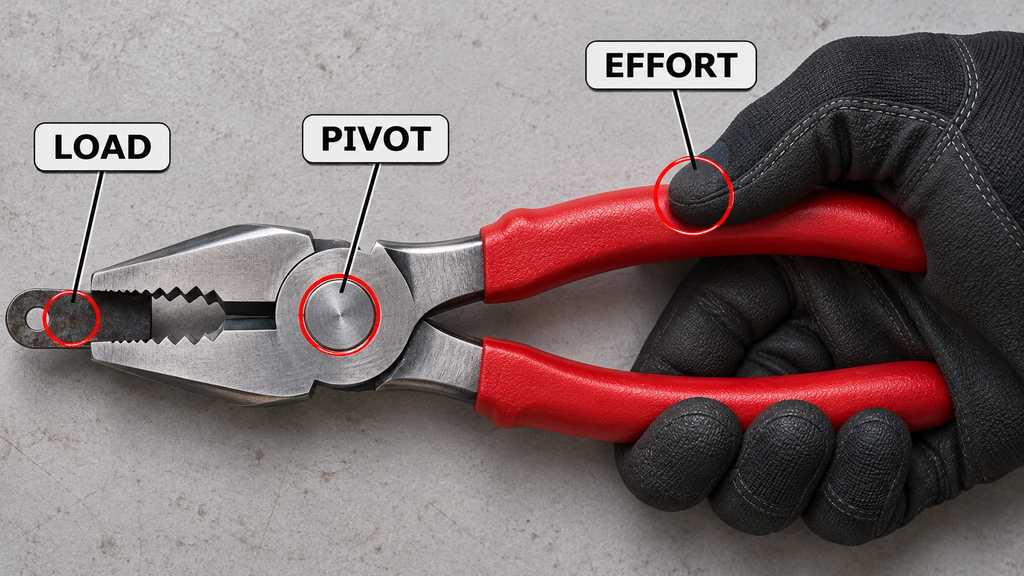
Check your answer by explaining the movement: what rotates, where you push, and what resists? If you cannot identify all three, inspect the mechanism again rather than classifying it from its name. A tool with several pivots may require analyzing each stage separately.
Using Leverage Safely in the Garage
Greater leverage can also overload a tool or make a sudden release harder to control. Use the correct tool and size, inspect it for damage, and position yourself so a slip will not throw you off balance.
- Do not slide a pipe over a wrench handle to increase leverage.
- Use a slow, steady pull on a wrench rather than jerking it.
- Wear eye protection when flying debris is possible.
Safety reference: Canadian Centre for Occupational Health and Safety: wrench precautions.
For small parts, select suitable pliers instead of forcing delicate tips; use a correctly fitting wrench for nuts and bolts. CCOHS also advises against extending plier handles for extra leverage.
Safety reference: CCOHS: selecting and using pliers safely.